


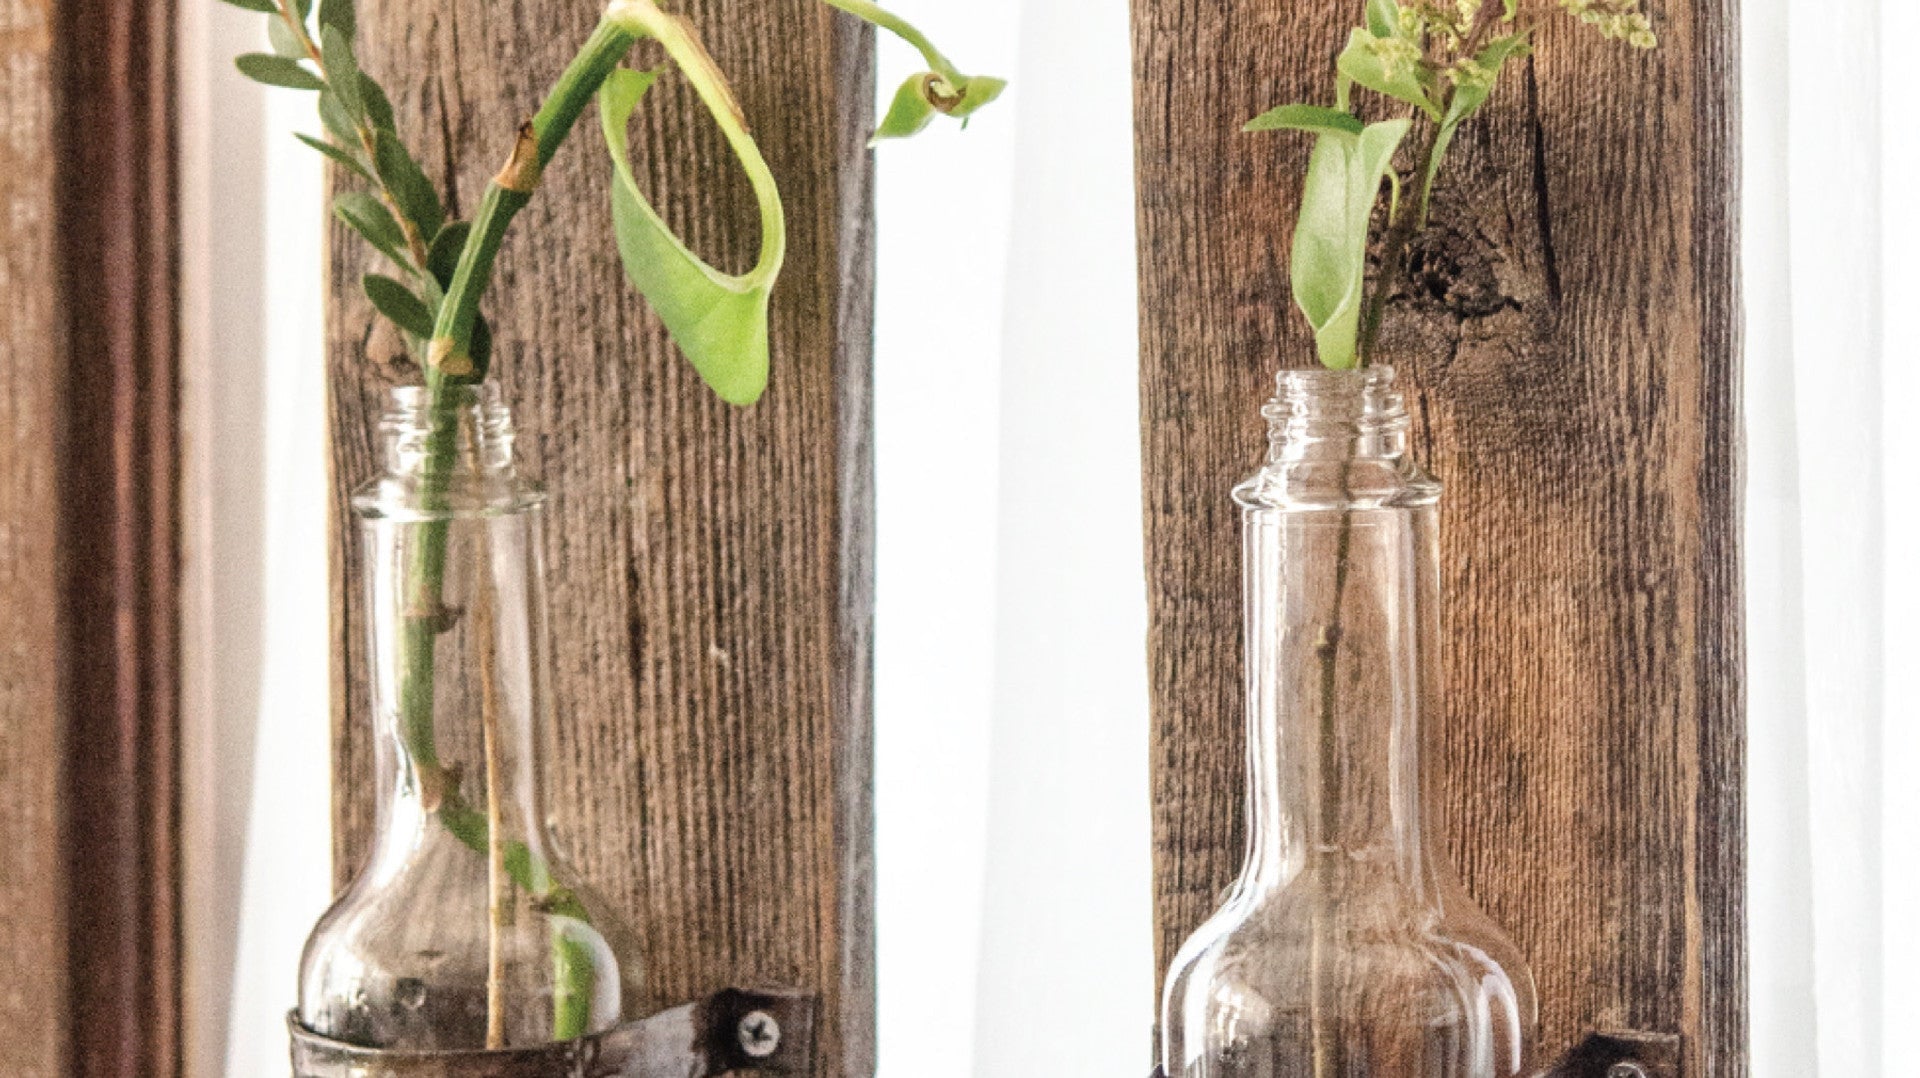
DIY Propagation Station Made from an Old Fence
This project was published inside In Her Garden Volume 1. Be sure to pick up your copy for more inspiration from the garden!
A couple of years ago we had a big windstorm that blew down part of our fence. The fence was pretty old, so we decided to replace it. But, being who I am, I could not get rid of the old fence.
Recently, I became aware of propagating plants from leaf clippings, and I had a lot of leaf clippings in ugly glass jars in my window. I love the idea of propagating plants, but I also wanted a prettier way to do it. I started contemplating how to make something that would be more attractive, and I came up with this idea to use that old fence and a variety of recycled materials.
Supplies:
- Can opener: safe-cut
- Drill: cordless
- Drill bits
- Hand saw/Table saw
- L-bracket: 1½"
- Old fence pieces
- Pliers: flat-head; needle-nose
- Pop rivet gun w/ rivets
- Sandpaper
- Screwdriver bits
- Screws: small (6)
- Sealer: polycrylic (Minwax)
- Soda pull-tabs: (2)
- Tape measure
- Tin can: rusted
- Tin snips
- Twine/cord
- Upcycled hot sauce bottle
- Washers: #10 (2)

To Make:
Cut the fence pieces to the desired length, and use the sandpaper to smooth any rough edges. Use a safe-cut can opener to remove the lid from a large tin can (this leaves a small lip on the can instead of a rough edge like a traditional can opener). Rust the can and the lid (see Tips).
Working on the backside of the fence piece, drill two small holes 1½ inch from the top and about 1 inch from each side. Attach the pull-tabs using small screws and washers. To finish the hanger, tie on a short piece of the cording or twine.
Use the tin snips to cut off one side of the can lid so it will fit flat against the fence piece. The piece that is left should be large enough for the hot sauce bottle to fit comfortably. To apply the L-bracket, align the elbow of the bracket with the flat edge of the can lid. Drill the appropriate-size holes, and attach the bracket to the lid with the rivet gun and rivets (the bracket should be attached to the bottom of the can lid).
To make the support strap, cut a strip of tin can approximately 2 inches wide and long enough to wrap around the bottle you are using; add a couple of inches in length to make the folds. Use the pliers to make the folds and the curve in the support strap. To avoid rough edges, fold both long sides toward the center, and press the crease with the pliers to flatten. Fold the ends of the piece under and shape the curve to fit around the bottle. Drill holes in the ends of the support strap, using a pair of pliers to hold the metal strap to keep it from spinning. Use small screws to attach the lid with the L-bracket and the support strap piece to the wooden fence piece. Seal the wood and the rusted metal.
Tips:
- To quickly rust tin cans, you can burn them in a fire, apply peroxide and salt, and leave them in the sun for a few hours. You can also use tin cans that have not been rusted; they are a little stiffer and more difficult to work with, and do not have the rustic look.
- This project can be spray-painted in different colors if you don’t like the rustic look.
Cindy Fortin has been crafting with recycled materials at Upcycle Design Lab since 2010. You can find her tutorials at upcycledesignlab.com and on her YouTube channel (limpil5623). You can also find her on Facebook (upcycleddesignlab) and Instagram and Twitter (@cfortin82).
Read more
Do you have a friend who is constantly covered in paint, and proudly shows off her ink-smudged hands? Give the artistic women in your life the gift of creativity with items that will inspire her to try a new craft or add to her...

Even the most creative and dynamic artists fall into a slump from time to time. If you're finding it difficult to overcome a creative block, we recommend pulling out a journal and letting your thoughts run free. The practice of...

Leave a comment
All comments are moderated before being published.
This site is protected by hCaptcha and the hCaptcha Privacy Policy and Terms of Service apply.