


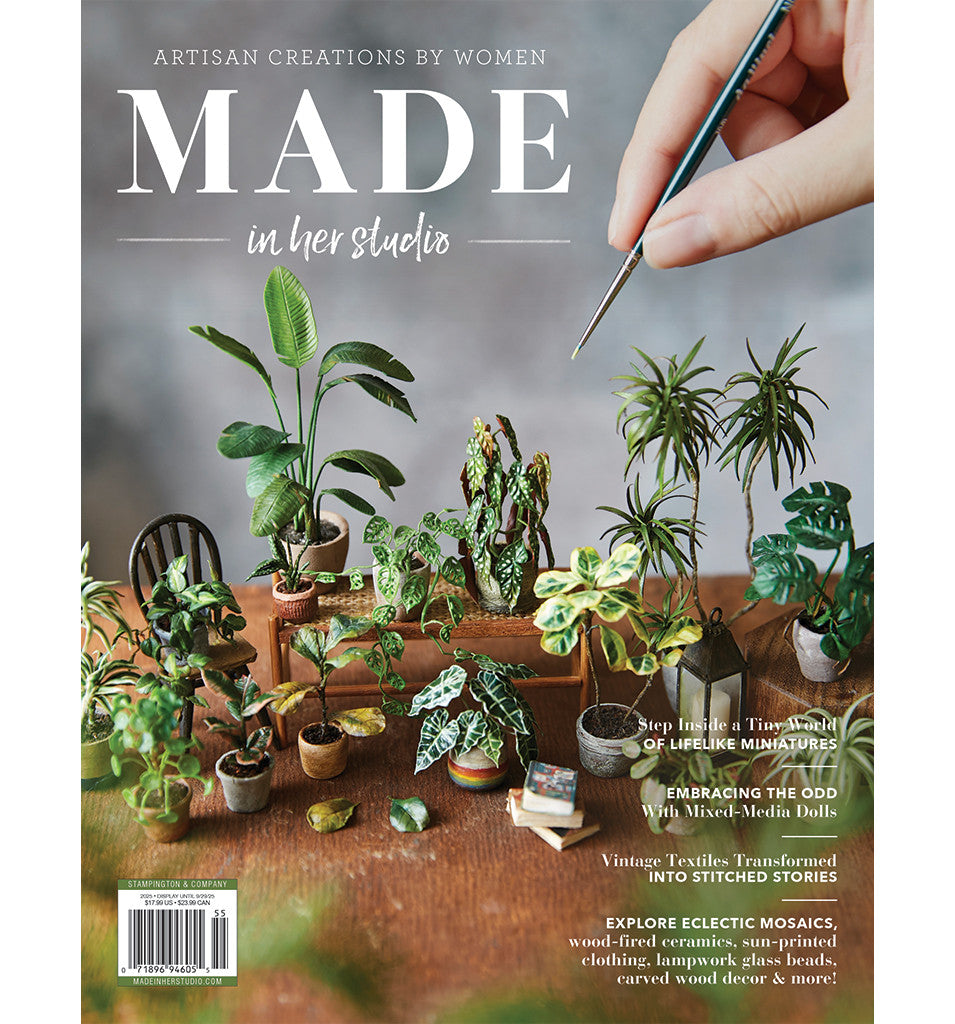
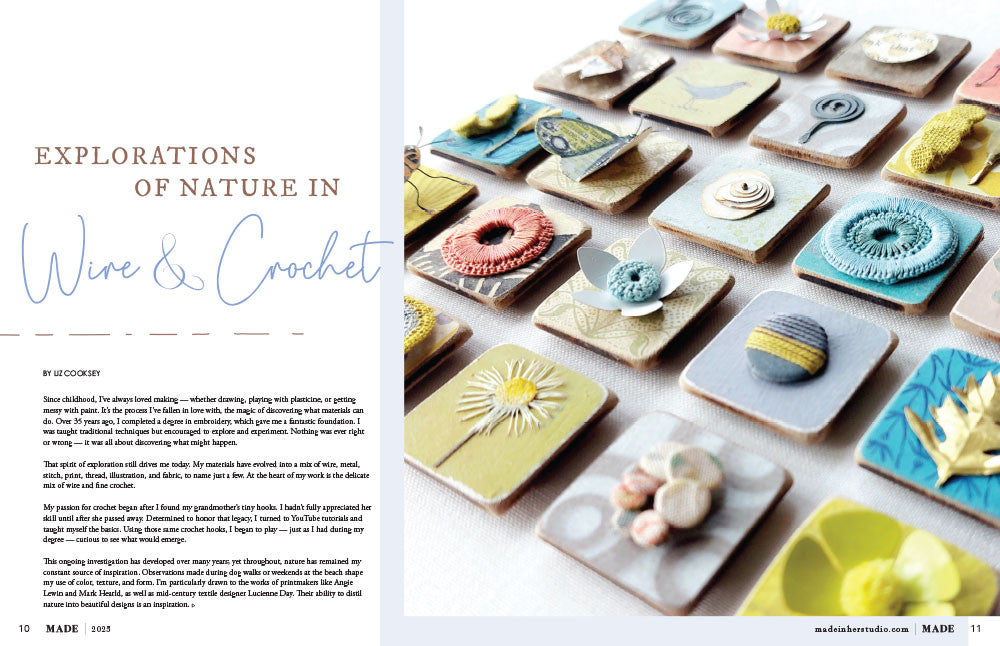
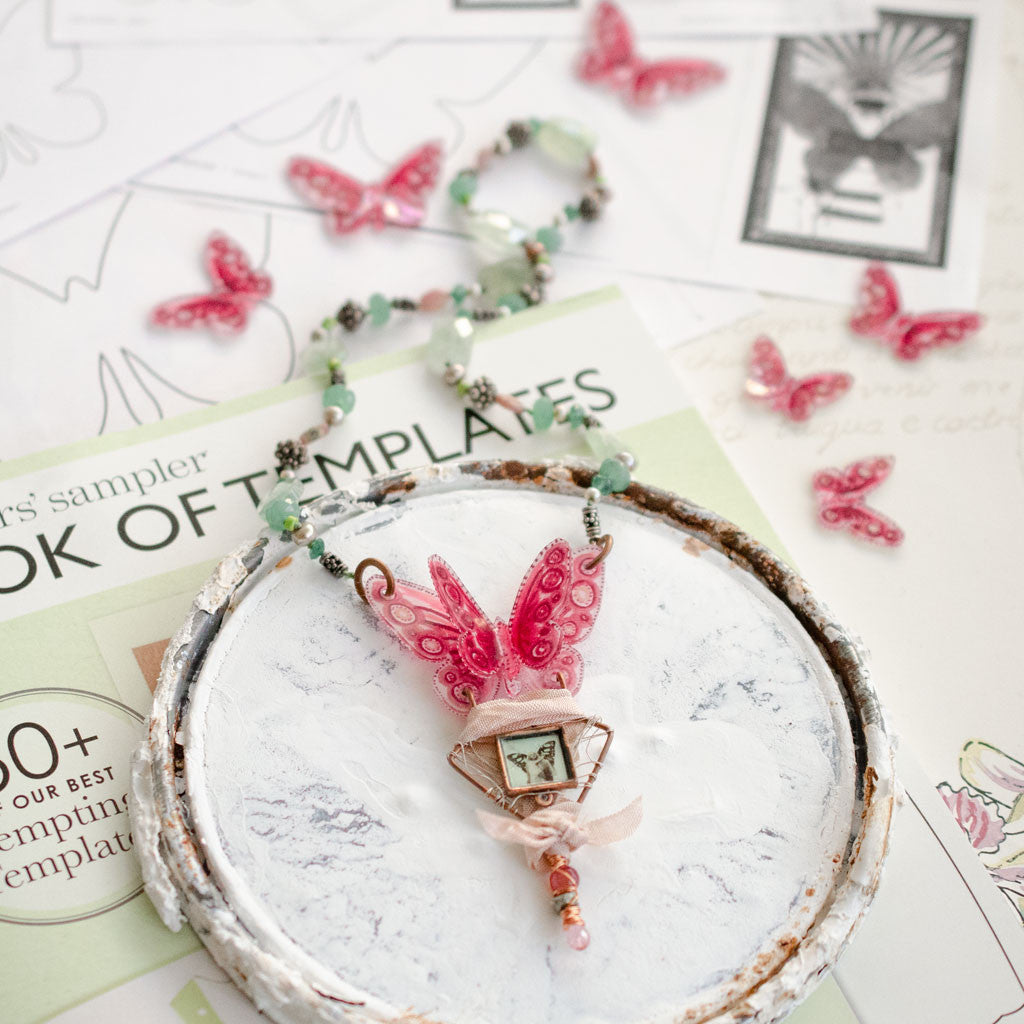
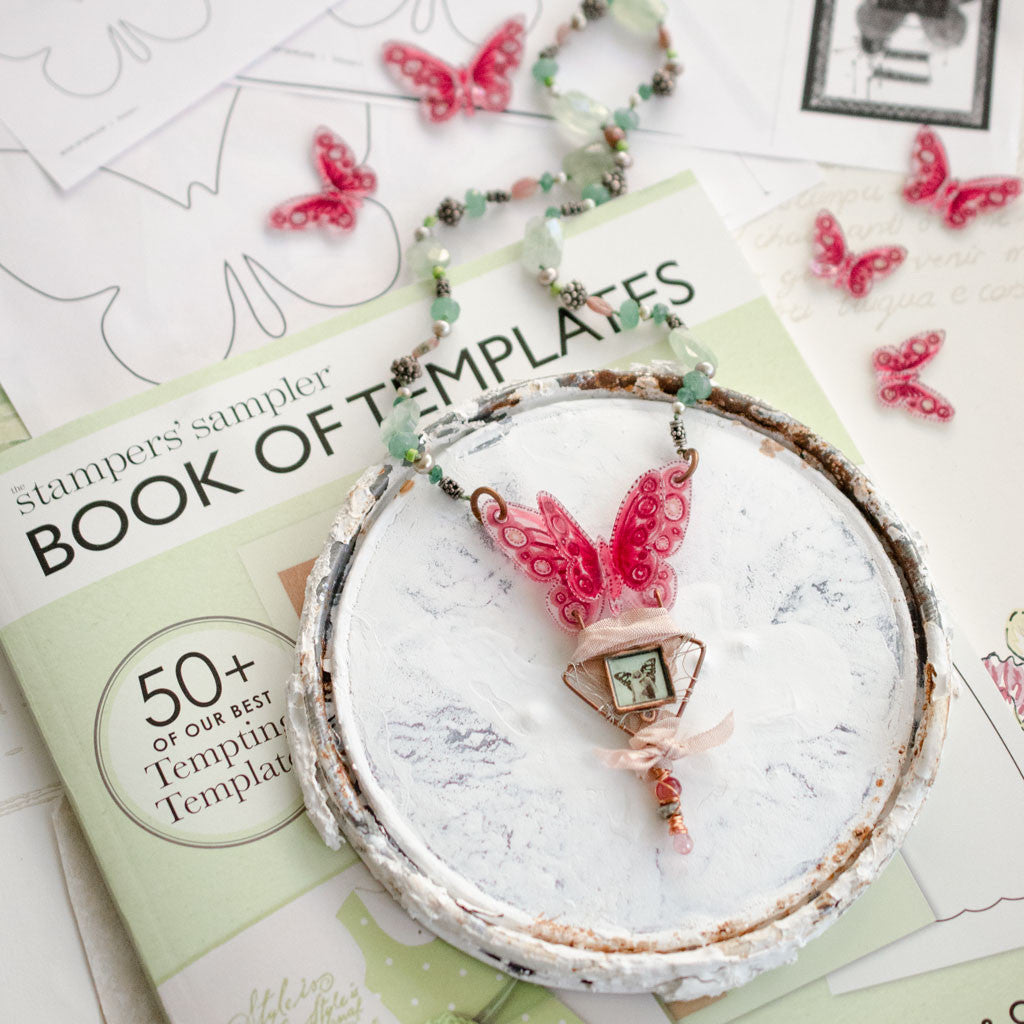
Shrink Plastic Butterfly Template Necklace by Johanna Love
I am more of a jewelry maker than a card maker or art journaler, so I admit I didn't initially realize how useful the Book of Templates could be to my preferred medium of jewelry. Once I framed my thinking differently, a world of possibilities opened up to me on the pages within this magazine. I realized not only were the templates a fun and eclectic collection of shapes and subjects, but each template offers a variety of design inspiration for jewelry applications.
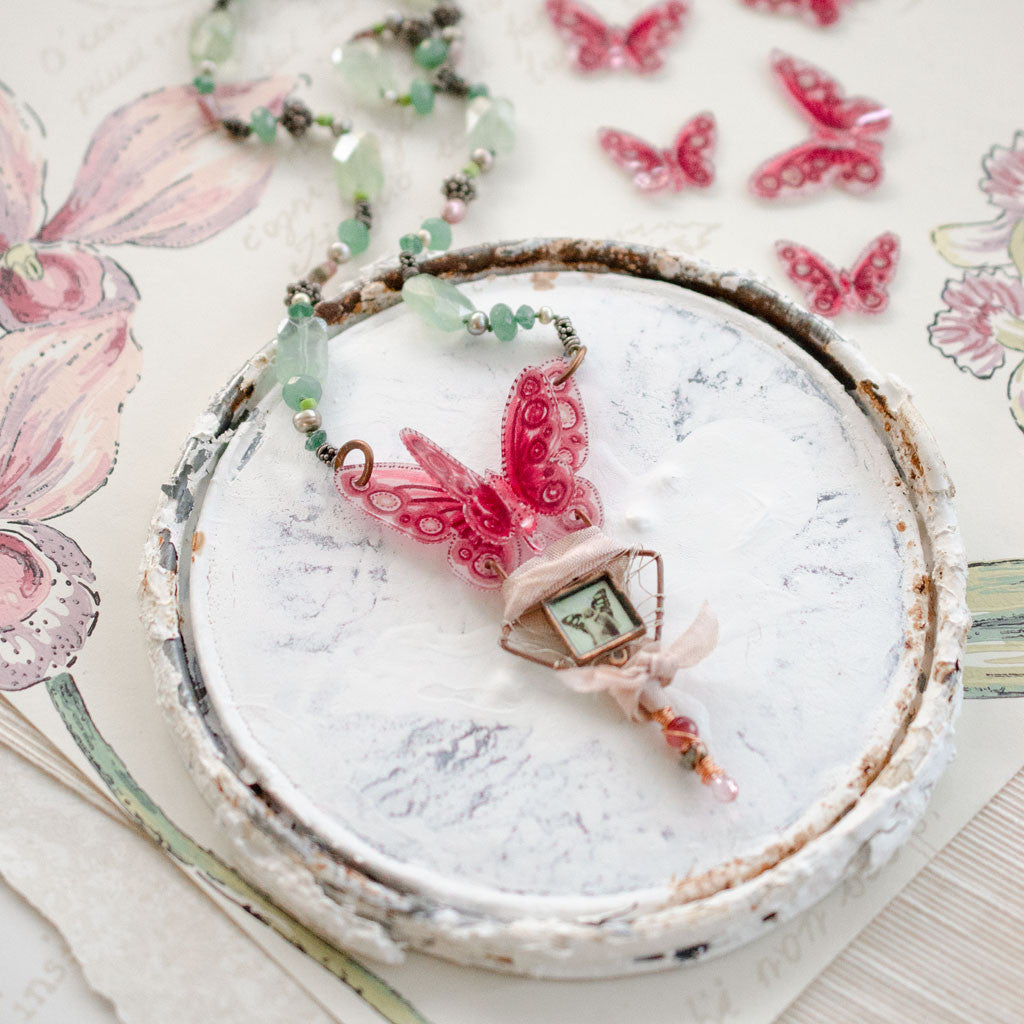
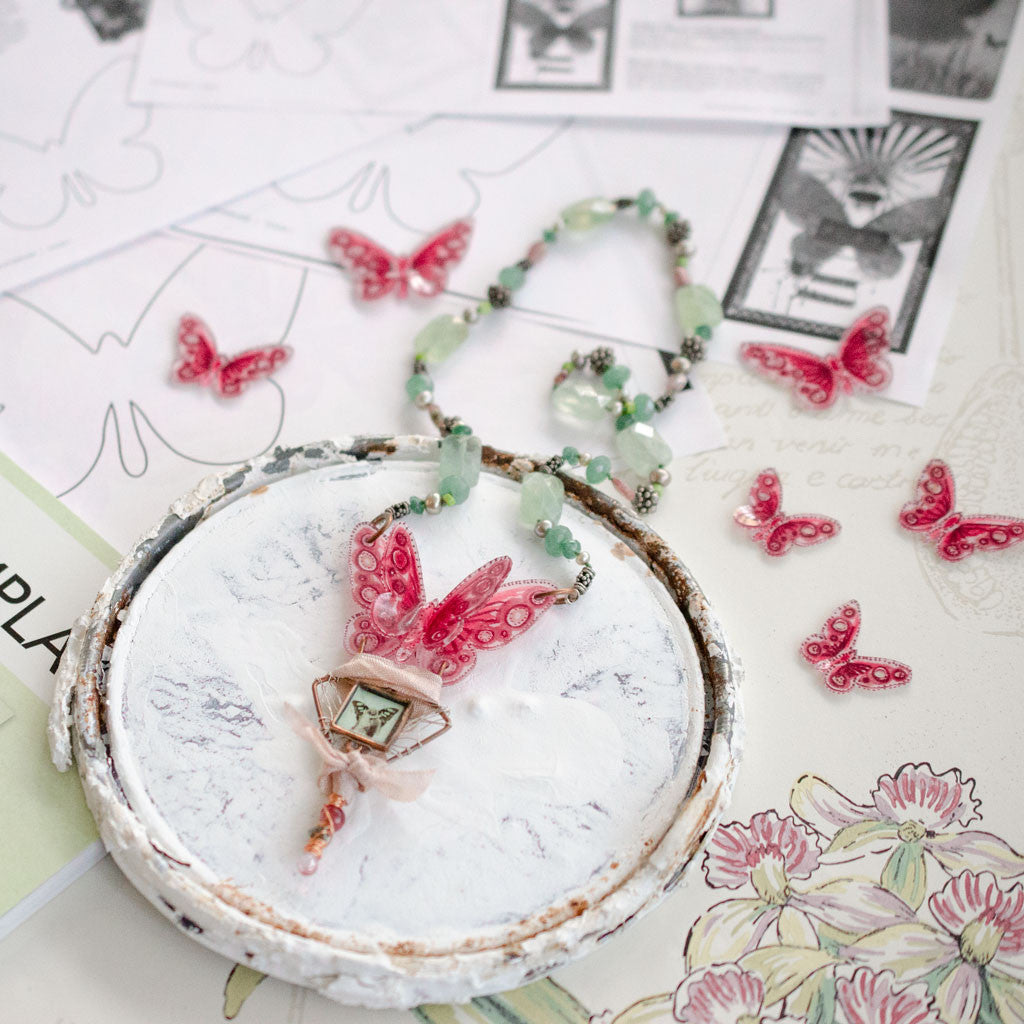
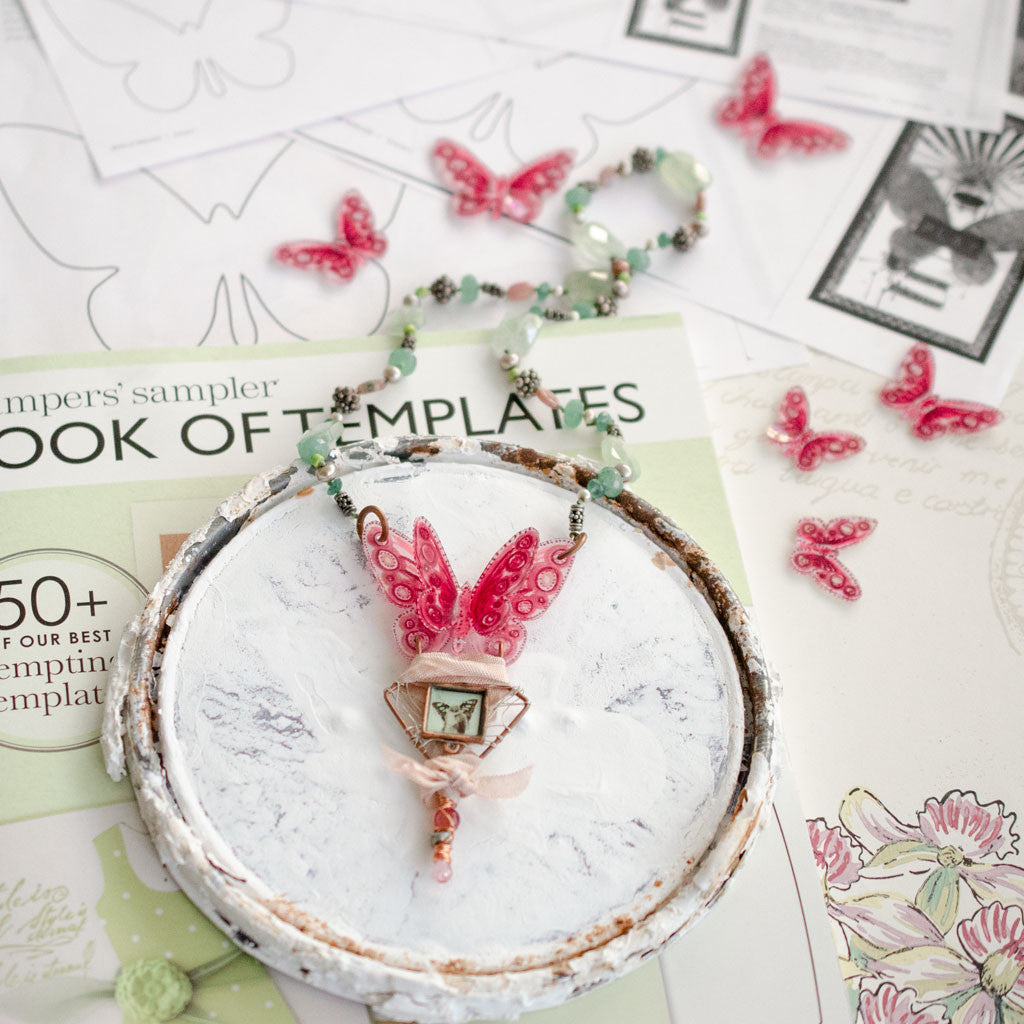
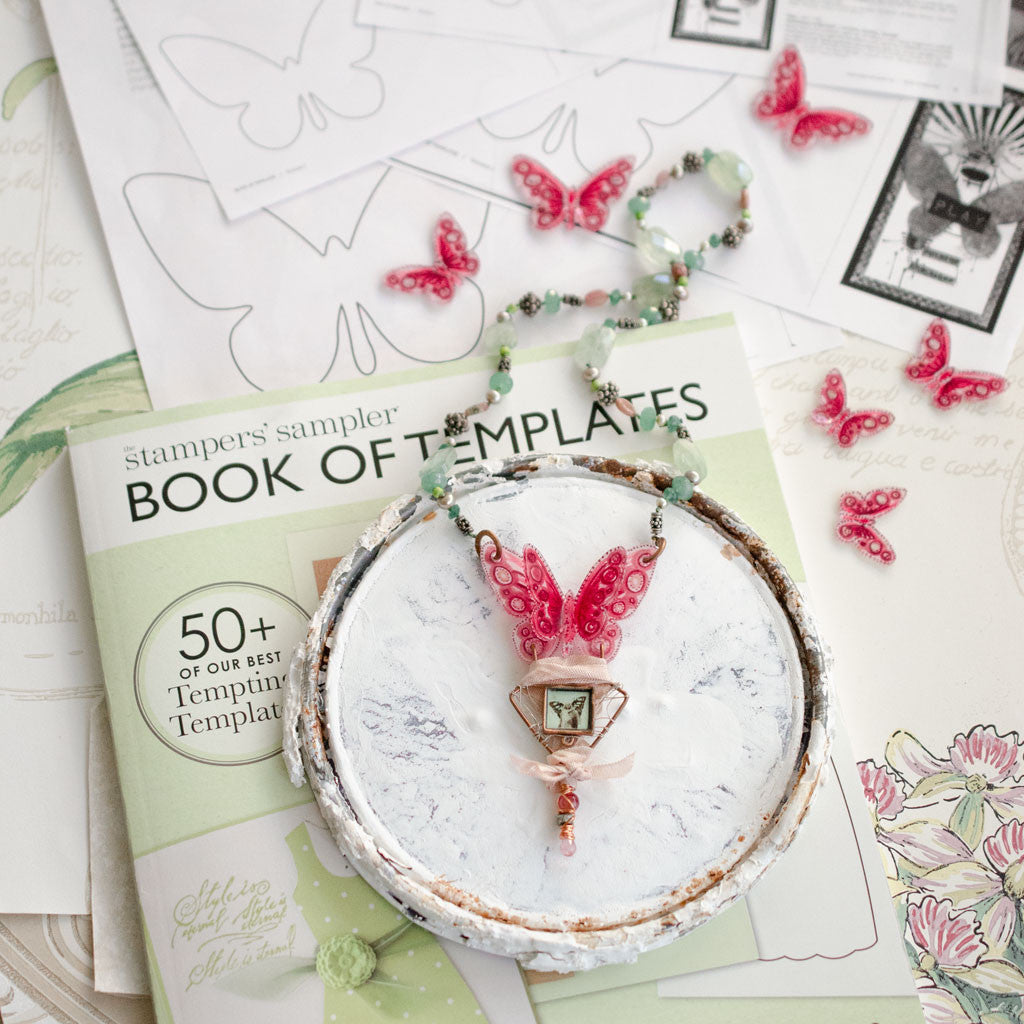
I decided to use shrink plastic since the templates are larger than what I'd normally prefer for jewelry. Shrink plastic reduces the size to about 25% of the original. Although there were so many possibilities on every page of Book of Templates, the butterfly template caught my eye. I thought it would be fun to make a necklace with it since the wings made obvious connector points.
Supplies:
- Shrink plastic (frosted finish)
- Scissors
- Permanent colored markers
- Graphite pencil
- Clear instant glue
- Single hole puncher
- Butterfly Template from Book of Templates
Instructions:
Photocopy the template you want to use at 100%. Then make photocopy each at incrementally smaller sizes (75% & 50%). Take one sheet, frosted side up, put on top of largest photocopy, and use pencil to trace the butterfly. Then switch out and trace the next size down a few times. Then switch out with the smallest photocopy and trace a few times. Your shrink plastic sheet is now filled with pencil butterfly outlines.
Start filling in each butterfly with marker drawings and patterns as you see fit (I chose to use various colors of pink, and I filled each butterfly with roughly the same patterns). Be mindful that the frosted side of the plastic is the wrong side of your image, so if you want words to appear correctly on the finished product, you must write them backwards.
Carefully cut out each butterfly along the pencil outlines, being extremely cautious since the shrink plastic is very brittle at this point. Then punch a hole at the end of each wing: these holes will be for connecting jump rings to (a standard hole-punch is a perfect size to yield a good jump ring hole after shrinking).
Follow manufacturer's instructions for heating your butterflies in your toaster. A few moments after you remove them from heat, you can handle them enough to bend/shape the wings of one of the medium sized butterflies before the shrunken butterflies cool and solidify. Be sure to leave the largest butterfly flat so you can layer it with a medium one later.
Once fully cooled, take the largest butterfly and attach the bent medium sized butterfly to the front with a dab of glue to make your butterfly centerpiece 3D. Once the glue is cured 24 hours later, assemble your necklace as desired. The extra butterflies can be used in other designs to coordinate with this necklace if you end up not using them in the original necklace design.
Tips:
- I always like to make extras of components to help keep my design options open, but you may decide to only make exactly the number of butterflies you need for the necklace to conserve supplies.
- Since the shrink plastic is so brittle before heated, you may prefer to use a precision knife and cutting mat to cut out your plastic shapes.
- If you do not have access to a photocopier, you can trace directly out of the Book of Templates.
Free Shipping on Subscriptions
Easy 60 Day Returns
Friendly Customer
Support
Shrink Plastic Butterfly Template Necklace by Johanna Love
Frequently asked questions
Looking for a quick answer? Here are some of our customer’s most frequently asked questions to help you along the way.
Thanks for your interest in our magazines! We encourage you to visit our Calls & Challenges page to see what our editors are looking for.
Ready to begin? Here is where you can find our Submission Guidelines.
Our subscriptions ship directly from our printer in Wisconsin. For this reason, we need to be notified of your change of address at least two months before the next issue comes out, or it will be sent to the address we had on file and provided to our printer at the time it was due.
How to Notify Us About Your Change of Address
- Email the following to customerservice@stampington.com:
- The publication(s) you subscribe to
- Your name and new address
- Your old address
2. Call to inform us of your new mailing address:
- Toll-Free: 1-877-782-6737 or International: 1-949-380-7318
Mail Forwarded by the Post Office
If you forward mail to your new address through the Post Office, it won't apply to periodicals/your magazine subscription unfortunately. Also, since mail forwarding only lasts for a short time-frame, we request that you still notify us of your address change to prevent any service interruption to your subscription.
Stampington & Company cannot be held responsible for replacing "lost" issues from your subscription, if we did not receive your change of address request at least two months prior to your next issue's release date.
Subscription issues should arrive within the first week of the month your publication is released. Please add up to two weeks for international delivery.
If your magazine has not arrived by the 20th of the month, please contact our customer service department, so we can check to make sure nothing is amiss with your subscription, and see if you're eligible for a replacement copy. International subscribers can receive a digital version of the magazine as a replacement if one attempt has already been made to deliver the print edition to you.
Stampington & Company cannot be held responsible for postal delays or circumstances outside of our control, but we will make every effort to make it right.
We offer FREE shipping on all magazine subscriptions and instant download purchases to our customers. You can also take advantage of free U.S. shipping on select pre-orders of your favorite magazines (discounted International rates will apply). Browse our selection of Pre-Orders With Free U.S. Shipping here.
What are my shipping charges?
Shipping charges are calculated by weight, shipping destination, and speed. You will be able to choose the best delivery method for your needs at checkout.
To help keep your costs down, we offer a discounted rate of $5.95 to ship a single magazine to you (within the United States).
Need your order fast? We offer the following expedited shipping options:
- 3-day delivery
- 2-day delivery
*Please contact us if you have any questions or special instructions regarding your rush order.
What Carriers do You Use to Ship Items?