No-Carve Pumpkin Decorating Project
While I love decorating pumpkins when Halloween comes around, I’ve never really enjoyed carving them. Growing up, I used to have my mom scoop everything out for me because I couldn’t stand to touch the slimy innards. I would also quickly get upset when the carving knife slipped a bit, making a mistake I couldn’t fix. Over the years I’ve tried a variety of different methods for decorating pumpkins without needing to carve them, and this is probably my favorite one so far.
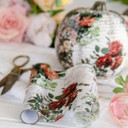
It’s no secret that I absolutely love working with printed tissue. It’s almost magical the way it seems to melt onto whatever surface you’re working on. It’s also a very forgiving material to work with.
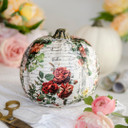
I find that applying tissue to a white background really makes the design pop. My pumpkins were white to begin with, but if you're unable to find one this color, you can always paint yours white. Apply a layer of gel medium to the pumpkin, and then add the tissue. I found working with pieces of tissue that were several inches wide worked best. Try to smooth out any wrinkles that you can, but don’t worry about it too much because no matter how careful you are, wrinkles will still happen. Once the pumpkin is completely covered with tissue, carefully apply a layer of gel medium over the top of everything, and let dry. Be gentle when you do this; the wet tissue can easily tear if you are not. You can leave the pumpkin as is, or tie ribbons or torn fabric around the stem for a little extra embellishment.


