Baby Blue Bella Cone: Project by Kristen Robinson
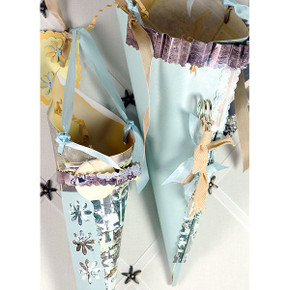
Begin with two pieces of Sweet Bella Paper Vintage Poster (Blue side) and Vintage Book cut down to 10" x 10 being sure to save the scraps and glue together. Once the pages are glued (and dry), roll the square into a cone shape. Prior to gluing the cone shut punch two π" holes (approximately 2" apart) on the seam this is where you will place a Sweet pin. Using a paper adhesive place a small line of glue under seam; set aside to dry - I add a rubber band to the center as this will hold the layers in place as the glue dries.
Take one of the Sweet Buttons and cover with coordinating paper being sure to use the template that is supplied with the buttons. Once the cone has sufficiently dried attach the button to the top center.
Take a scrap of paper that you cut away earlier measuring11" x 12", accordion fold it and glue to the rim of your cone. Using deco scissors or pinking shears cut a 11" strip that is long enough to cover the seam of your cone.
To the front of your cone a Sweet pin that has been adorned with ribbon. Finally punch a hole on either side of your cone and add strips of ribbon to the top of your cone to hang as well as an Alpha Card on one side which can be used as a gift card.


