


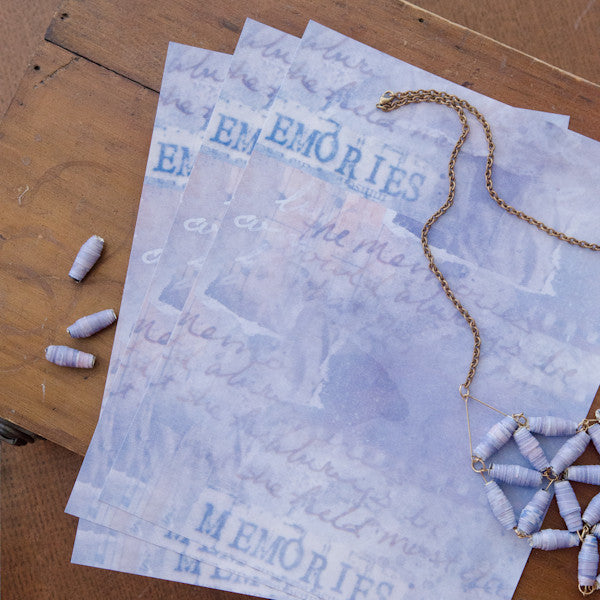
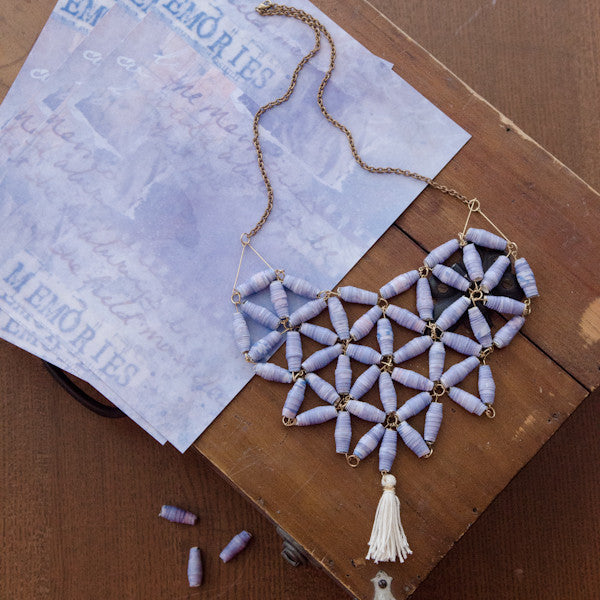

Purple Paper Beads Necklace Project
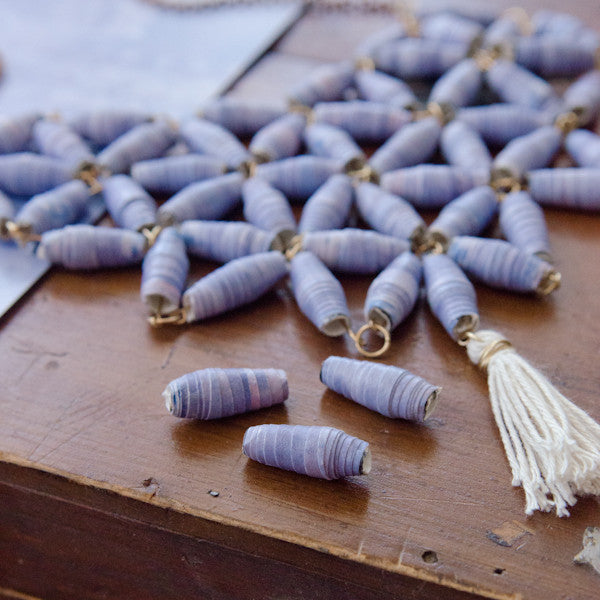
Have you ever embarked on a project, only to find that it is taking twice as long as you thought it would? That is the case with this “simple” paper bead necklace. I figured I would make a few beads and string them on a piece of twine, but my imagination soon got away from me. All the while making it, I knew it would be worth the extra effort to add a few more beads and make a shaped design. Soon there was a tassle, and about 50 beads involved in the process. It’s amazing where your imagination can go if you let it loose!
Purple Paper Beads Necklace Project Directions:
To make it easier to roll the paper, I used paper straws as the base of the bead. You can also use a toothpick or other instrument, then peel the paper beads off the stick when it is time to string them. The paper straws create a much larger hole in the center of the bead, so you will need to size your project accordingly.
With a piece of Artist Paper, mark half inch increments along the edge of the page on both of the longest edges (reverse side only). Connect these half-inch marks to form very long triangles. Use a paper trimmer to cut them out.
Attach the wide end of the strip with gel medium to a paper straw, then twist the remaining paper strip around the straw, adhering with gel medium along the way. I found that you need a very tight wrap in order to get good adhesion with the gel medium. Even with the thinnest layer of glue, I wrapped it tight enough that the gel was leaking out the sides. If this happens, just wipe it away when you have finished wrapping the entire strip.
Allow paper beads to dry completely, then trim away the excess straw with a pair of scissors. If the straw squishes a bit, use a stick or toothpick to reshape the bead.
To assemble the necklace:
I highly recommend that you draw a diagram of your necklace’s shape and count your beads to ensure that you have enough. I also used the diagram while assembling the necklace to mark which beads I had already attached.
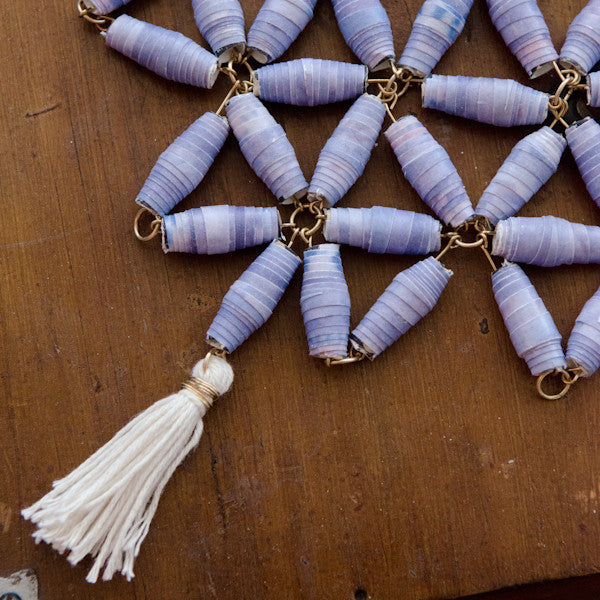
[Working from the center bottom of the necklace] Open a jumpring, thread 6 eyepins onto it, and close the ring. For those using a paper straw as the core of your bead, you can close each eyepin at both ends, then thread the paper bead on just before you attach the end to another jumpring. If your paper bead’s hole is smaller than the end of the eyepin, you will need to thread the paper bead, then form the loop at the opposite end.
Continue building on this shape until your entire framework is complete. End each side with a jumpring and attach this to a length of chain. For this necklace, I used the already completed Vintaj necklace chain, and used nippers to cut the finished necklace in half.
You will also ? these publications:


Free Shipping on Subscriptions
Easy 60 Day Returns
Friendly Customer
Support
Purple Paper Beads Necklace Project
Frequently asked questions
Looking for a quick answer? Here are some of our customer’s most frequently asked questions to help you along the way.
Thanks for your interest in our magazines! We encourage you to visit our Calls & Challenges page to see what our editors are looking for.
Ready to begin? Here is where you can find our Submission Guidelines.
Our subscriptions ship directly from our printer in Wisconsin. For this reason, we need to be notified of your change of address at least two months before the next issue comes out, or it will be sent to the address we had on file and provided to our printer at the time it was due.
How to Notify Us About Your Change of Address
- Email the following to customerservice@stampington.com:
- The publication(s) you subscribe to
- Your name and new address
- Your old address
2. Call to inform us of your new mailing address:
- Toll-Free: 1-877-782-6737 or International: 1-949-380-7318
Mail Forwarded by the Post Office
If you forward mail to your new address through the Post Office, it won't apply to periodicals/your magazine subscription unfortunately. Also, since mail forwarding only lasts for a short time-frame, we request that you still notify us of your address change to prevent any service interruption to your subscription.
Stampington & Company cannot be held responsible for replacing "lost" issues from your subscription, if we did not receive your change of address request at least two months prior to your next issue's release date.
Subscription issues should arrive within the first week of the month your publication is released. Please add up to two weeks for international delivery.
If your magazine has not arrived by the 20th of the month, please contact our customer service department, so we can check to make sure nothing is amiss with your subscription, and see if you're eligible for a replacement copy. International subscribers can receive a digital version of the magazine as a replacement if one attempt has already been made to deliver the print edition to you.
Stampington & Company cannot be held responsible for postal delays or circumstances outside of our control, but we will make every effort to make it right.
We offer FREE shipping on all magazine subscriptions and instant download purchases to our customers. You can also take advantage of free U.S. shipping on select pre-orders of your favorite magazines (discounted International rates will apply). Browse our selection of Pre-Orders With Free U.S. Shipping here.
What are my shipping charges?
Shipping charges are calculated by weight, shipping destination, and speed. You will be able to choose the best delivery method for your needs at checkout.
To help keep your costs down, we offer a discounted rate of $5.95 to ship a single magazine to you (within the United States).
Need your order fast? We offer the following expedited shipping options:
- 3-day delivery
- 2-day delivery
*Please contact us if you have any questions or special instructions regarding your rush order.
What Carriers do You Use to Ship Items?