
5 Simple & Creative DIY Gift Wrap Ideas
Posted by Stampington & Company on Dec 20th 2019
With Christmas only 5 days away, many of us have quite a bit of wrapping to do! We always find that incorporating a creative touch to packaging is a simple way to make gifts more meaningful. Whether it be stamping on Kraft Paper or painting canisters, there are several fun options for getting creative with gift wrap. Today we're sharing 5 of our favorite simple & creative gift wrap ideas that your loved ones will absolutely adore!
5 Simple & Creative DIY Gift Wrap Ideas
1. Give a Little Gold - Gift Wrap Holders
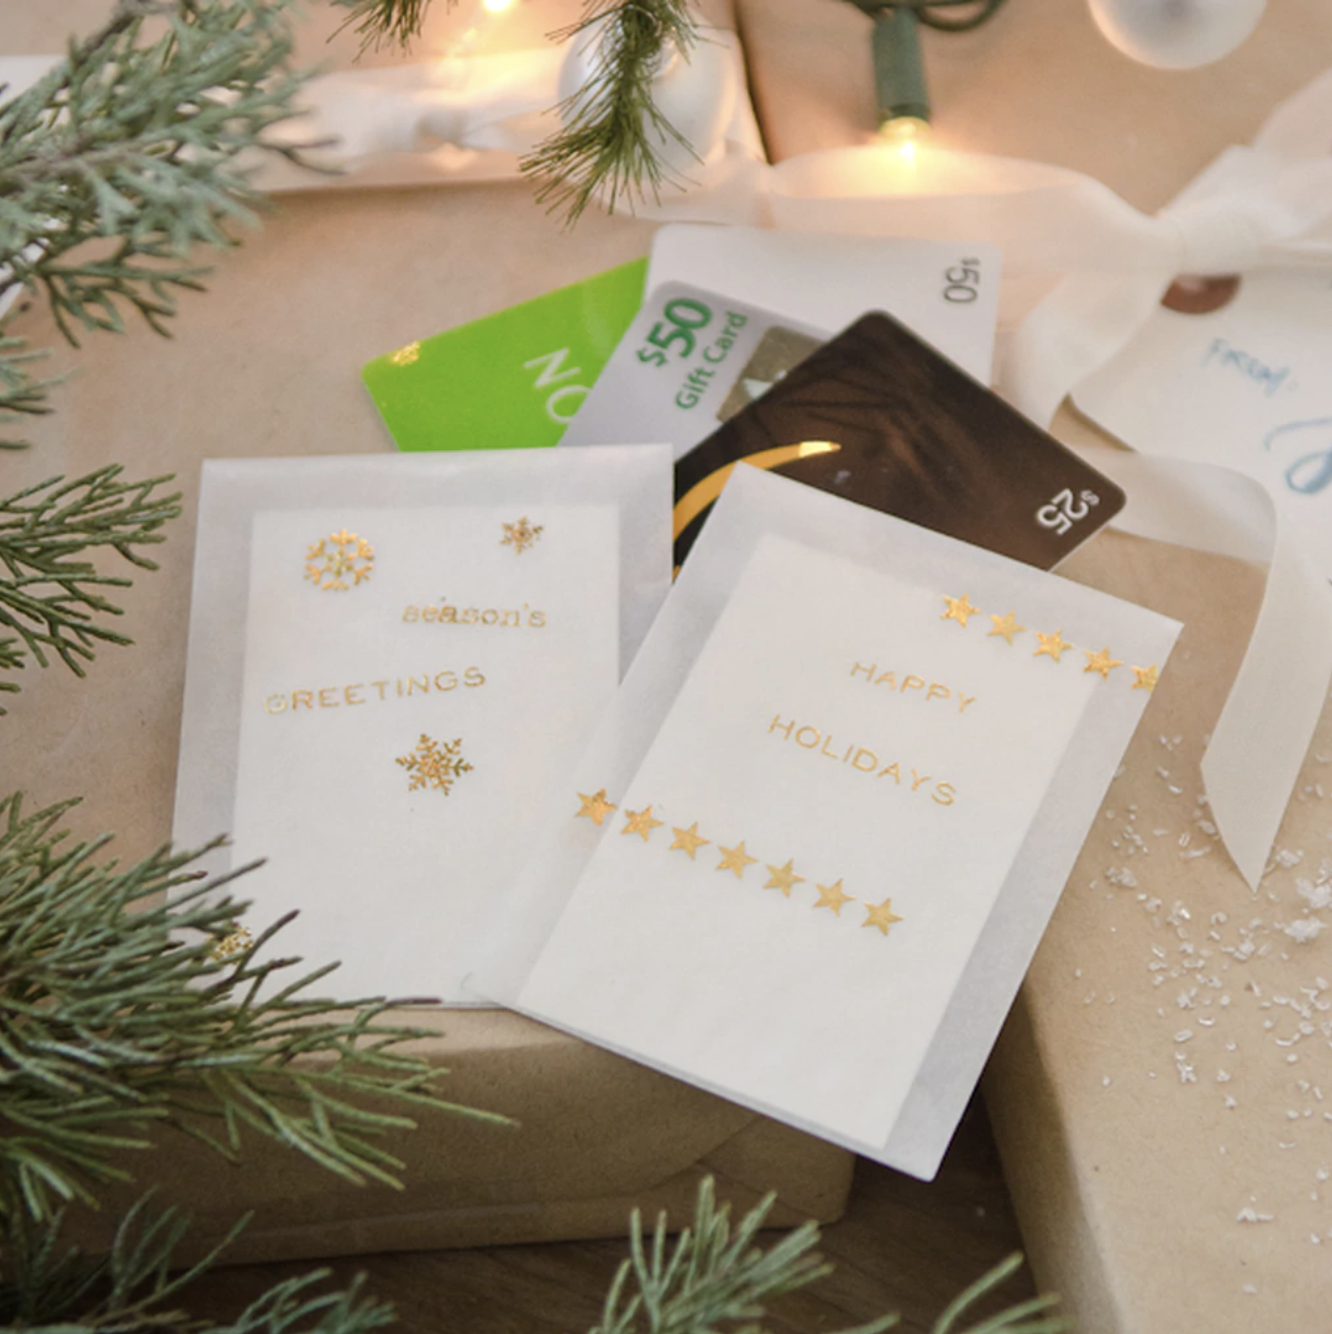
These darling gift card holders include a little sparkle and are very easy to make!
Instructions:
1. Place glassine envelopes on a flat surface. Cut out and arrange stickers of your choosing on surface. We recommend using metallic rub-ons in which you rub hard on the envelope surface with the edge of a popsicle stick. Then, peel away backing.
2. Place gift cards inside and seal with washi tape. If you don’t want gift cards to be visible from the outside, wrap a piece of white paper around the gift card before placing it inside.
2. Pretty Holiday Packaging using Paper Rosettes
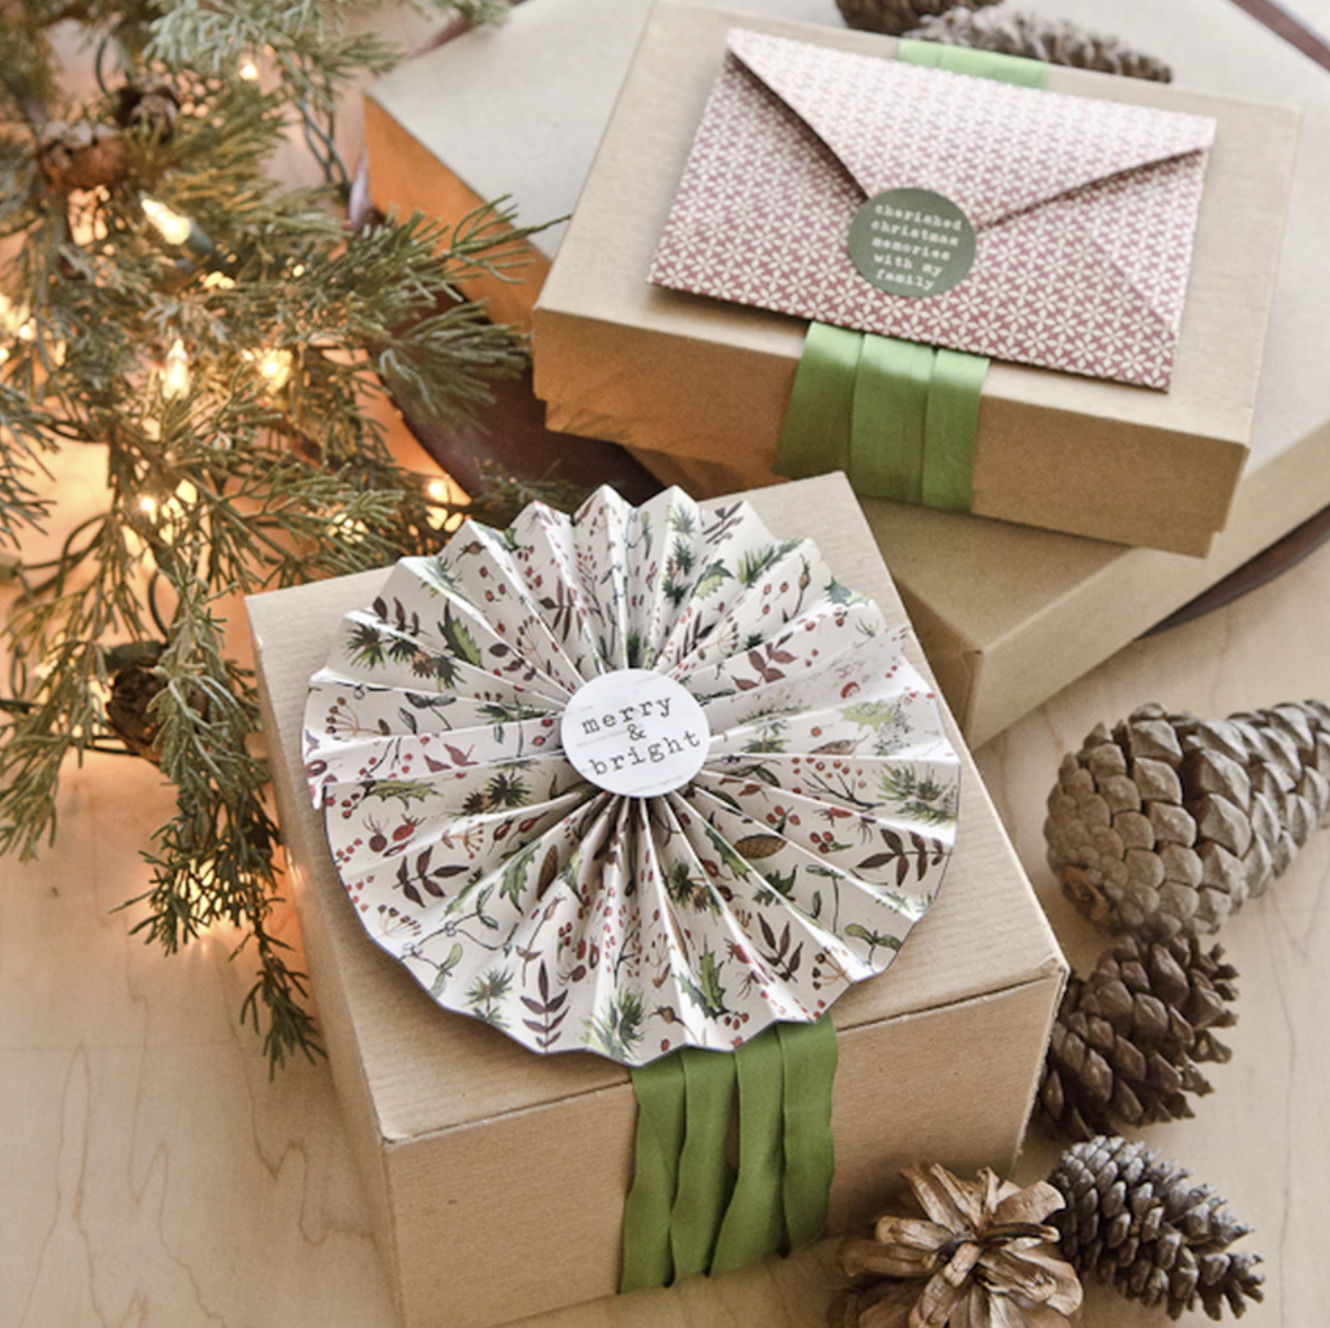
We love making paper rosettes for a festive dash of whimsy!
Instructions:
1. Cut 12 x 12” paper into 6” strips, to make a paper rosette that is 12” in diameter. For a different sized rosette, cut the strips to half the width of your finished rosette.
2. To create ½ inch accordion folds, first lay paper on scoring board and score at each inch (1, 2, 3, etc.), then flip over paper and score at each half inch (1.5, 2.5, 3.5, etc.). Accordion fold using these scored lines.
3. Glue ends of several strips together to form one very long strip. Connect the two ends together, and glue to form a tube. Gather the center of the rosette together, then glue a piece of paper to back to keep rosette from shifting.
3. Printable Recipe on Treat Bags
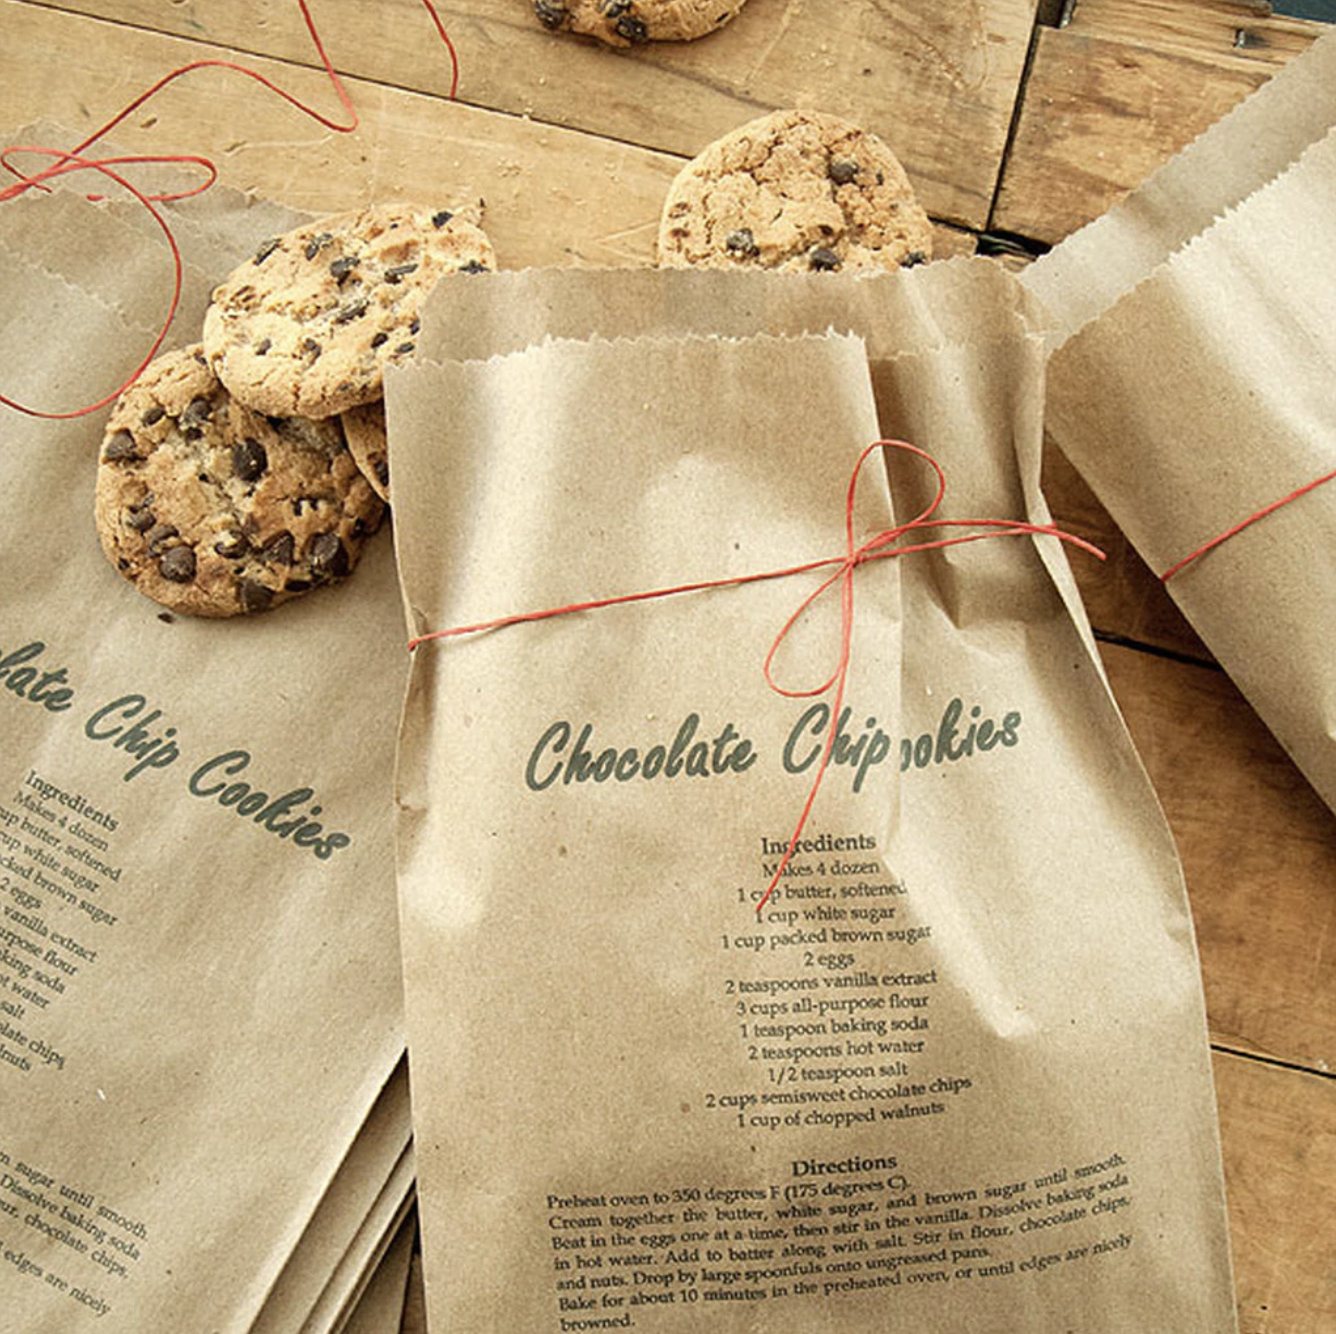
Spruce up your packaging by printing a recipe directly onto Kraft bags before filling them with homemade cookies. This way when your friends and family try the cookies, they will also get to take the recipe with them!
Instructions:
1. Type up your recipe and make any desired adjustments to the font, text size, and alignment.
2. When you are ready to print on the bags, place the Kraft bag into the printer with the pinch bottom (closed end) of the bag in the printer. If you try to run it through with the open end down it will most likely jam the printer. You will need to rotate the text before printing.
3. For Word 2007: go to Print > Properties > Page Layout and then select Rotate by 180 degrees. Select the paper size as user defined.
4. Finish the bags off with some simple twine or scrapper's floss.
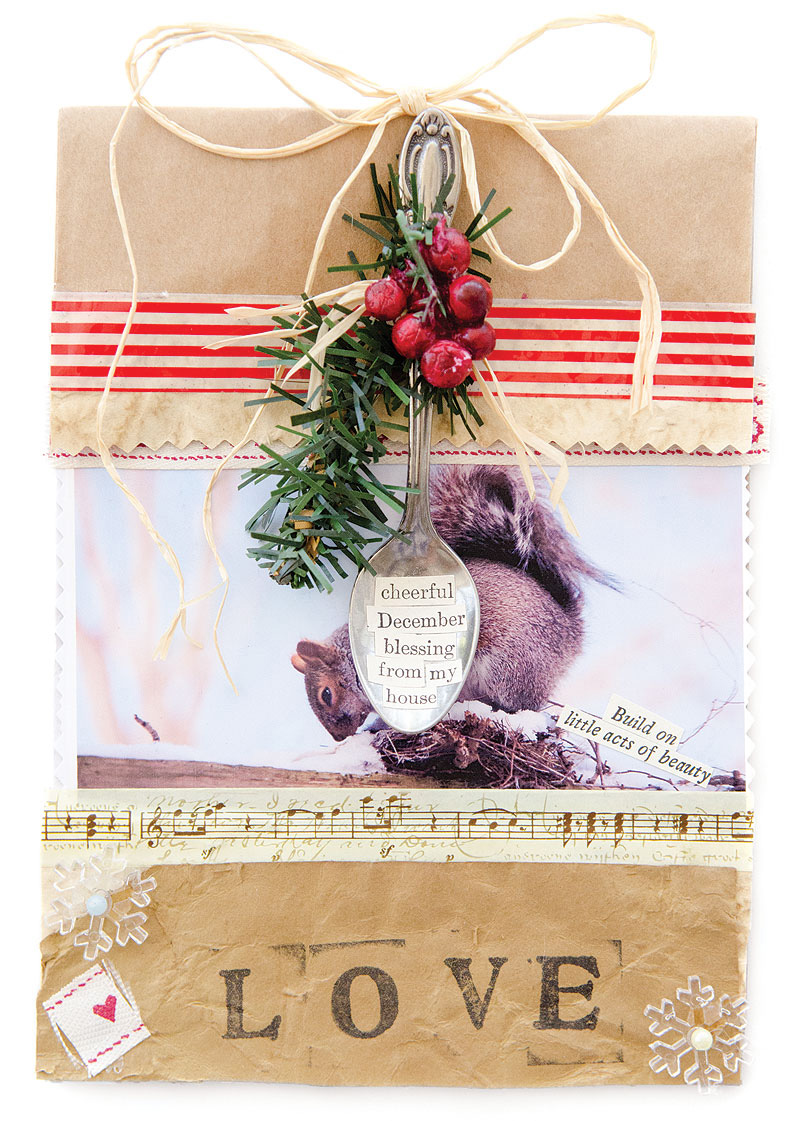
4. Brown Paper Packages Tied Up with String
Project by Deb Dunn featured in Somerset Holidays & Celebrations Volume 8
These festive paper packages can be used once the gift is opened to hold Christmas cards and/or gift tags, plus the spoon becomes a gift itself! Below are materials and instructions. Feel free to use the material list as inspiration to choose whichever embellishments you prefer.
Materials:
- Adhesive
- Book pages
- Brown paper lunch bag
- Decorative tape
- Decorative-edged scissors
- Demitasse spoon: small
- Faux pine sprigs
- Hole punch
- Paper doily
- Photo sticker squares
- Photograph
- Pom-poms
- Raffia
- Ribbon
- Rickrack
- Snowflakes
- Tiny bells
Instructions:
1. Start by deciding on what your bag will hold and how large you want the finished bag to be. Fold the top of the bag over and cut to size with decorative scissors. Gather the supplies you will use to decorate your gift bag.
2. Layer your brown paper bag with a paper doily. Attach a favorite photograph with the photo sticker squares and additional chosen embellishments. When you are happy with the arrangement, glue in place.
3. Look through discarded book pages for a quote that corresponds with your image and add it. Punch a small hole in the top fold of the bag to attach spoon to.
4. To create the gift spoon, look through your discarded book pages once more for words to create a sentimental message or simply a few words such as "Dear Friend." Cut out words and place on spoon. When you are happy with the arrangement, add a small touch of glue and press firmly onto the spoon.
5. If you like the look of glitter, you can add a touch of glue along the edges of the spoon and dip in glitter to add some holiday sparkle.
5. Christmas Canisters
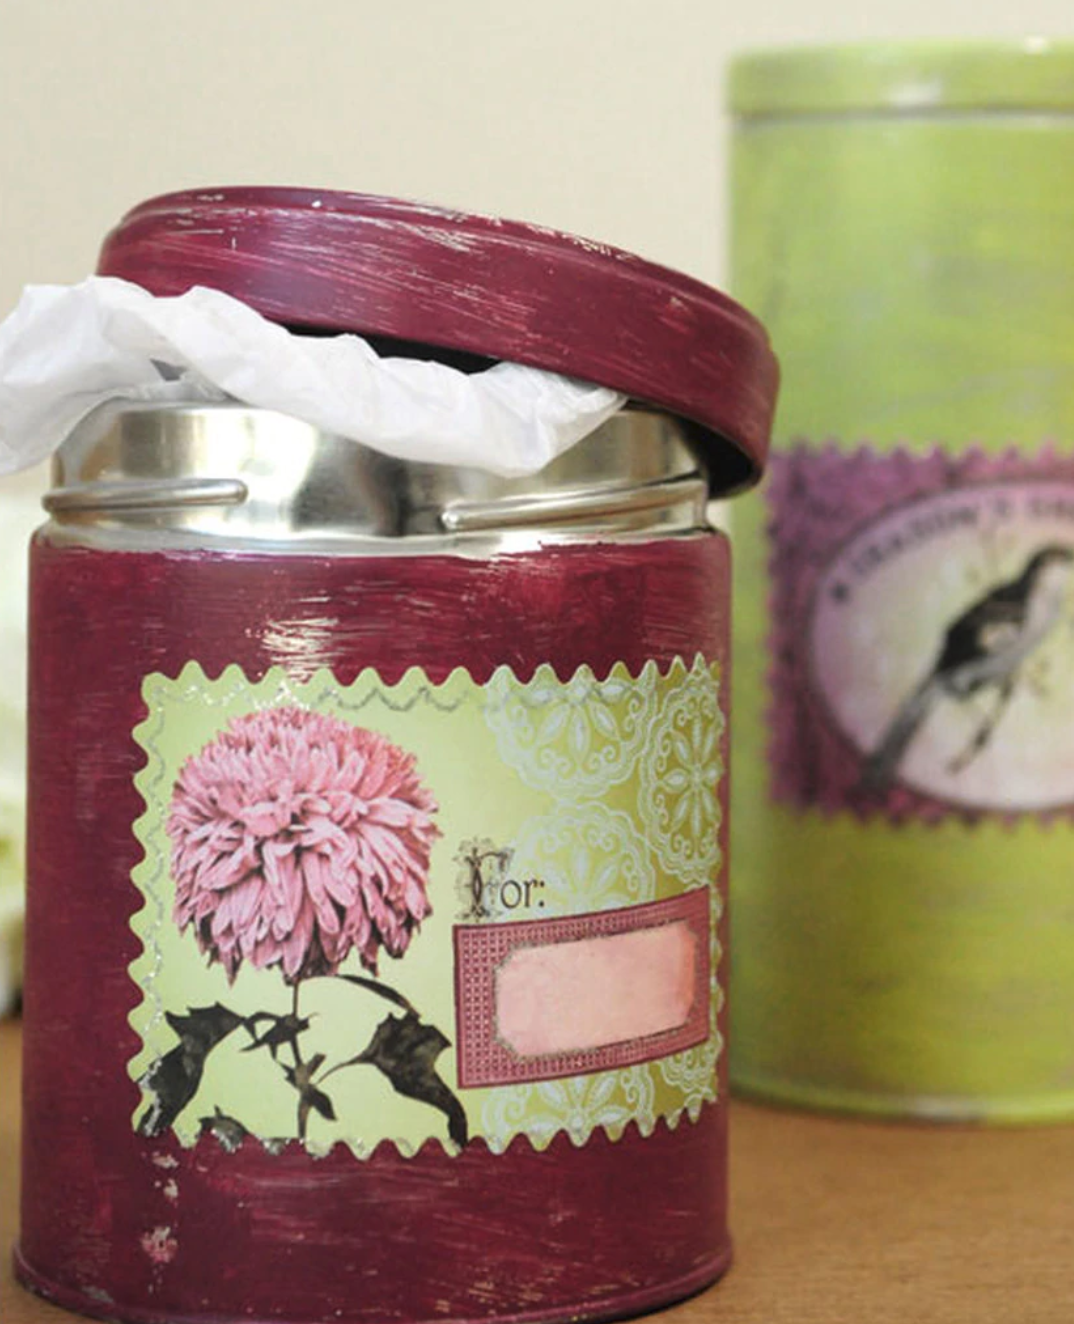
Create these quick-and-easy, inexpensive gift tins in no time! You can use them to fill with baked goods and all sorts of little treasures this holiday season.
Instructions:
To alter the tins, simply paint them with acrylic paint. Allow the paint to dry and then lightly sand them with sandpaper. Paint the outside of the tin with Collage Pauge to seal it so that the paint doesn’t chip. Let the tins dry for at least an hour and then add coordinating labels of your choosing.
For more creative holiday inspiration, be sure to follow us on Instagram!
Wishing you a Merry Christmas!
Love,
The Stampington & Company Team