


"We delight in the beauty of the butterfly, but rarely admit the changes it has gone through to achieve that beauty." - Maya Angelou
We love incorporating a deeper meaning in our creative projects and using butterfly motifs is a wonderful way to accomplish this! See below for a collection of whimsical butterfly-themed projects that will remind you of the magic of growth and change.
4 Butterfly-Themed Mixed-Media Projects
1. Shrink Plastic Butterfly Template Necklace

Supplies:
- Shrink plastic (frosted finish)
- Scissors
- Permanent colored markers
- Graphite pencil
- Clear instant glue
- Single hole puncher
- Butterfly Template from Book of Templates
Instructions:
Photocopy the template you want to use at 100%. Then make photocopy each at incrementally smaller sizes (75% & 50%). Take one sheet, frosted side up, put on top of largest photocopy, and use pencil to trace the butterfly. Then switch out and trace the next size down a few times. Then switch out with the smallest photocopy and trace a few times. Your shrink plastic sheet is now filled with pencil butterfly outlines.
Start filling in each butterfly with marker drawings and patterns as you see fit (I chose to use various colors of pink, and I filled each butterfly with roughly the same patterns). Be mindful that the frosted side of the plastic is the wrong side of your image, so if you want words to appear correctly on the finished product, you must write them backwards.
Carefully cut out each butterfly along the pencil outlines, being extremely cautious since the shrink plastic is very brittle at this point. Then punch a hole at the end of each wing: these holes will be for connecting jump rings to (a standard hole-punch is a perfect size to yield a good jump ring hole after shrinking).
Follow manufacturer's instructions for heating your butterflies in your toaster. A few moments after you remove them from heat, you can handle them enough to bend/shape the wings of one of the medium sized butterflies before the shrunken butterflies cool and solidify. Be sure to leave the largest butterfly flat so you can layer it with a medium one later.
Once fully cooled, take the largest butterfly and attach the bent medium sized butterfly to the front with a dab of glue to make your butterfly centerpiece 3D. Once the glue is cured 24 hours later, assemble your necklace as desired. The extra butterflies can be used in other designs to coordinate with this necklace if you end up not using them in the original necklace design.
Tips:
- I always like to make extras of components to help keep my design options open, but you may decide to only make exactly the number of butterflies you need for the necklace to conserve supplies.
- Since the shrink plastic is so brittle before heated, you may prefer to use a precision knife and cutting mat to cut out your plastic shapes.
- If you do not have access to a photocopier, you can trace directly out of the Book of Templates.

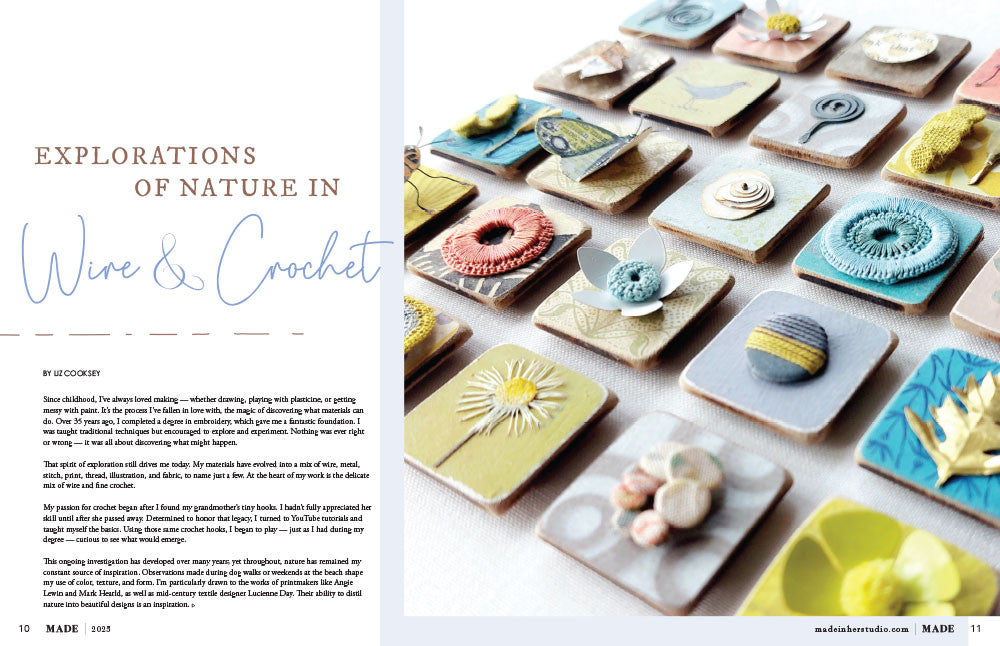
2. Butterfly Beach Houses Project

Instructions:
Start by painting wood house pieces with white acrylic paint. Once the white paint has dried, paint the rectangle shape for each house a different bright color of your choice using acrylic paint. If you don’t have the exact color you want, mix up some various colors together for unique colors.
Using stamps, an acrylic mount, and more acrylic paint, stamp various designs onto the houses and then set them aside to dry. While the paint is drying, cut out some vintage text for each roof and glue the text on.
On each house, attached some pieces of decorative butterfly canvas designs. Then after gluing those on, place an inspirational saying sticker onto each house. Display your little beach houses somewhere fun in your home!

3. Pretty in Pink Packaging Project

Instructions:
Waxed Vial:
Fill vial with an assortment of herbs and salts. Put cork on vial.
Wrap jute trim around the seam of the vial and the cork.
Melt wax in a melting pot.
Dip the cork end of the vial into the wax, rotate as you dip. Be careful to not roll your vial in the wax or it will add a foggy, waxy feel to the vial. Dip the vial until the cork and jute is completely coated with wax.
Once the wax is dry, add metal tag.
Tea Tub Gift Packaging Idea Bag:
Stamp motif onto muslin bag with brown permanent ink.
Remove the original tie from a muslin bag. Thread with pink ribbon.
Fill tub tea filter with salt and herbs and fold shut. Punch holes and tie with string to hold closed.
Stamp butterflies onto grubby tag, and hang on the side of the bag.

4. Butterfly Necklace Project

Instructions:
Create the butterfly:
Stamp the butterfly onto a scrap of canvas with StazOn ink. Paint with a tiny amount of yellow and purple acrylic paint, and cut around the butterfly image.
When dry, layer this canvas over a scrap of yellow fabric and sew the pieces together. Trim the lower fabric into the shape of the butterfly that is a little larger than the canvas. Glue some jewels to the butterfly. Stamp the butterfly again on an old credit card or other piece of plastic. Trim loosely around the image, and this will serve as a backing for the painted butterfly.
Attach the butterfly to the chain:
Cut a chain that is about 3-4 inches in length. Lay the middle of the chain over the plastic butterfly, and attach with hot glue. Next, hot glue the fabric butterfly over the wire with the chain in the middle.
Attach the chain to ribbon:
Attach the chain to some velvet ribbon by threading a small amount of jewelry wire through the last loop and winding the wire around the ribbon until secure. Attach some beads or charms to the velvet. Repeat on the other side of the chain with some fabric scraps and more beads or charms.
Read more
Photo by Anna Kern featured in In Her Studio Summer 2020 Creative block rears its head in many different ways, and sometimes taking the first step is the hardest part. For mixed-media artists, this struggle is exemplified by t...
Summer officially begins this weekend! In celebration, we're sharing a fun summer project here on Somerset Place today. These colorful tea tins are perfect for storing your favorite summery flavored teas. Use them on your kitc...

Leave a comment
All comments are moderated before being published.
This site is protected by hCaptcha and the hCaptcha Privacy Policy and Terms of Service apply.