Is it just us or is crafting even more fun during the holiday season? Whether it's hand-stamped wrapping paper or a special ornament that can be displayed for years to come, there are countless holiday DIYs that add an extra dash of magic to the season. Today we're sharing a collection of our favorite ornament projects that you can easily make and even give as a gift.
5 Ornament Projects You Can Make Yourself!
1. Spoon Scroll Ornaments

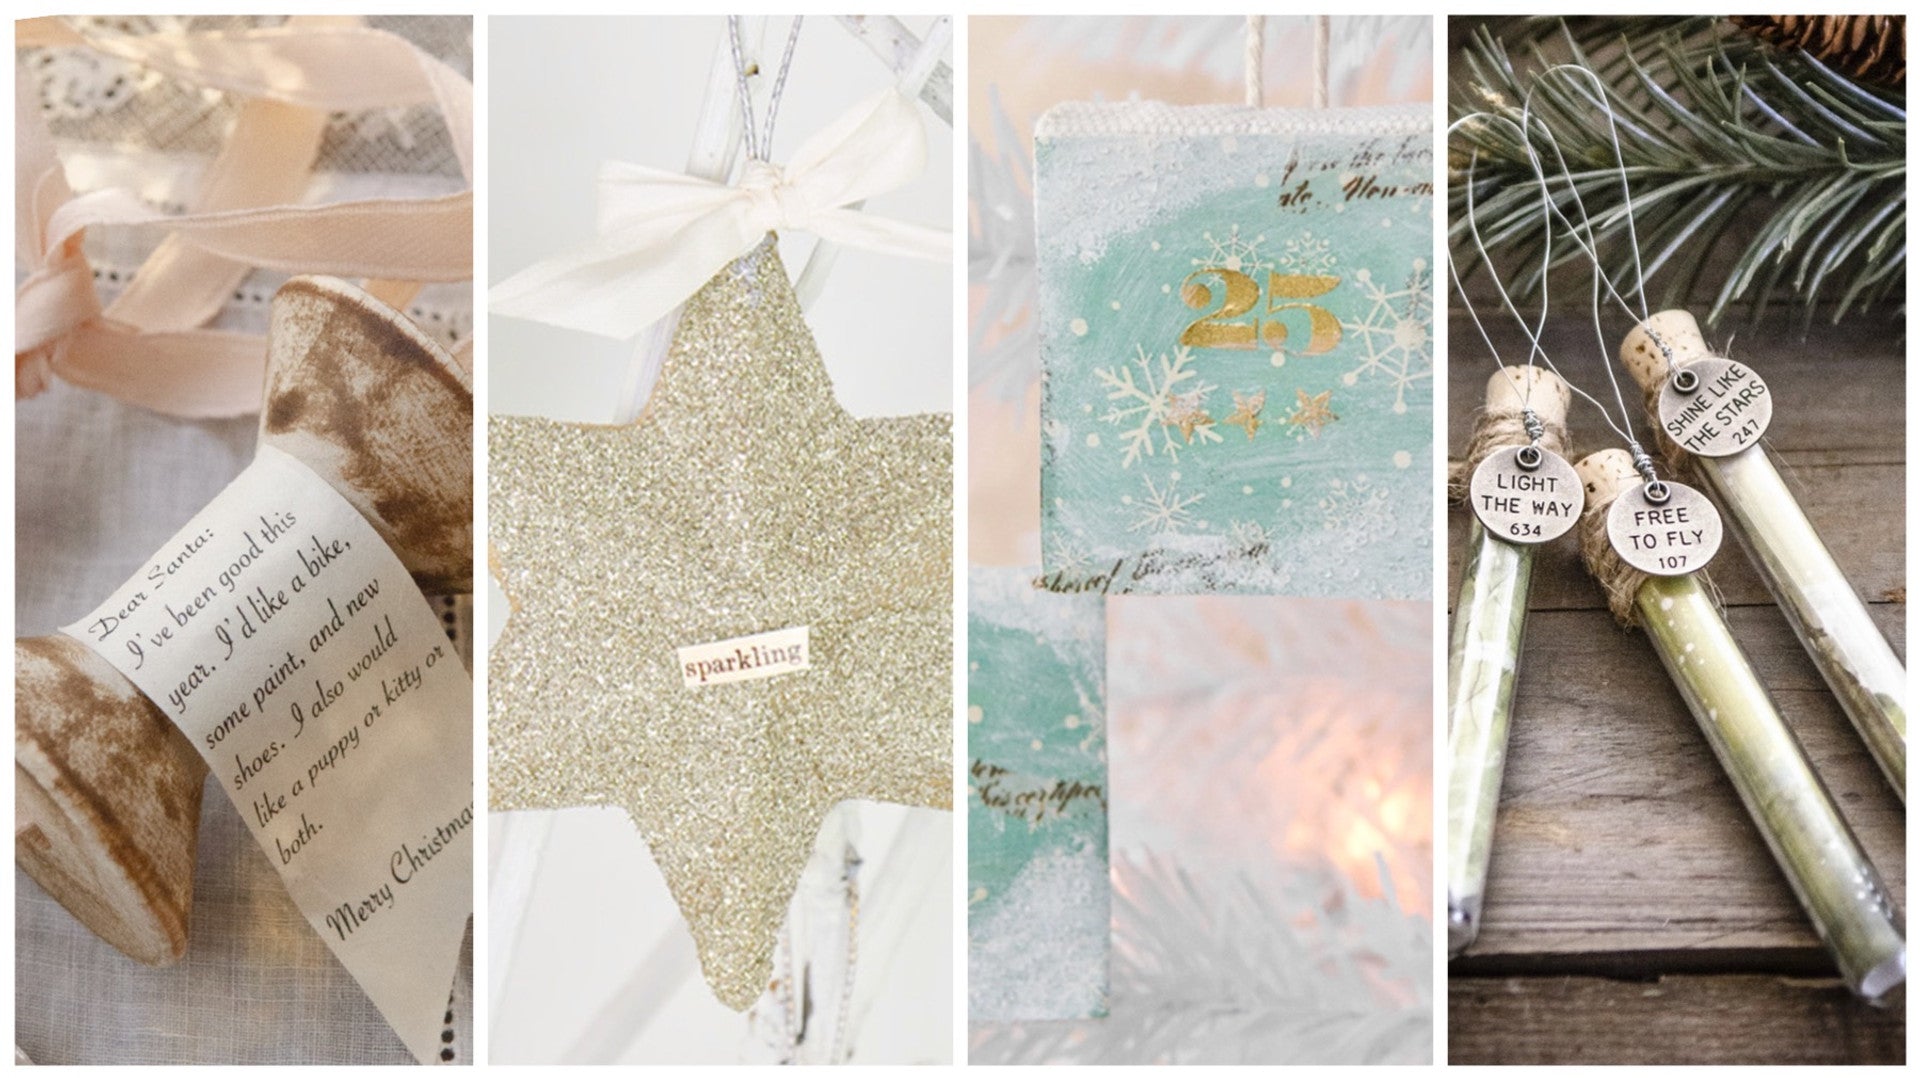
This one has a lot of fun potential! Our editor of Somerset Studio, Christen Hammons, typed up a little letter to Santa on the computer. You could also cut a strip of your child’s Christmas list. She cut the paper to size, and glued the top portion to a wooden spool. Simply sponge ink onto the spool, and add ribbon for hanging!
2. Test Tube Ornaments

To make these beauties, cut a small piece of an artist paper from Somerset Studio 1/2 inch shorter than the test tube. Next, roll it up so that you can it insert into the tube. Push the cork into place and then wrap twine around it, securing it with a small knot. Thread thin wire through a metal word tag, tucking one end of it behind the twine, and then twist the wire together to create a hoop for hanging. It really is as simple as that!
3. Starry Night Ornaments

Simple stars with a touch of vintage flair complete these starry ornaments. Add some collage pauge to a disposable bowl and dip each star ornament in (one at a time - and one side at a time) and then place onto a piece of scrap paper. Sprinkle glass glitter over the stars, then transfer the stars onto a different piece of scrap paper. Pour the excess glass glitter from the first piece of scrap paper back into the glitter container. Allow the stars to dry then repeat the same steps, just decorating the opposite side of the stars.
Cut out the small text words and glue the words onto a piece of white cardstock. Allow the pieces to dry, then cut the words out again and glue each word onto the center of each star. We used diamond glaze adhesive to glue the words on.
Try adding a very small delicate piece of seam binding ribbon (if desired) to each star. Hang your ornaments on the Christmas tree, or anywhere around the home for a festive touch.
4. Teeny Canvas Ornaments

Tiny canvases are the perfect size to turn into ornaments. It took us just a few minutes to adhere a square of patterned paper to each one, followed by a quick wash of white acrylic paint, a rub-on or two, and a touch of white glitter. To hang them, you can just staple a length of twine to the back. These are also the ideal size to turn into gift toppers. Imagine the recipient’s delight when they find they can place the gift topper on their tree to enjoy all season long!
5. Vintage Heart Ornaments

Why not add a dash of romance to your tree with these darling heart ornaments?! Begin by cutting out the heart shapes using vintage French sheet music. Remember to cut two pieces for each heart so that you have a front and back. Cut out clip art images. Cut out a piece of natural muslin for each clip art image that is slightly bigger than the clip art image (leave approx ¼” around the edges).
Make sure your sewing machine is threaded with a burgundy thread and set to a zig zag stitch. Using only the front heart for each ornament, sew the clip art image (with the muslin behind it) onto the front of each heart.
Take a small strip of red ticking fabric and create a loop and place in between the front and back (for each ornament). Sew the front and back together for each ornament, leaving a small space at the bottom of the heart. Stuff the heart with poly-fill or alternatively some scrap fabric pieces. After you have stuffed each heart, sew the hearts shut.
Looking for more holiday DIY inspiration? Take a peek inside our annual edition of A Somerset Holiday now available on newsstands and on our website!
Read more

Project pictured in A Somerset Holiday Volume 15 Do you have a friend who is constantly covered in paint, and proudly shows off her ink-smudged hands? Give the artistic women in your life the gift of creativity with items that...

Have you peeked inside our December issues yet? Art Quilting Studio offers a variety of quilting projects perfect for cozying up this winter. Fan favorite, Bella Grace, shares inspiration for celebrating this season's magic whi...


Leave a comment
All comments are moderated before being published.
This site is protected by hCaptcha and the hCaptcha Privacy Policy and Terms of Service apply.