Creating Fabric Rosettes Video
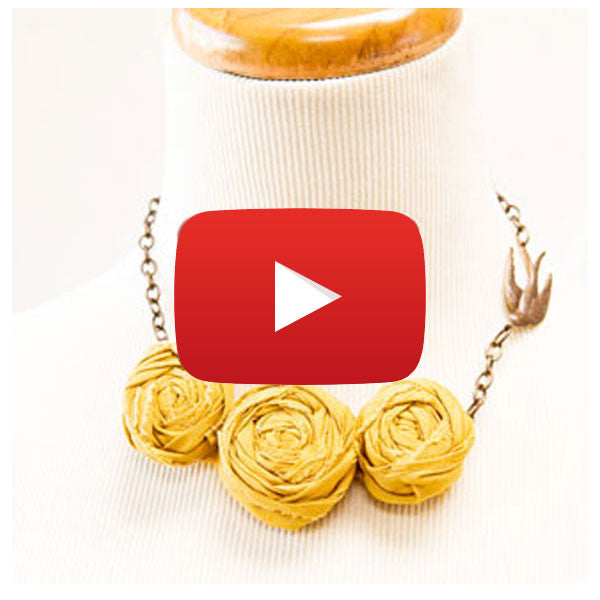
Fabric Rosettes are a lovely addition to wearable art projects. You can create necklaces, brooches, hair accessories and much more!
Fabric lengths
For my necklace I decided to create three roses. Its best to cut the fabric into different lengths so that you have a longer strip for the middle rose so that it’s the largest and then two smaller strips for the other two roses. If you were creating a necklace with 5 or 7 roses you would cut smaller strips for the roses accordingly.
Creating the roses
To create the rose take you long strip and fold it in half. Then tie a knot at one end. The flat part of the knot is where you will begin the wrap, this will be the center. Gradually wrap the fabric around the knot, twisting the fabric up as you go, this will create the look of the petals inside the rose and give it a nice “tattered” appearance because on edge is the folded side and the other is the cut side with the raw edge. Use one hand to hold the rose and keep it together and the other hand to wrap. Once the rose is complete, you will secure it at the back by stitching it a few times, stitch across the bottom of the rose, stitching through as many of the layers as possible to help secure it.
Glue the roses to the felt:
Once your roses are complete you will glue them onto a piece of felt, you can create a template for the number of roses you are using or just glue them straight onto the felt and then cut around them. Leave a small space on either end open because this is where you will add the chain.
Adding the chain
Stitch the end loops of each piece of chain onto the backs of the roses in between the rose and the felt. The length of the chain will depend on how long you want the necklace. Once you have stitched the chain on, secure by adding a drop of hot glue of the chain loop that you stitched and then secure the felt over it.
Attaching the Swallow pendant
Using your pliers, open up to chain links on one side of the necklace and attach the Soaring Swallow Pendant, secure the links closed.
Clasp
Attach the clasp of your choice from the clasp sampler pack to the necklace.
The jewelry findings products used in this creative how-to video are available at the Shoppe at Somerset.
Market List:
- Fabric
- Coordinating colored thread and need
- Felt
- Glue gun
- Chain
- Claps
- Soaring swallow pendant
- Pliers
- Scissors
Free Shipping on Subscriptions
Easy 60 Day Returns
Friendly Customer
Support


Creating Fabric Rosettes Video
Frequently asked questions
Looking for a quick answer? Here are some of our customer’s most frequently asked questions to help you along the way.
Thanks for your interest in our magazines! We encourage you to visit our Calls & Challenges page to see what our editors are looking for.
Ready to begin? Here is where you can find our Submission Guidelines.
Our subscriptions ship directly from our printer in Wisconsin. For this reason, we need to be notified of your change of address at least two months before the next issue comes out, or it will be sent to the address we had on file and provided to our printer at the time it was due.
How to Notify Us About Your Change of Address
- Email the following to customerservice@stampington.com:
- The publication(s) you subscribe to
- Your name and new address
- Your old address
2. Call to inform us of your new mailing address:
- Toll-Free: 1-877-782-6737 or International: 1-949-380-7318
Mail Forwarded by the Post Office
If you forward mail to your new address through the Post Office, it won't apply to periodicals/your magazine subscription unfortunately. Also, since mail forwarding only lasts for a short time-frame, we request that you still notify us of your address change to prevent any service interruption to your subscription.
Stampington & Company cannot be held responsible for replacing "lost" issues from your subscription, if we did not receive your change of address request at least two months prior to your next issue's release date.
Subscription issues should arrive within the first week of the month your publication is released. Please add up to two weeks for international delivery.
If your magazine has not arrived by the 20th of the month, please contact our customer service department, so we can check to make sure nothing is amiss with your subscription, and see if you're eligible for a replacement copy. International subscribers can receive a digital version of the magazine as a replacement if one attempt has already been made to deliver the print edition to you.
Stampington & Company cannot be held responsible for postal delays or circumstances outside of our control, but we will make every effort to make it right.
We offer FREE shipping on all magazine subscriptions and instant download purchases to our customers. You can also take advantage of free U.S. shipping on select pre-orders of your favorite magazines (discounted International rates will apply). Browse our selection of Pre-Orders With Free U.S. Shipping here.
What are my shipping charges?
Shipping charges are calculated by weight, shipping destination, and speed. You will be able to choose the best delivery method for your needs at checkout.
To help keep your costs down, we offer a discounted rate of $5.95 to ship a single magazine to you (within the United States).
Need your order fast? We offer the following expedited shipping options:
- 3-day delivery
- 2-day delivery
*Please contact us if you have any questions or special instructions regarding your rush order.
What Carriers do You Use to Ship Items?


