Quirky Character Cards Project
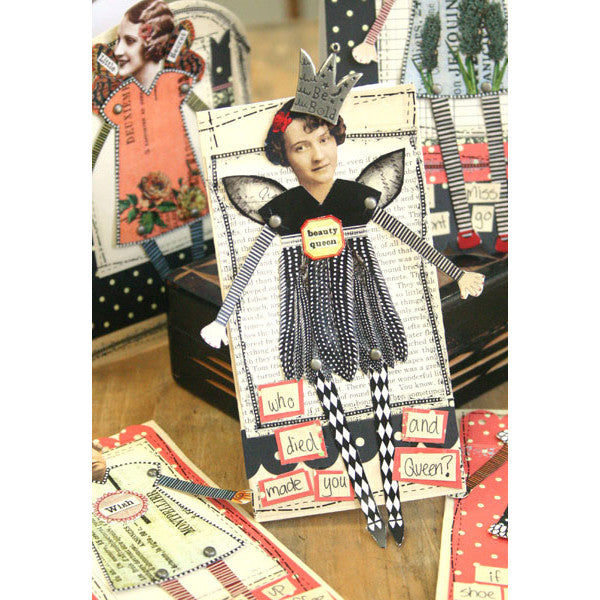
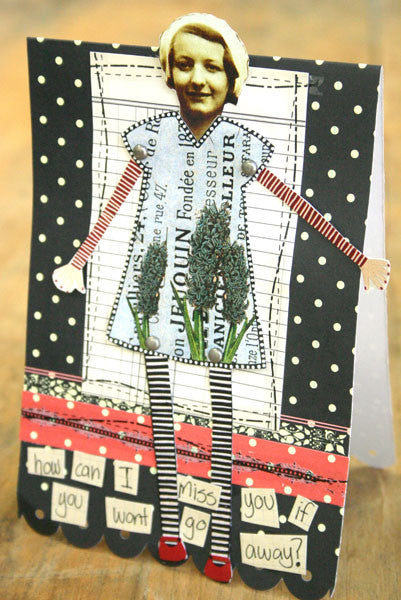
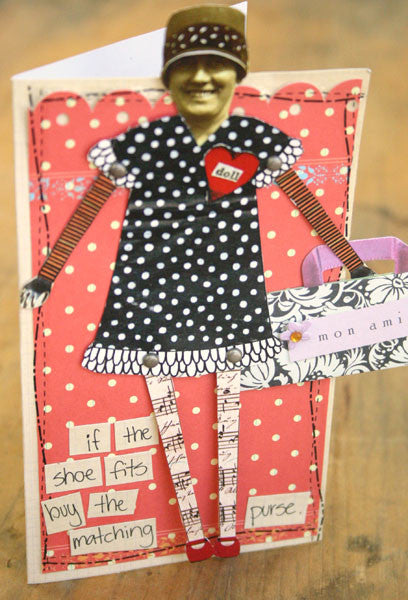
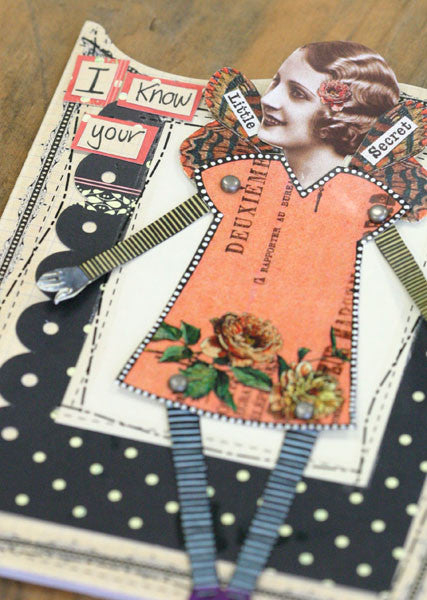
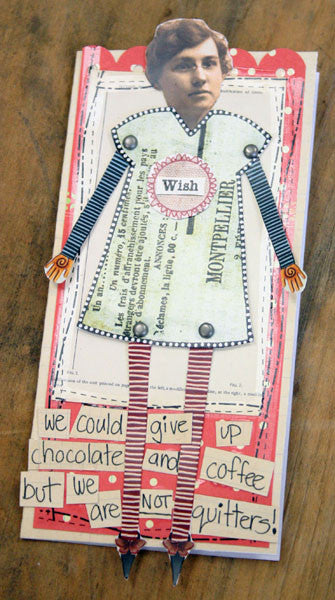
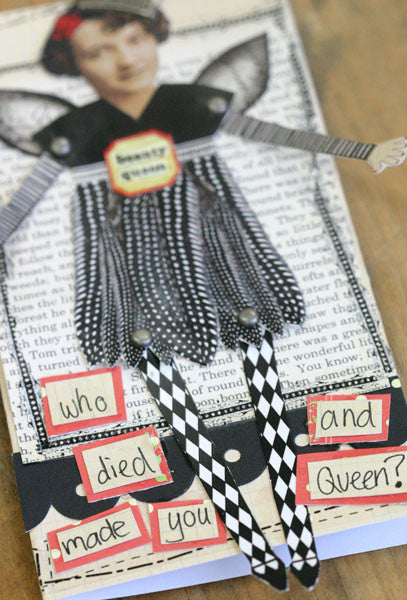
The ARTchix Studio Paper Doll Collage sheets are so creative and inspirational! I knew that some fun cards with quirky quotes would be the perfect project for these cool collage sheets.
I used three collage sheetsto create the dolls. I didn’t want to limit myself to using just one because there are so many fun parts on each sheet and I felt that mixing them up would have a really cool effect. To assemble the dolls just simply cut down the pieces you are using then attach the arms and legs using brads. Glue the head onto the back of the dress.
Each card has a unique size and I recommended that you assemble your doll first, and then choose the coordinating background papers and then decide on the size of the card. Once you have chosen your background papers, glue them onto the card, the cards are made from the Attic Treasures paper and then use the rub-on tape runners to do some decorative borders.
They have a "faux stitching" look that is really fun. Add any extra embellishments you desire, on my queen card I added an Artgirlz crown and on the purse card I added a paper purse embellishment. The final step is to handwrite some quirky quotes onto cardstock using the Rapido Sketch pen. Then cut down all the individual words and glue onto the cards as shown in the pictures.
Remember for easy assembly try using the Tim Holtz scissors by Tonic and a good adhesive.
Free Shipping on Subscriptions
Easy 60 Day Returns
Friendly Customer
Support


Quirky Character Cards Project
Frequently asked questions
Looking for a quick answer? Here are some of our customer’s most frequently asked questions to help you along the way.
Thanks for your interest in our magazines! We encourage you to visit our Calls & Challenges page to see what our editors are looking for.
Ready to begin? Here is where you can find our Submission Guidelines.
Our subscriptions ship directly from our printer in Wisconsin. For this reason, we need to be notified of your change of address at least two months before the next issue comes out, or it will be sent to the address we had on file and provided to our printer at the time it was due.
How to Notify Us About Your Change of Address
- Email the following to customerservice@stampington.com:
- The publication(s) you subscribe to
- Your name and new address
- Your old address
2. Call to inform us of your new mailing address:
- Toll-Free: 1-877-782-6737 or International: 1-949-380-7318
Mail Forwarded by the Post Office
If you forward mail to your new address through the Post Office, it won't apply to periodicals/your magazine subscription unfortunately. Also, since mail forwarding only lasts for a short time-frame, we request that you still notify us of your address change to prevent any service interruption to your subscription.
Stampington & Company cannot be held responsible for replacing "lost" issues from your subscription, if we did not receive your change of address request at least two months prior to your next issue's release date.
Subscription issues should arrive within the first week of the month your publication is released. Please add up to two weeks for international delivery.
If your magazine has not arrived by the 20th of the month, please contact our customer service department, so we can check to make sure nothing is amiss with your subscription, and see if you're eligible for a replacement copy. International subscribers can receive a digital version of the magazine as a replacement if one attempt has already been made to deliver the print edition to you.
Stampington & Company cannot be held responsible for postal delays or circumstances outside of our control, but we will make every effort to make it right.
We offer FREE shipping on all magazine subscriptions and instant download purchases to our customers. You can also take advantage of free U.S. shipping on select pre-orders of your favorite magazines (discounted International rates will apply). Browse our selection of Pre-Orders With Free U.S. Shipping here.
What are my shipping charges?
Shipping charges are calculated by weight, shipping destination, and speed. You will be able to choose the best delivery method for your needs at checkout.
To help keep your costs down, we offer a discounted rate of $5.95 to ship a single magazine to you (within the United States).
Need your order fast? We offer the following expedited shipping options:
- 3-day delivery
- 2-day delivery
*Please contact us if you have any questions or special instructions regarding your rush order.
What Carriers do You Use to Ship Items?


