
9am - 5pm PST, Mon. - Fri.
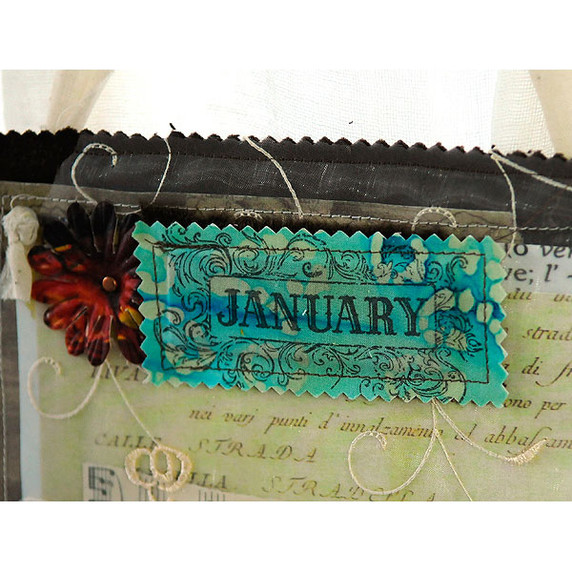
Start with brown fabric and measure to the size you want your calendar to be. Layer torn sheets from the Venetian Collectionon to the fabric. Add a white piece of corrugated paper toward the bottom. Then add some torn music paper over the corrugated white paper. Add a sheet decorative piece of material over everything and sew it all down. Take a clear pocket page and cut it down to size and sew it over the corrugated section. This will be your holder for pictures or papers that you are displaying for that month. Take some magnetic tape and stick it to the top of the calendar. Sew a piece of brown fabric over it to hold it in place. This is where you will put your magnetic months. At the bottom, add strips of crushed velvet cream ribbon and crushed velvet sienna brown ribbon. Alternate the colors to make three rows. Add a strip of magnetic tape to the center of the ribbons and then sew a piece of fabric to hold it down in place. This is where you will put your magnetic numbers.
At the top left add an Artful Collage Flower and hold it in place with a copper brad. I used a stiff piece of board to put behind the calendar so that it stays straight. Then put another piece of fabric behind the board so that the board is between the decorated fabric front and back. Sew the pieces together. Add Artful Collage Flowers all along the bottom of the piece with white brads. On a piece of brown paper from the Venetian Collection stamp all the numbers from the Gypsy Year stamp set using black StazOn and acrylic blocks. Cut out each number and glue them to magnetic tape and then cut out. Finish the edges of each number by distressing the edge with brown StazOn Ink.
Use a heart die cut or punch to cut out the hearts from the Venetian Collection. Add them to the left side of the clear pocket. For the magnetic months, use different scraps of colored fabric. Stamp each month from the Gypsy Year stamp set with the black StazOn onto the fabric scraps. Add a strip of magnetic tape behind the month and then add a piece of paper behind it and sew them down together with brown thread. Cut out each one with decorative edged scissors. Finish the whole piece by adding two grommets to the top and add fabric so that the piece can hang.
The photograph used in this project is courtesy of Stampington & Company Managing Editor Amanda Crabtree.


