

Don't Fly Away Project
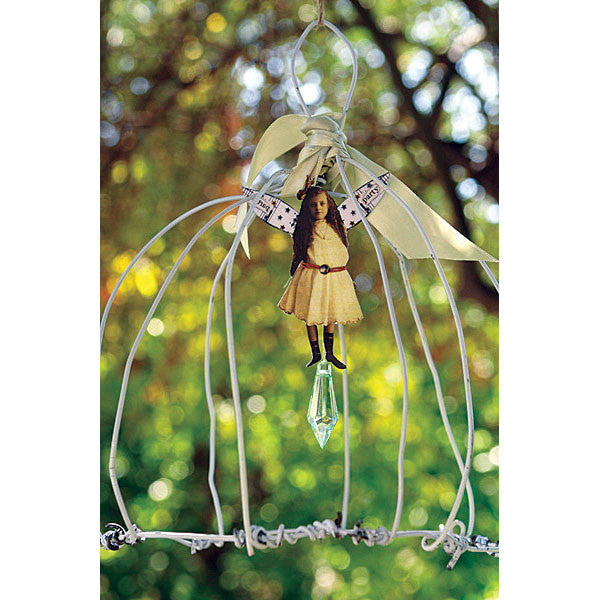
Our new publication GreenCraft has inspired me in so many ways. I now look at regular everyday items differently and every time I’m about to discard something I usually find myself thinking about how I can re-use it creatively. Like many households I have a collection of white and brass "drycleaner style" wire hangers that have accumulated over the years. Recently when cleaning out it occurred to me that these simple items could be shaped and transformed into miniature decorative bird cages!
To create a small cage you will need approximately 3 hangers, wire cutters, and a pair of pliers. First start by cutting a piece of wire and creating a circle. This will be the base. Then unwind another hanger so that it became a long piece of wire. In the middle of the piece I created the loop at the top and with the excess bring the down on either side of the loop and attaché to the base circle by winding tightly around the base wire a few times and then snip off the excess. Then you will cut 7 pieces of wire down to a similar length and one-by-one you will attach one end to the neck of the top loop and the other to the base. When you have finished all of them and cut off all the excess wire you can manipulate and bend the wire to create more of a birdcage shape. All the winding that takes place with connecting the wires can be done with the pliers, but I also found that some hangers were more flexible than others and for those I was able to wrap and connect without pliers.
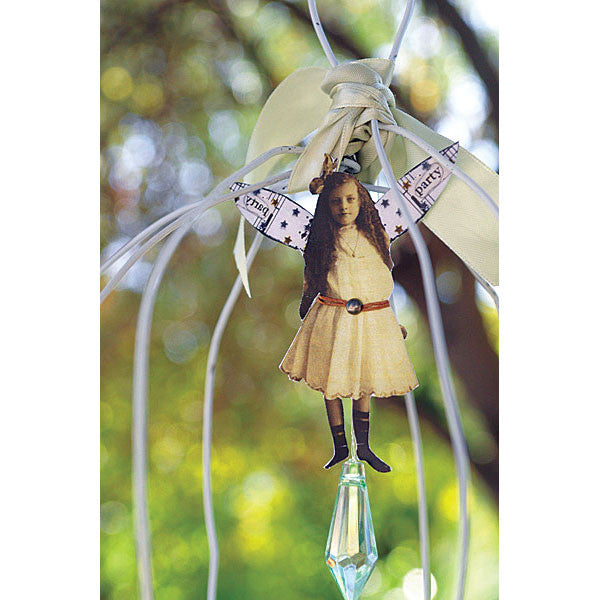
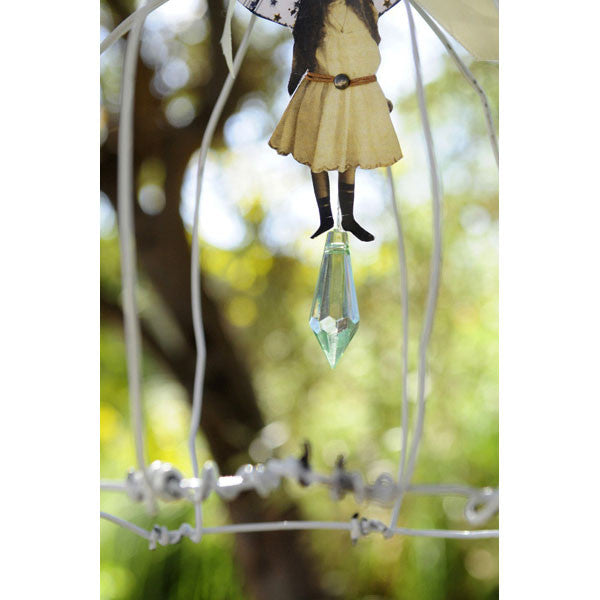
I wrapped some green satin ribbon around the neck to cover up all the wire wrapping. It would be fine to leave the neck as is without ribbon for more of a raw look. I then used an ARTchix Studio collage image and glued the image to a thick piece of cardstock then cut out the image. Thread a green crystal onto some clear thread. On the girl image wrap some brown scrapper’s floss around her waist to create a belt, tie it at the back and then punch a brad through the center of the belt. On the back of the girl image thread the clear thread through the belt to secure it and then tie the top of the clear thread to the section that is just under the loop.
Free Shipping on Subscriptions
Easy 60 Day Returns
Friendly Customer
Support


Don't Fly Away Project
Frequently asked questions
Looking for a quick answer? Here are some of our customer’s most frequently asked questions to help you along the way.
Thanks for your interest in our magazines! We encourage you to visit our Calls & Challenges page to see what our editors are looking for.
Ready to begin? Here is where you can find our Submission Guidelines.
Our subscriptions ship directly from our printer in Wisconsin. For this reason, we need to be notified of your change of address at least two months before the next issue comes out, or it will be sent to the address we had on file and provided to our printer at the time it was due.
How to Notify Us About Your Change of Address
- Email the following to customerservice@stampington.com:
- The publication(s) you subscribe to
- Your name and new address
- Your old address
2. Call to inform us of your new mailing address:
- Toll-Free: 1-877-782-6737 or International: 1-949-380-7318
Mail Forwarded by the Post Office
If you forward mail to your new address through the Post Office, it won't apply to periodicals/your magazine subscription unfortunately. Also, since mail forwarding only lasts for a short time-frame, we request that you still notify us of your address change to prevent any service interruption to your subscription.
Stampington & Company cannot be held responsible for replacing "lost" issues from your subscription, if we did not receive your change of address request at least two months prior to your next issue's release date.
Subscription issues should arrive within the first week of the month your publication is released. Please add up to two weeks for international delivery.
If your magazine has not arrived by the 20th of the month, please contact our customer service department, so we can check to make sure nothing is amiss with your subscription, and see if you're eligible for a replacement copy. International subscribers can receive a digital version of the magazine as a replacement if one attempt has already been made to deliver the print edition to you.
Stampington & Company cannot be held responsible for postal delays or circumstances outside of our control, but we will make every effort to make it right.
We offer FREE shipping on all magazine subscriptions and instant download purchases to our customers. You can also take advantage of free U.S. shipping on select pre-orders of your favorite magazines (discounted International rates will apply). Browse our selection of Pre-Orders With Free U.S. Shipping here.
What are my shipping charges?
Shipping charges are calculated by weight, shipping destination, and speed. You will be able to choose the best delivery method for your needs at checkout.
To help keep your costs down, we offer a discounted rate of $5.95 to ship a single magazine to you (within the United States).
Need your order fast? We offer the following expedited shipping options:
- 3-day delivery
- 2-day delivery
*Please contact us if you have any questions or special instructions regarding your rush order.
What Carriers do You Use to Ship Items?


