


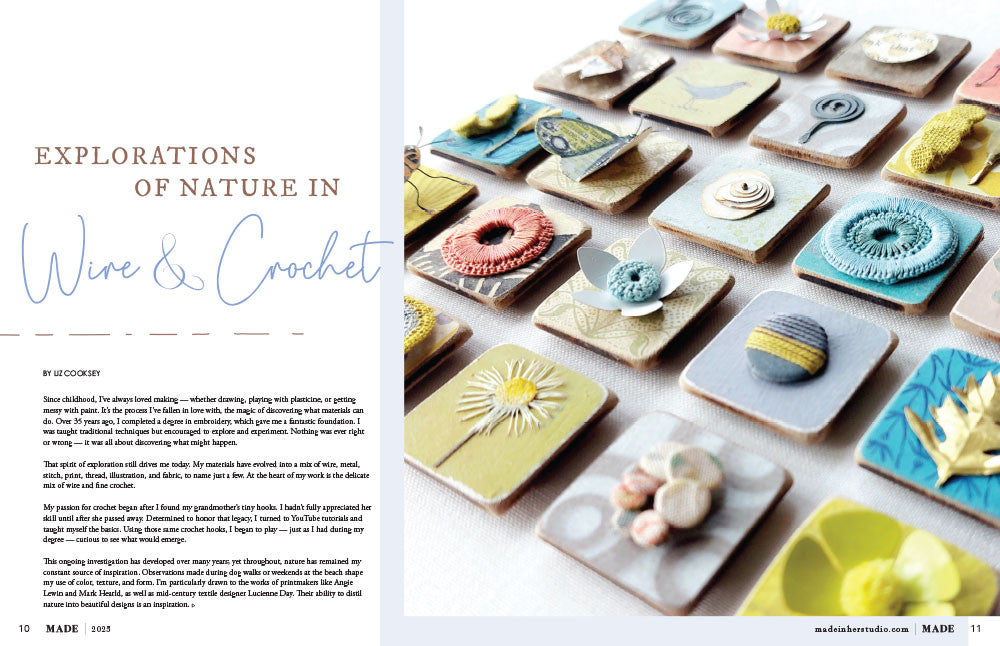
DIY Lip Balm Project
Create your own homemade lip balm with only a handful of simple supplies! There are plenty of recipe variations that you can find online, and for this project, I chose a very simple one that combines natural beeswax and vegetable oil. You must use the natural, unbleached beeswax. Many of the recipes I found contained other types of oil so if using vegetable oil isn't the best option for you, just do a little online searching for recipes containing other types of oils.
DIY Lip Balm Project Directions:
- Before you start, open the mini tins and lay them flat on an old chopping board or surface that is completely flat - but keep in mind that the surface may get wax on it. If you don't have a heat resistant counter be very careful; plus you don't want to have to clean wax off your nice countertop, so be sure to protect the counter surface! You can pick up an old metal cooking tray or chopping block inexpensively at a thrift store, or carefully layer wax paper to contain any accidental spills.
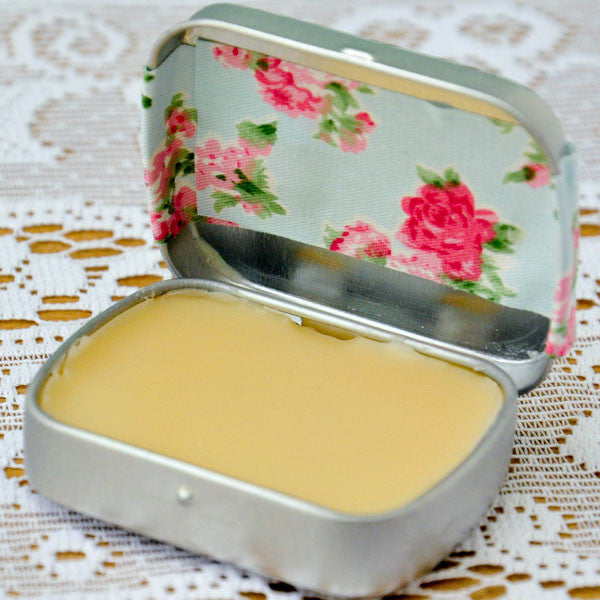
- You can use the Melting Pot Project Pan to create the lip balm mixture, or alternatively, a saucepan. If you choose to use a saucepan, make sure it is completely clean and one that you plan on using for future lip balm or beauty projects only. To create (and fill) 4 tins of the lip balm, I mixed 1/3 cup of vegetable oil with 1/3 cup of the beeswax.
- Heat it on a medium heat, stirring slowly with a wooden spoon. Add a flavor if desired - for a few of mine a added a few drops of Vanilla essence and a few others I used a peppermint "syrup" flavor.
- If you want clear lip balm leave it as is - but if you'd like a little color, add a very small amount of lipstick. You can purchase the inexpensive ones at the store and use a knife to slice off approx 1/8" of the lipstick and add it to the mixture. If you want a little more color just add more - but a little goes a long way.
- Once the lip balm mixture has completely melted to a liquid and the color is just right, you can pour the mixture into the tins. Since the tins have hinges, if you fill it too high the mixture might leak out so just fill below the hinges. It takes only a few minutes to harden and you can always add more to fill to the desired level. Set aside to harden.
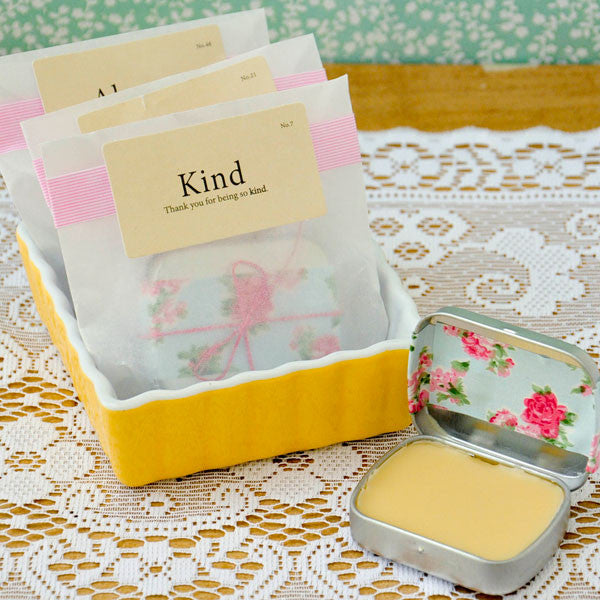
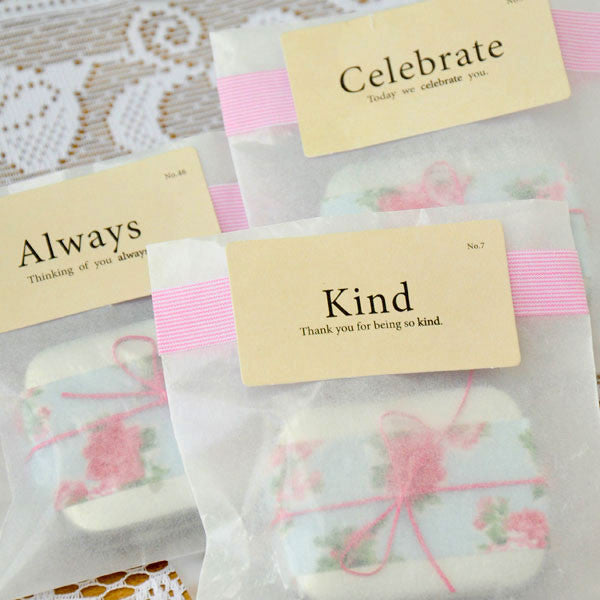
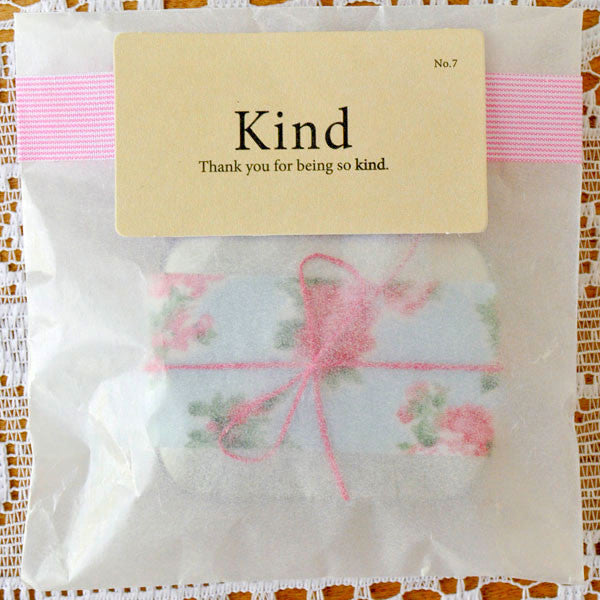
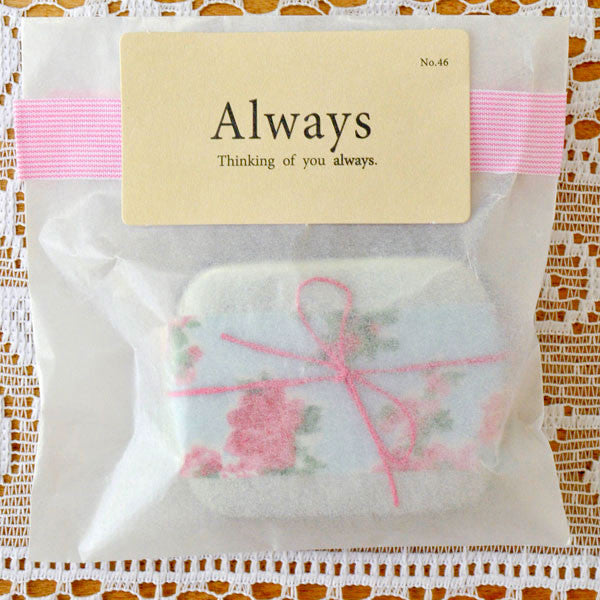
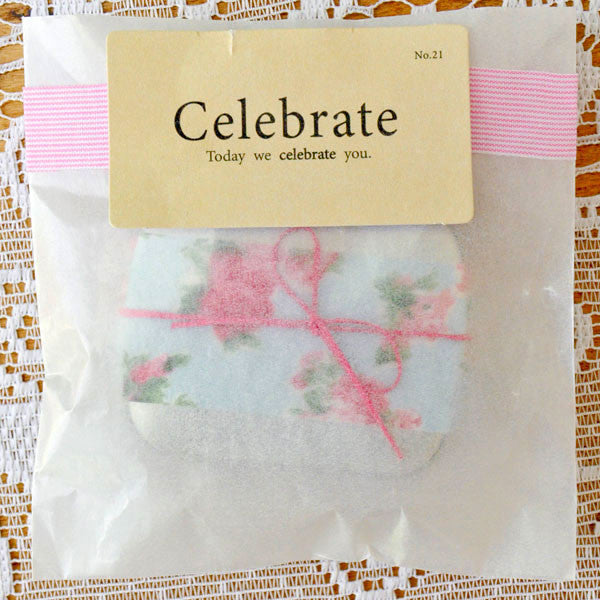
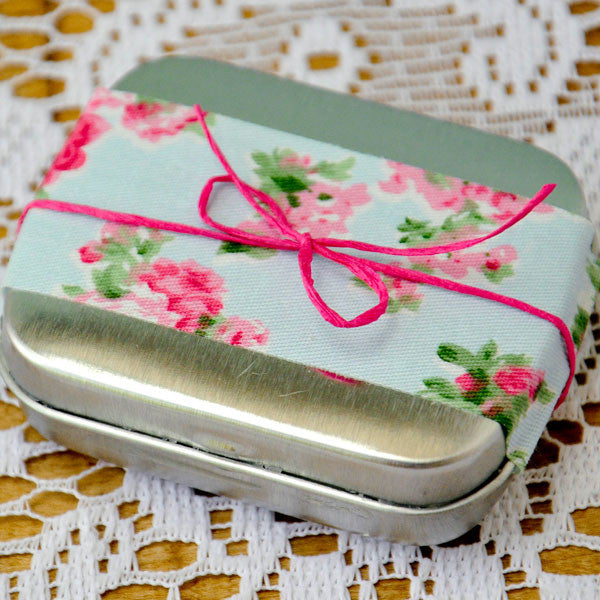
- I recommend embellishing the tins after the wax has set. If you accidentally spill wax on the outside it's much easier to clean off the excess wax if the tins are bare. I don't suggest sanding and painting the tins because sanding metal produces tiny specks of metal dust - which you don't want in your lip balm! Embellish the tins using some strips of fabric tape and then tie with a simple strand of scrapper's floss.
To complete the project, package your lip balm tins with a little shabby flair. Place the tin inside a glassine sleeve and then secure the top with the pink striped fabric tape. Add a mini flashcard with adhesive and voila!
PLEASE NOTE - this project is not intended for children. Whenever you work with hot oil and wax we recommend you do so with extreme caution.
Free Shipping on Subscriptions
Easy 60 Day Returns
Friendly Customer
Support
Frequently asked questions
Looking for a quick answer? Here are some of our customer’s most frequently asked questions to help you along the way.
Thanks for your interest in our magazines! We encourage you to visit our Calls & Challenges page to see what our editors are looking for.
Ready to begin? Here is where you can find our Submission Guidelines.
Our subscriptions ship directly from our printer in Wisconsin. For this reason, we need to be notified of your change of address at least two months before the next issue comes out, or it will be sent to the address we had on file and provided to our printer at the time it was due.
How to Notify Us About Your Change of Address
- Email the following to customerservice@stampington.com:
- The publication(s) you subscribe to
- Your name and new address
- Your old address
2. Call to inform us of your new mailing address:
- Toll-Free: 1-877-782-6737 or International: 1-949-380-7318
Mail Forwarded by the Post Office
If you forward mail to your new address through the Post Office, it won't apply to periodicals/your magazine subscription unfortunately. Also, since mail forwarding only lasts for a short time-frame, we request that you still notify us of your address change to prevent any service interruption to your subscription.
Stampington & Company cannot be held responsible for replacing "lost" issues from your subscription, if we did not receive your change of address request at least two months prior to your next issue's release date.
Subscription issues should arrive within the first week of the month your publication is released. Please add up to two weeks for international delivery.
If your magazine has not arrived by the 20th of the month, please contact our customer service department, so we can check to make sure nothing is amiss with your subscription, and see if you're eligible for a replacement copy. International subscribers can receive a digital version of the magazine as a replacement if one attempt has already been made to deliver the print edition to you.
Stampington & Company cannot be held responsible for postal delays or circumstances outside of our control, but we will make every effort to make it right.
We offer FREE shipping on all magazine subscriptions and instant download purchases to our customers. You can also take advantage of free U.S. shipping on select pre-orders of your favorite magazines (discounted International rates will apply). Browse our selection of Pre-Orders With Free U.S. Shipping here.
What are my shipping charges?
Shipping charges are calculated by weight, shipping destination, and speed. You will be able to choose the best delivery method for your needs at checkout.
To help keep your costs down, we offer a discounted rate of $5.95 to ship a single magazine to you (within the United States).
Need your order fast? We offer the following expedited shipping options:
- 3-day delivery
- 2-day delivery
*Please contact us if you have any questions or special instructions regarding your rush order.
What Carriers do You Use to Ship Items?