



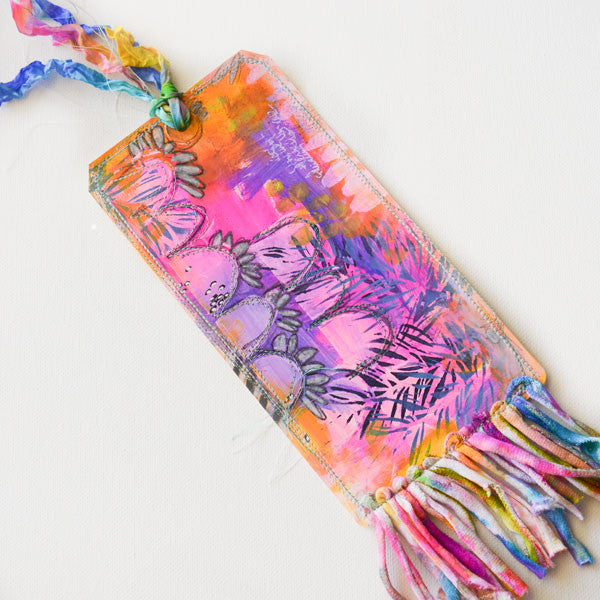
Stitched & Stenciled Tag by Rae Missigman
I love creating unique art using shipping tags as a substrate. Stencils, paint and a few mark making tools are all you need to fashion a simple and beautiful note in just a few minutes. For an extra pop of fun, add some colorful ribbons and trims. And of course I have to add stitching to almost everything I do!
Stitched & Stenciled Tag Art Project Directions:
Spread gesso over the entire surface of a shipping tag. Let dry partially, and then apply spray inks, (I used Bubblegum, Fuchsia and Calypso).
Use a brush to move and mix the inks around with the gesso.
Apply acrylic paint (I used Dina’s Night & Turquoise) through the Mix & Match Scalloped Edges and Frazzled & Ruffled Feather stencils, using your finger and plenty of paint to get a raised edge. Let dry or speed up process with a heat tool.
Layer white and yellow acrylic paint onto the tag, adding color and making marks.
Outline your stencil shapes with a pencil and China Marker. Journal with a white gel pen.
Add stitching around the edges and shapes.
Slip knot colorful ribbon to the top of your tag, and sew on some colorful trim to the bottom.
Free Shipping on Subscriptions
Easy 60 Day Returns
Friendly Customer
Support


Stitched & Stenciled Tag by Rae Missigman
Frequently asked questions
Looking for a quick answer? Here are some of our customer’s most frequently asked questions to help you along the way.
Thanks for your interest in our magazines! We encourage you to visit our Calls & Challenges page to see what our editors are looking for.
Ready to begin? Here is where you can find our Submission Guidelines.
Our subscriptions ship directly from our printer in Wisconsin. For this reason, we need to be notified of your change of address at least two months before the next issue comes out, or it will be sent to the address we had on file and provided to our printer at the time it was due.
How to Notify Us About Your Change of Address
- Email the following to customerservice@stampington.com:
- The publication(s) you subscribe to
- Your name and new address
- Your old address
2. Call to inform us of your new mailing address:
- Toll-Free: 1-877-782-6737 or International: 1-949-380-7318
Mail Forwarded by the Post Office
If you forward mail to your new address through the Post Office, it won't apply to periodicals/your magazine subscription unfortunately. Also, since mail forwarding only lasts for a short time-frame, we request that you still notify us of your address change to prevent any service interruption to your subscription.
Stampington & Company cannot be held responsible for replacing "lost" issues from your subscription, if we did not receive your change of address request at least two months prior to your next issue's release date.
Subscription issues should arrive within the first week of the month your publication is released. Please add up to two weeks for international delivery.
If your magazine has not arrived by the 20th of the month, please contact our customer service department, so we can check to make sure nothing is amiss with your subscription, and see if you're eligible for a replacement copy. International subscribers can receive a digital version of the magazine as a replacement if one attempt has already been made to deliver the print edition to you.
Stampington & Company cannot be held responsible for postal delays or circumstances outside of our control, but we will make every effort to make it right.
We offer FREE shipping on all magazine subscriptions and instant download purchases to our customers. You can also take advantage of free U.S. shipping on select pre-orders of your favorite magazines (discounted International rates will apply). Browse our selection of Pre-Orders With Free U.S. Shipping here.
What are my shipping charges?
Shipping charges are calculated by weight, shipping destination, and speed. You will be able to choose the best delivery method for your needs at checkout.
To help keep your costs down, we offer a discounted rate of $5.95 to ship a single magazine to you (within the United States).
Need your order fast? We offer the following expedited shipping options:
- 3-day delivery
- 2-day delivery
*Please contact us if you have any questions or special instructions regarding your rush order.
What Carriers do You Use to Ship Items?


