


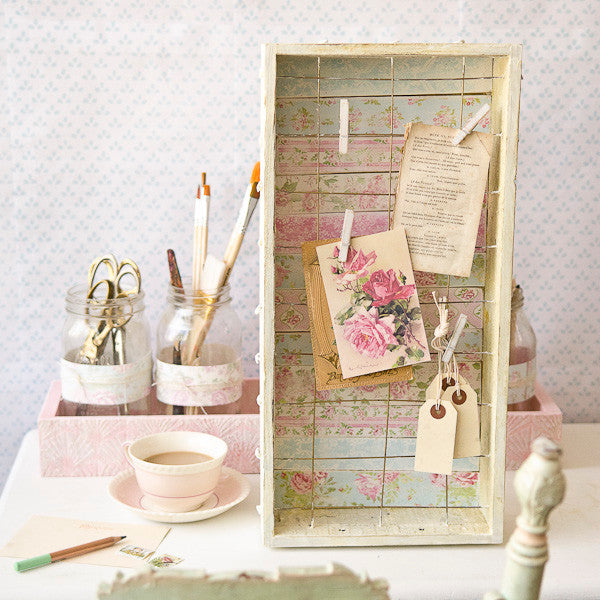


Shabby Chic Desk Décor Part 1: Memo Board
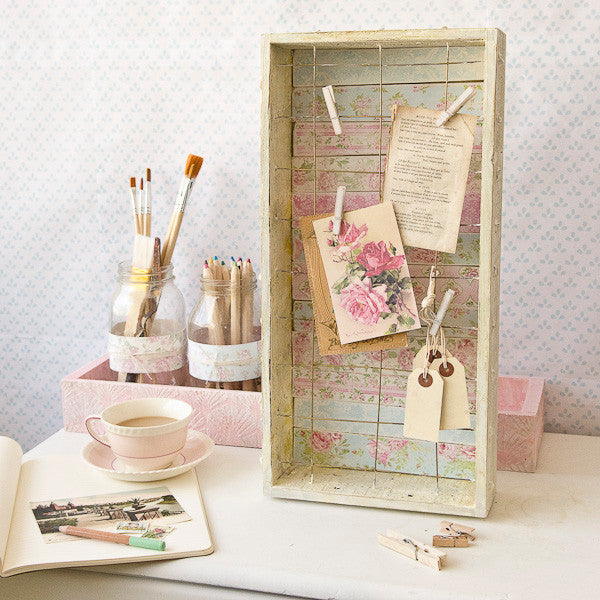
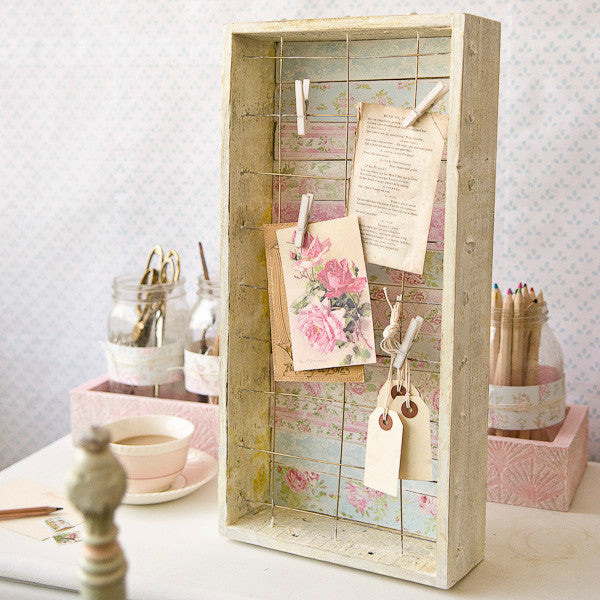
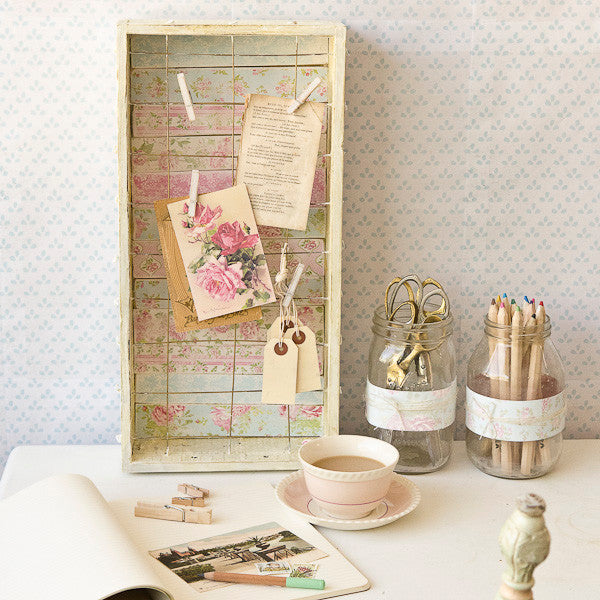
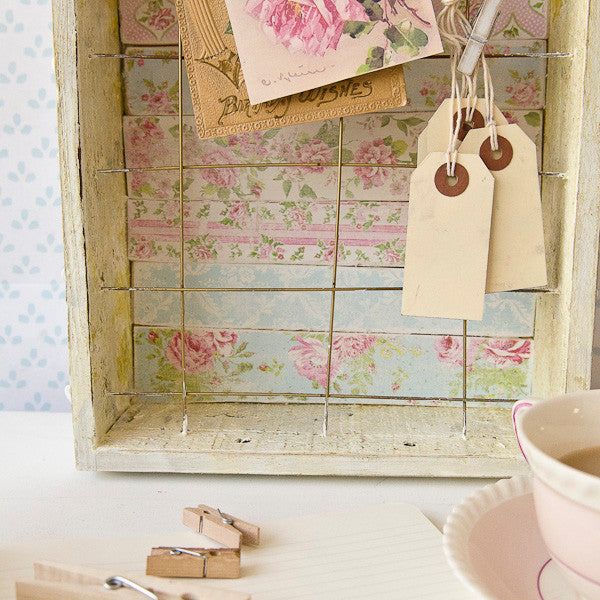
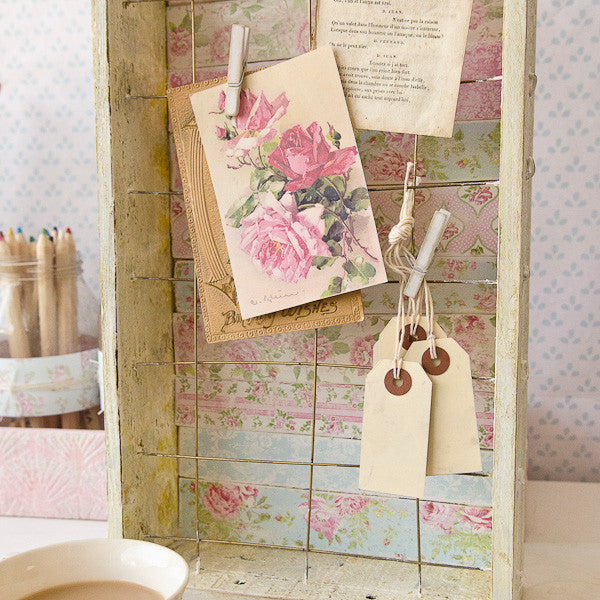
Every spring season, I see shabby chic home décor in every store and I fall in love all over again. The delicate hues of pink and blue capture my imagination and I begin to dream of an entire house filled with beautiful florals and distressed whites. Instead of tackling the entire house, I decided to start with my desk, which is where I spend most of my creative time. This memo board and desktop storage will have me feeling inspired every time I sit down to work.
Shabby Chic Memo Board Directions:
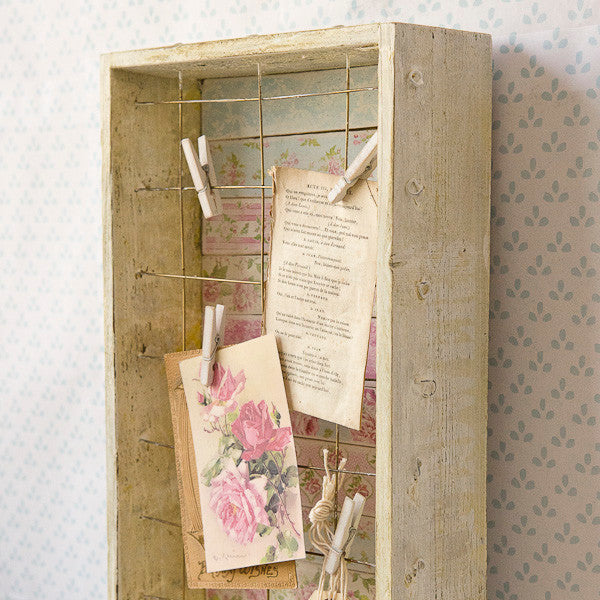
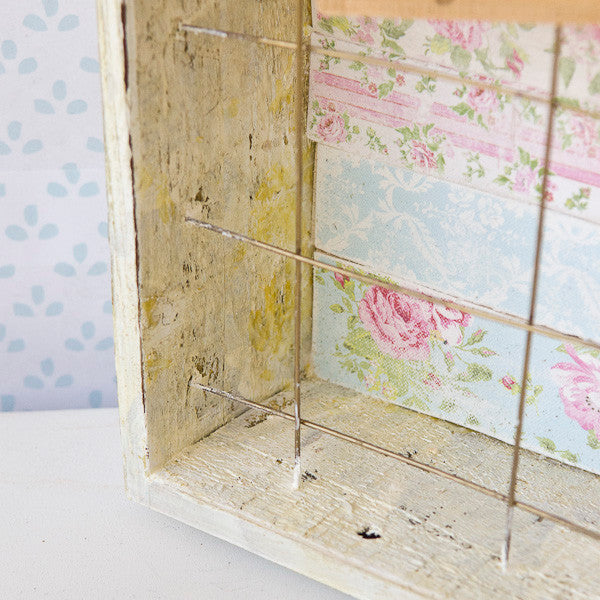
To begin, spray the entire vintage plant box with a clear acrylic sealer. This will keep the stain from floating to the surface after you paint it white. (I learned the hard way after 3 coats of paint that I needed to seal it first.)
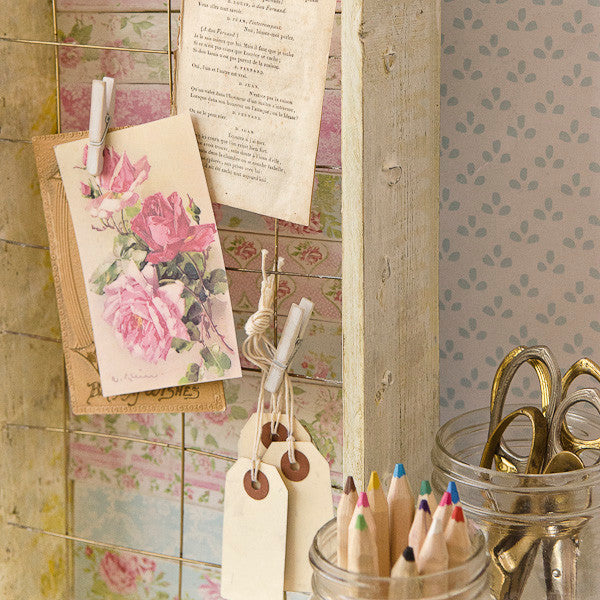
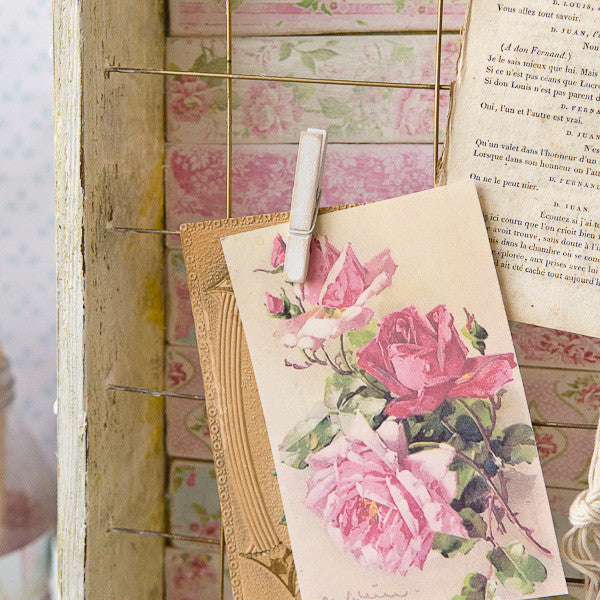
Paint entire box with Dylusions White Linen Paint. I opted not to remove the wire grid while painting because it is fairly difficult to get reassembled, but I found that the white paint rubbed off easily with a little sandpaper if it got into the wrong place.
With scrap wood or paint stir sticks, cut strips to fit the width of the interior of the vintage plant box.
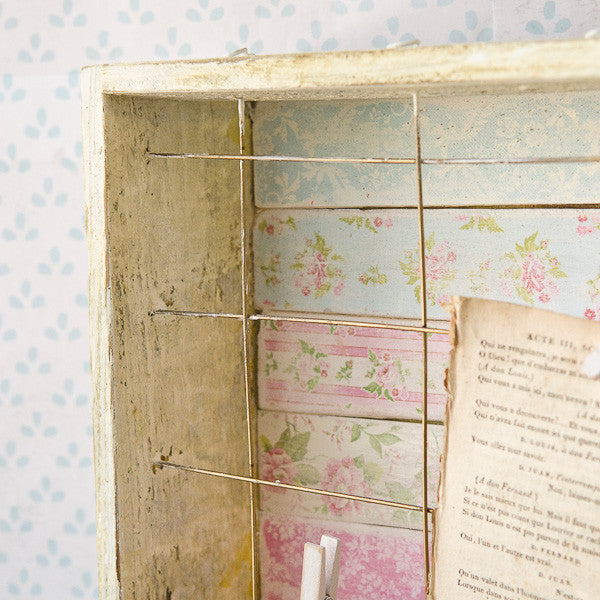
Glue strips from the Pretty Posy Paper Pad to the wood strips with gel medium. Trim away excess paper. Allow gel medium to dry, then use sandpaper to distress the edges and surface of the paper. I used a medium grit sandpaper and it took the brightness off the paper strips really well and gave it a lovely distressed look.
Slide distressed wood strips under the wire of the box and adhere to the back of the box with gel medium. Repeat until the entire back is covered.
Distress white clothespins with sandpaper for hanging your memos on the board.
You will also ? these publications:


Free Shipping on Subscriptions
Easy 60 Day Returns
Friendly Customer
Support
Shabby Chic Desk Décor Part 1: Memo Board
Frequently asked questions
Looking for a quick answer? Here are some of our customer’s most frequently asked questions to help you along the way.
Thanks for your interest in our magazines! We encourage you to visit our Calls & Challenges page to see what our editors are looking for.
Ready to begin? Here is where you can find our Submission Guidelines.
Our subscriptions ship directly from our printer in Wisconsin. For this reason, we need to be notified of your change of address at least two months before the next issue comes out, or it will be sent to the address we had on file and provided to our printer at the time it was due.
How to Notify Us About Your Change of Address
- Email the following to customerservice@stampington.com:
- The publication(s) you subscribe to
- Your name and new address
- Your old address
2. Call to inform us of your new mailing address:
- Toll-Free: 1-877-782-6737 or International: 1-949-380-7318
Mail Forwarded by the Post Office
If you forward mail to your new address through the Post Office, it won't apply to periodicals/your magazine subscription unfortunately. Also, since mail forwarding only lasts for a short time-frame, we request that you still notify us of your address change to prevent any service interruption to your subscription.
Stampington & Company cannot be held responsible for replacing "lost" issues from your subscription, if we did not receive your change of address request at least two months prior to your next issue's release date.
Subscription issues should arrive within the first week of the month your publication is released. Please add up to two weeks for international delivery.
If your magazine has not arrived by the 20th of the month, please contact our customer service department, so we can check to make sure nothing is amiss with your subscription, and see if you're eligible for a replacement copy. International subscribers can receive a digital version of the magazine as a replacement if one attempt has already been made to deliver the print edition to you.
Stampington & Company cannot be held responsible for postal delays or circumstances outside of our control, but we will make every effort to make it right.
We offer FREE shipping on all magazine subscriptions and instant download purchases to our customers. You can also take advantage of free U.S. shipping on select pre-orders of your favorite magazines (discounted International rates will apply). Browse our selection of Pre-Orders With Free U.S. Shipping here.
What are my shipping charges?
Shipping charges are calculated by weight, shipping destination, and speed. You will be able to choose the best delivery method for your needs at checkout.
To help keep your costs down, we offer a discounted rate of $5.95 to ship a single magazine to you (within the United States).
Need your order fast? We offer the following expedited shipping options:
- 3-day delivery
- 2-day delivery
*Please contact us if you have any questions or special instructions regarding your rush order.
What Carriers do You Use to Ship Items?