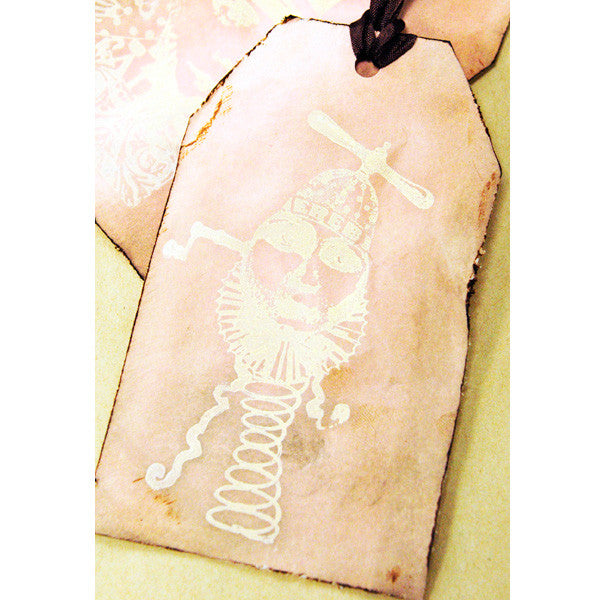
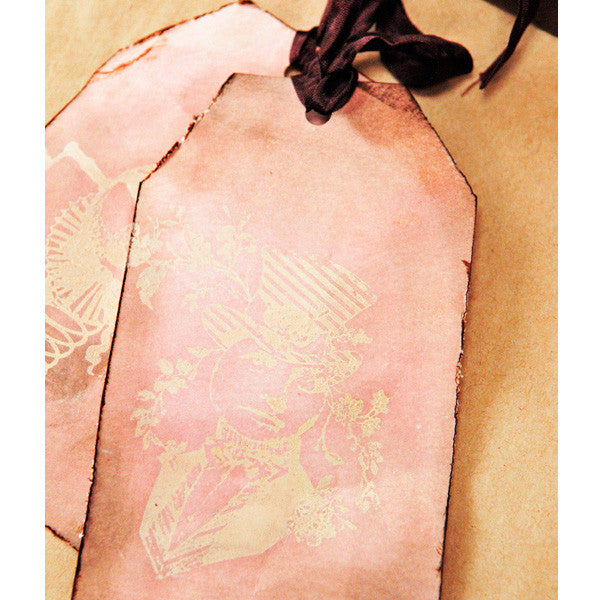

Whimsy Tags Project
Stamp resist techniques are so easy and really add some interest to your projects. You can use the various stamp resist techniques in mixed-media projects or create some simple, yet elegant tags. For this project, I used a resist technique where I stamp with acrylic paint and then use distress inks (blended) over the stamped image. First ink up your stamps from the Fanciful Whimseys: Portrait Gallerie collection with the Malted Milk acrylic paint dabber and stamp the images onto plain white tags. To speed up the drying process, use the coloriser heat tool to dry the paint.
Ink up the Alcohol Ink Applicator tool with some Tattered Rose distress ink and gently blend the ink onto the tag, then ink the applicator tool with some Walnut Stain distress ink and blend it into the tag slightly around the edges. Distress the edges of the tags with the paper distresser tool then ink over the edges with the Walnut Stain ink. Punch a hole in the top of each tag and add some dark brown seam binding ribbon to each tag. If you want the tags to look really aged and distressed, you can always add more brown ink or try crunching up the tag and then flattening it out so it looks worn.
Free Shipping on Subscriptions
Easy 60 Day Returns
Friendly Customer
Support


Frequently asked questions
Looking for a quick answer? Here are some of our customer’s most frequently asked questions to help you along the way.
Thanks for your interest in our magazines! We encourage you to visit our Calls & Challenges page to see what our editors are looking for.
Ready to begin? Here is where you can find our Submission Guidelines.
Our subscriptions ship directly from our printer in Wisconsin. For this reason, we need to be notified of your change of address at least two months before the next issue comes out, or it will be sent to the address we had on file and provided to our printer at the time it was due.
How to Notify Us About Your Change of Address
- Email the following to customerservice@stampington.com:
- The publication(s) you subscribe to
- Your name and new address
- Your old address
2. Call to inform us of your new mailing address:
- Toll-Free: 1-877-782-6737 or International: 1-949-380-7318
Mail Forwarded by the Post Office
If you forward mail to your new address through the Post Office, it won't apply to periodicals/your magazine subscription unfortunately. Also, since mail forwarding only lasts for a short time-frame, we request that you still notify us of your address change to prevent any service interruption to your subscription.
Stampington & Company cannot be held responsible for replacing "lost" issues from your subscription, if we did not receive your change of address request at least two months prior to your next issue's release date.
Subscription issues should arrive within the first week of the month your publication is released. Please add up to two weeks for international delivery.
If your magazine has not arrived by the 20th of the month, please contact our customer service department, so we can check to make sure nothing is amiss with your subscription, and see if you're eligible for a replacement copy. International subscribers can receive a digital version of the magazine as a replacement if one attempt has already been made to deliver the print edition to you.
Stampington & Company cannot be held responsible for postal delays or circumstances outside of our control, but we will make every effort to make it right.
We offer FREE shipping on all magazine subscriptions and instant download purchases to our customers. You can also take advantage of free U.S. shipping on select pre-orders of your favorite magazines (discounted International rates will apply). Browse our selection of Pre-Orders With Free U.S. Shipping here.
What are my shipping charges?
Shipping charges are calculated by weight, shipping destination, and speed. You will be able to choose the best delivery method for your needs at checkout.
To help keep your costs down, we offer a discounted rate of $5.95 to ship a single magazine to you (within the United States).
Need your order fast? We offer the following expedited shipping options:
- 3-day delivery
- 2-day delivery
*Please contact us if you have any questions or special instructions regarding your rush order.
What Carriers do You Use to Ship Items?


