

No Ordinary Bird Project
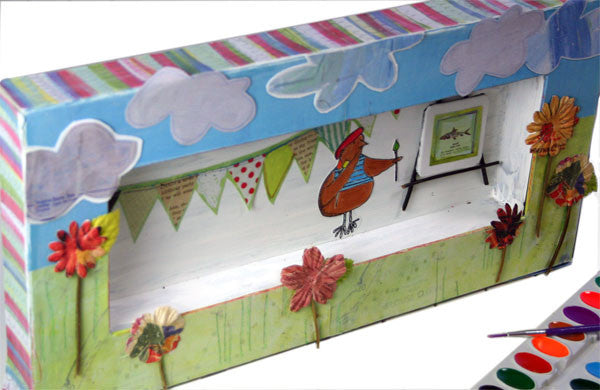
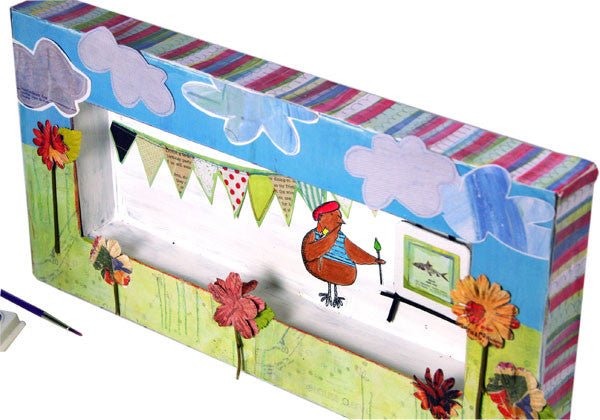
Channel your inner 8 old and create a whimsical wall hanging! Begin with the 8" x 16" Shadowboxby Provocraft. These shadowboxes are great because you can actually remove the top section of the box, which allows you to work separately on the inside and outside. Paint the inside with white acrylic paint and allow to dry. On the outside frame trace the patterned papers you wish to use from the Wonder Years collection. You will need a good quality decoupage or liquid adhesive to attach the papers to the box. I used the "catching fireflies" paper for the green grass look and the blue from the "go play" paper for the sky. I then used the striped "let's picnic" paper to cover the outside edges of the frame. Glue all those papers on and allow to dry.
Mix gesso and water together (equal portions). Using Claudine Hellmuth brushes paint over all the patterned paper that has already been glued to the shadow box. This will give the papers a chalk-like finish. Allow to dry. Cut out some clouds from the other side of the "let's picnic" paper. To create a unique cloud look I took 2 of the clouds and glued them onto sticky back canvas then cut out the cloud leaving a thin white border of canvas. Attach all your clouds to the sky section.
On the green paper use a green crayon to draw over the stems on the flowers so that the stand out more. Use thin twigs and attach them to some of the flower stems with a strong liquid adhesive. Attach the various collage flowers over the top of the stems. Add a few artful collage leaves to just a few of the flowers.
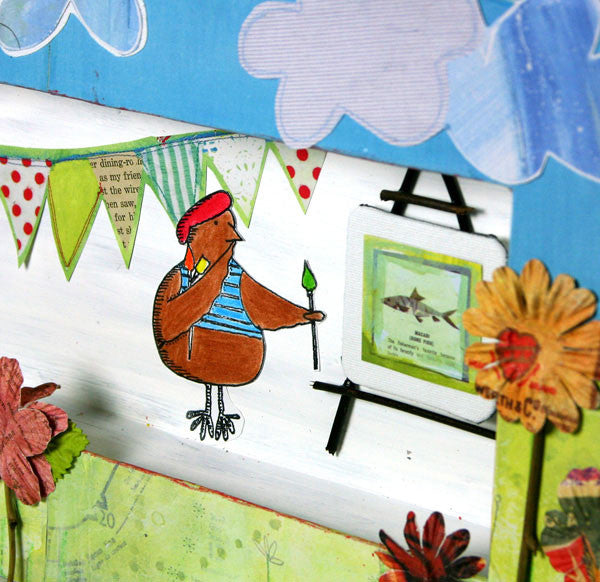
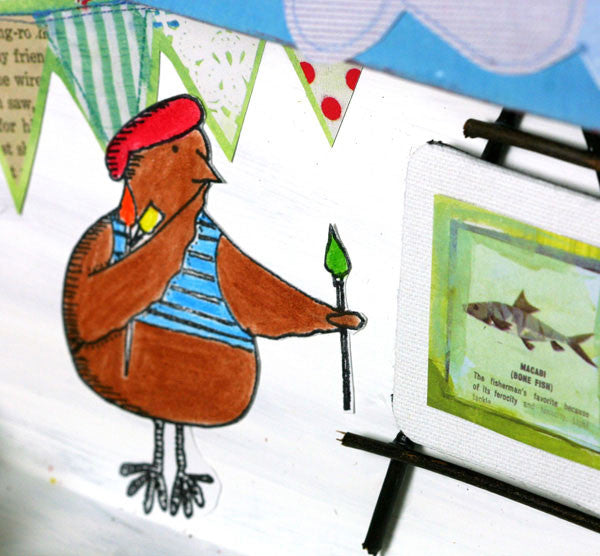
Cut out the banner from the "hooray" paper and glue to the inside of the box. Stamp the bird from the Marylinn Kelly "A Knack for Accessories" acrylic stamp with black stazOn ink. Color the bird using pencils and then cut out using the Tim Holtz scissors by Tonic. Glue the bird image on as shown in the picture. Use more thin twigs and break or cut them to length so you can create a mini easel. Glue the twigs on with liquid glue and allow to dry. Use a small square of blank sticky back canvas to cover a piece of chipboard and then glue onto the easel. Cut out the fish image from the "catching fireflies" paper and glue onto the mini canvas.
Free Shipping on Subscriptions
Easy 60 Day Returns
Friendly Customer
Support


No Ordinary Bird Project
Frequently asked questions
Looking for a quick answer? Here are some of our customer’s most frequently asked questions to help you along the way.
Thanks for your interest in our magazines! We encourage you to visit our Calls & Challenges page to see what our editors are looking for.
Ready to begin? Here is where you can find our Submission Guidelines.
Our subscriptions ship directly from our printer in Wisconsin. For this reason, we need to be notified of your change of address at least two months before the next issue comes out, or it will be sent to the address we had on file and provided to our printer at the time it was due.
How to Notify Us About Your Change of Address
- Email the following to customerservice@stampington.com:
- The publication(s) you subscribe to
- Your name and new address
- Your old address
2. Call to inform us of your new mailing address:
- Toll-Free: 1-877-782-6737 or International: 1-949-380-7318
Mail Forwarded by the Post Office
If you forward mail to your new address through the Post Office, it won't apply to periodicals/your magazine subscription unfortunately. Also, since mail forwarding only lasts for a short time-frame, we request that you still notify us of your address change to prevent any service interruption to your subscription.
Stampington & Company cannot be held responsible for replacing "lost" issues from your subscription, if we did not receive your change of address request at least two months prior to your next issue's release date.
Subscription issues should arrive within the first week of the month your publication is released. Please add up to two weeks for international delivery.
If your magazine has not arrived by the 20th of the month, please contact our customer service department, so we can check to make sure nothing is amiss with your subscription, and see if you're eligible for a replacement copy. International subscribers can receive a digital version of the magazine as a replacement if one attempt has already been made to deliver the print edition to you.
Stampington & Company cannot be held responsible for postal delays or circumstances outside of our control, but we will make every effort to make it right.
We offer FREE shipping on all magazine subscriptions and instant download purchases to our customers. You can also take advantage of free U.S. shipping on select pre-orders of your favorite magazines (discounted International rates will apply). Browse our selection of Pre-Orders With Free U.S. Shipping here.
What are my shipping charges?
Shipping charges are calculated by weight, shipping destination, and speed. You will be able to choose the best delivery method for your needs at checkout.
To help keep your costs down, we offer a discounted rate of $5.95 to ship a single magazine to you (within the United States).
Need your order fast? We offer the following expedited shipping options:
- 3-day delivery
- 2-day delivery
*Please contact us if you have any questions or special instructions regarding your rush order.
What Carriers do You Use to Ship Items?


