Lovely Lady and Clockwork Project
I highly recommend the Simple Soldered Jewelry & Accessoriesbook if you are a beginner so that you can learn all the techniques!
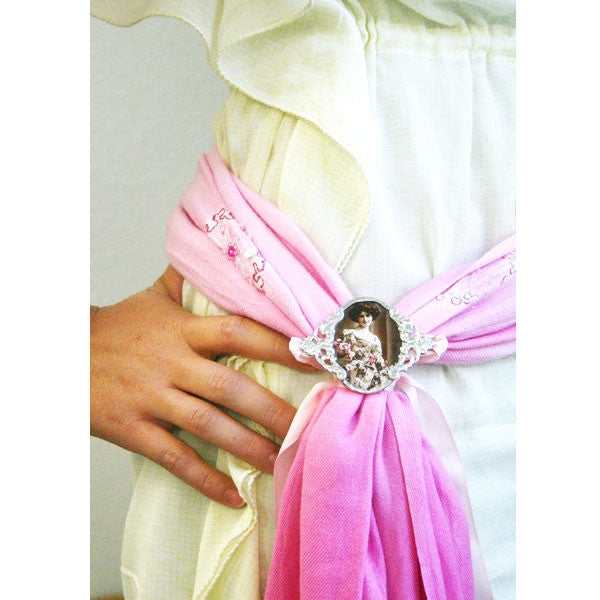
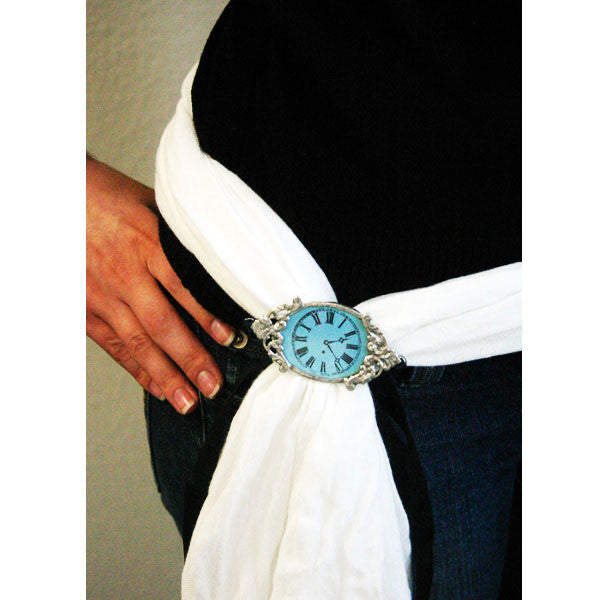
These projects have a variety of ways that they can be used. Try adding one to an accessory to create a chic wearable piece of art. They will add an elegant touch to a belt or handbag! Or add one to a gift box or gift bag to add a special touch to a present. You can also try using one as a pendant for a necklace. I have used a larger size glass for the pieces I created so depending on the size of the piece you are creating just ensure the decorative corners are bent just slightly so that it fits the shape of the neck nicely.
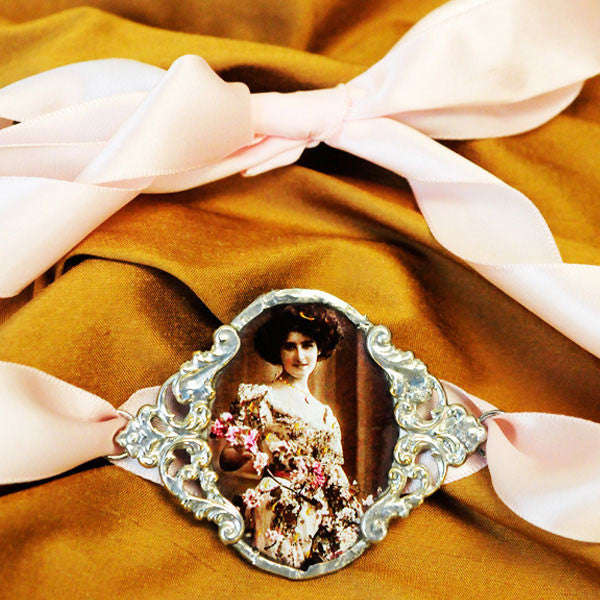
Lovely Lady:
First you will need to cut out the collage image from the Loveliness collage sheet. It will need to but cut out exactly the same size as the glass you are working with, for this project I used the Oval Glass 1½ "x 2". Sandwich the image between the two oval glass pieces and wrap the foil tape (either the tape in included in the soldering kit or one of the other sizes we have available) around the edges of the glass. Burnish the tape down onto the glass on both sides. Once you have done that, you can trim off some of the tape on the glass if needed using an exacto knife. Brush flux over the foil and with your soldering tool and lead free solder start adding solder to the edges. Once you have done the edges, take two decorative corners and paint with flux then use your pliers or the small clamp to hold the piece while you cover it with solder.
Any decorative metal embellishment will have to paint "painted" with the solder before you attach them which is explained in more detail in the book. Attach the corners to the side (one at a time) and heat the solder on the back where the corner connects to the pendant so that it attaches. Repeat the same step with the other corner on the opposite side. Take two jump rings and dab a small amount of flux on the ring, then attach to the edges of the filigree corner using the solder and iron. Once is has completely cooled down you can shine the piece by using the solder polish and a soft cloth.
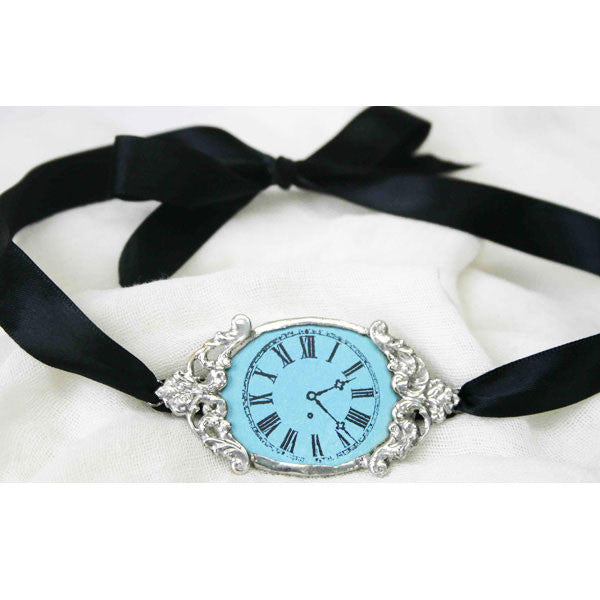
Clockwork:
I used the same oval glass shape as I did in the Lovely Lady project but decided to turn the oval in a horizontal direction. To create the clock image, spray some Riptide glimmer mist onto a piece of white cardstock and allow to dry. Then with black ink stamp the clock image from the Stampers' Sampler stamp sheet which is FREE with a multi year subscription to the Stampers’ Sampler (click here for more details). The clock image is also available in a larger size on the Time Clearly Impressed stamp sheet.
Trace the oval shape over the image using the Oval Glass 1½ "x 2". Sandwich the clock image between the two oval glass pieces and wrap the foil tape (either the tape in include in the soldering kit or one of the other sizes we have available) around the edges of the glass. Burnish the tape down onto the glass on both sides. Once you have done that, you can trim off some of the tape on the glass if needed using an exacto knife. Brush flux over the foil and with your soldering tool and lead free solder start adding solder to the edges using your soldering tool. Once you have done the edges, take two decorative corners and paint with flux then use your pliers or the small clamp to hold the piece while you cover it with solder.
Any decorative metal embellishment will have to paint "painted" with the solder before you attach them which is explained in more detail in the book. Attach the corners to the sides (one at a time) and heat the solder on the back where the corner connects to the pendant so that it attaches. Repeat the same step with the other corner on the opposite side. Take two jump rings and dab a small amount of flux on the ring, then attach to the edges of the filigree corner using the solder and iron. Once is has completely cooled down you can shine the piece by using the solder polish and a soft cloth.
Please Note: This tool is designed for North American electrical outlets. If you are purchasing from another region then it is recommended you use an adapter for the cord and required voltage. Please use the Soldering Iron with caution and follow all instructions included on the packaging and in the Simple Soldered Jewelry & Accessories book. This tool is not for children and should be used with caution around children.
Free Shipping on Subscriptions
Easy 60 Day Returns
Friendly Customer
Support


Lovely Lady and Clockwork Project
Frequently asked questions
Looking for a quick answer? Here are some of our customer’s most frequently asked questions to help you along the way.
Thanks for your interest in our magazines! We encourage you to visit our Calls & Challenges page to see what our editors are looking for.
Ready to begin? Here is where you can find our Submission Guidelines.
Our subscriptions ship directly from our printer in Wisconsin. For this reason, we need to be notified of your change of address at least two months before the next issue comes out, or it will be sent to the address we had on file and provided to our printer at the time it was due.
How to Notify Us About Your Change of Address
- Email the following to customerservice@stampington.com:
- The publication(s) you subscribe to
- Your name and new address
- Your old address
2. Call to inform us of your new mailing address:
- Toll-Free: 1-877-782-6737 or International: 1-949-380-7318
Mail Forwarded by the Post Office
If you forward mail to your new address through the Post Office, it won't apply to periodicals/your magazine subscription unfortunately. Also, since mail forwarding only lasts for a short time-frame, we request that you still notify us of your address change to prevent any service interruption to your subscription.
Stampington & Company cannot be held responsible for replacing "lost" issues from your subscription, if we did not receive your change of address request at least two months prior to your next issue's release date.
Subscription issues should arrive within the first week of the month your publication is released. Please add up to two weeks for international delivery.
If your magazine has not arrived by the 20th of the month, please contact our customer service department, so we can check to make sure nothing is amiss with your subscription, and see if you're eligible for a replacement copy. International subscribers can receive a digital version of the magazine as a replacement if one attempt has already been made to deliver the print edition to you.
Stampington & Company cannot be held responsible for postal delays or circumstances outside of our control, but we will make every effort to make it right.
We offer FREE shipping on all magazine subscriptions and instant download purchases to our customers. You can also take advantage of free U.S. shipping on select pre-orders of your favorite magazines (discounted International rates will apply). Browse our selection of Pre-Orders With Free U.S. Shipping here.
What are my shipping charges?
Shipping charges are calculated by weight, shipping destination, and speed. You will be able to choose the best delivery method for your needs at checkout.
To help keep your costs down, we offer a discounted rate of $5.95 to ship a single magazine to you (within the United States).
Need your order fast? We offer the following expedited shipping options:
- 3-day delivery
- 2-day delivery
*Please contact us if you have any questions or special instructions regarding your rush order.
What Carriers do You Use to Ship Items?


