Le Cirque Train Project
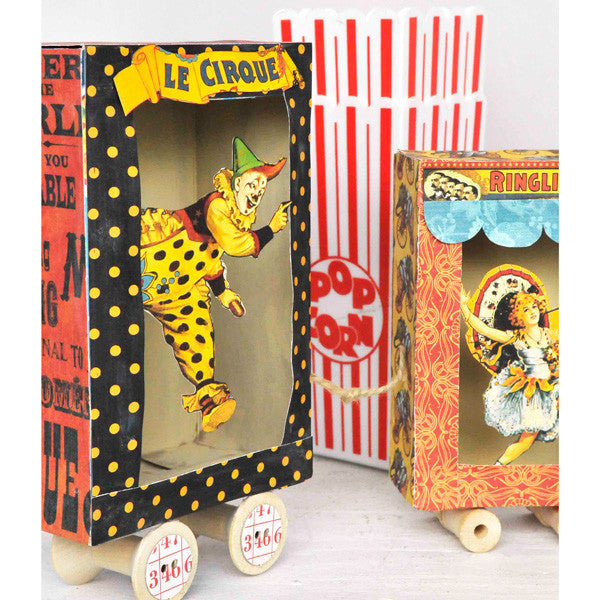
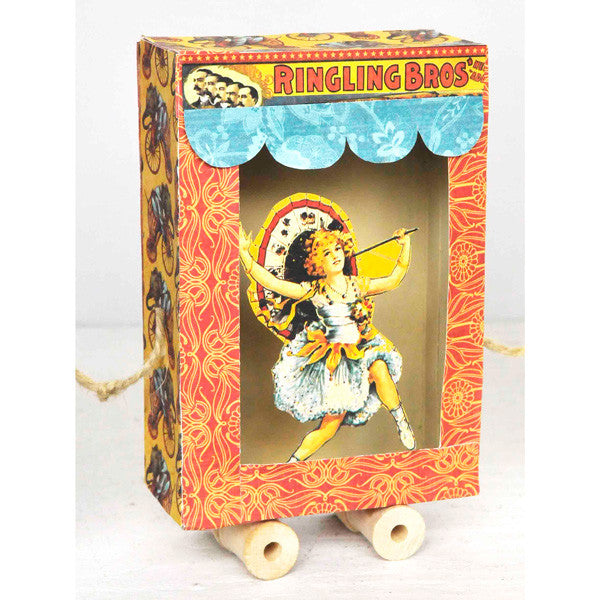
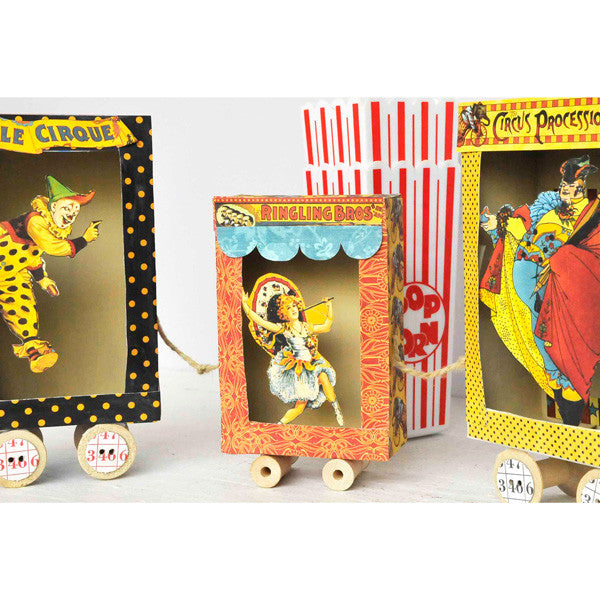
Using inspiration from the cover of Lisa Kettell’s book, "Altered Art Circus," I decided to create my own mini circus train using Le Cirque Papers by Graphic 45. My daughter loves to help me with projects, so I had a little assistance for this one! My petite artist’s favorite crafts are painting and gluing, so armed with some foam brushes, paint, and adhesive, my daughter and I got to work!
First, I cut out the front of the recycled boxes to create the carriages. This is a great way to repurpose old pasta or food boxes, and they would also make great shadow boxes. I sealed the top of each box by simply taping it shut. My daughter and I then painted the inside of each box with Sand Acrylic Paint.
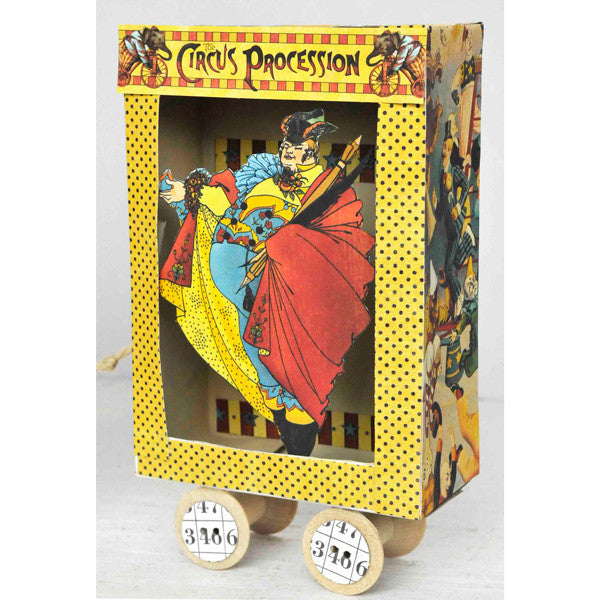
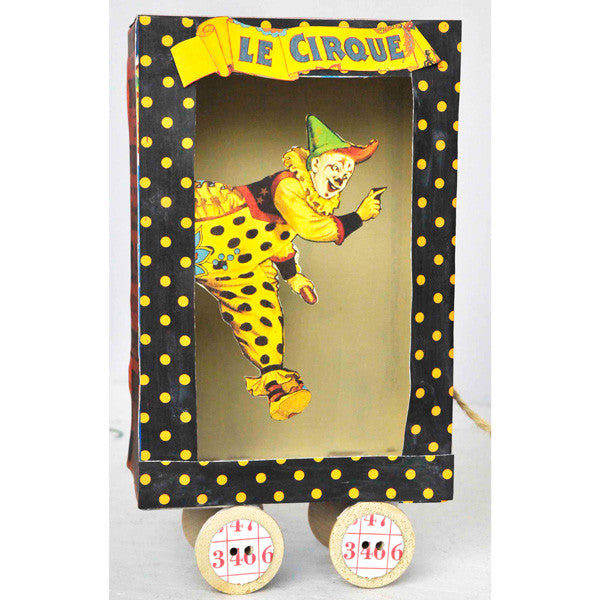
The next step consisted of trimming some of the circus papers the correct size to fit the boxes. Once we had done this, we glued all of the pieces onto the boxes with a Matte Medium and allowed the boxes to dry. I cut out some of the larger circus character images from Graphic 45’s Le Cirque Paper Pad, and we glued the characters to the inside of the boxes, as shown.
To complete the mini circus train, turn each box upside down, and add wooden spools to the bottoms for the wheels. It can be a bit of a challenge to get the spools to stick to the boxes, so I had to experiment a little to make it work. I ended up using a strong tape adhesive and then added a few drops of diamond glaze to the inside of the wheels. For the two larger boxes, I added chipboard buttons onto the spools to add some interest. Lastly, I glued a piece of twine or you could alternatively punch holes and string the twine through them in order to link the boxes together like train carriages.
Free Shipping on Subscriptions
Easy 60 Day Returns
Friendly Customer
Support


Le Cirque Train Project
Frequently asked questions
Looking for a quick answer? Here are some of our customer’s most frequently asked questions to help you along the way.
Thanks for your interest in our magazines! We encourage you to visit our Calls & Challenges page to see what our editors are looking for.
Ready to begin? Here is where you can find our Submission Guidelines.
Our subscriptions ship directly from our printer in Wisconsin. For this reason, we need to be notified of your change of address at least two months before the next issue comes out, or it will be sent to the address we had on file and provided to our printer at the time it was due.
How to Notify Us About Your Change of Address
- Email the following to customerservice@stampington.com:
- The publication(s) you subscribe to
- Your name and new address
- Your old address
2. Call to inform us of your new mailing address:
- Toll-Free: 1-877-782-6737 or International: 1-949-380-7318
Mail Forwarded by the Post Office
If you forward mail to your new address through the Post Office, it won't apply to periodicals/your magazine subscription unfortunately. Also, since mail forwarding only lasts for a short time-frame, we request that you still notify us of your address change to prevent any service interruption to your subscription.
Stampington & Company cannot be held responsible for replacing "lost" issues from your subscription, if we did not receive your change of address request at least two months prior to your next issue's release date.
Subscription issues should arrive within the first week of the month your publication is released. Please add up to two weeks for international delivery.
If your magazine has not arrived by the 20th of the month, please contact our customer service department, so we can check to make sure nothing is amiss with your subscription, and see if you're eligible for a replacement copy. International subscribers can receive a digital version of the magazine as a replacement if one attempt has already been made to deliver the print edition to you.
Stampington & Company cannot be held responsible for postal delays or circumstances outside of our control, but we will make every effort to make it right.
We offer FREE shipping on all magazine subscriptions and instant download purchases to our customers. You can also take advantage of free U.S. shipping on select pre-orders of your favorite magazines (discounted International rates will apply). Browse our selection of Pre-Orders With Free U.S. Shipping here.
What are my shipping charges?
Shipping charges are calculated by weight, shipping destination, and speed. You will be able to choose the best delivery method for your needs at checkout.
To help keep your costs down, we offer a discounted rate of $5.95 to ship a single magazine to you (within the United States).
Need your order fast? We offer the following expedited shipping options:
- 3-day delivery
- 2-day delivery
*Please contact us if you have any questions or special instructions regarding your rush order.
What Carriers do You Use to Ship Items?


