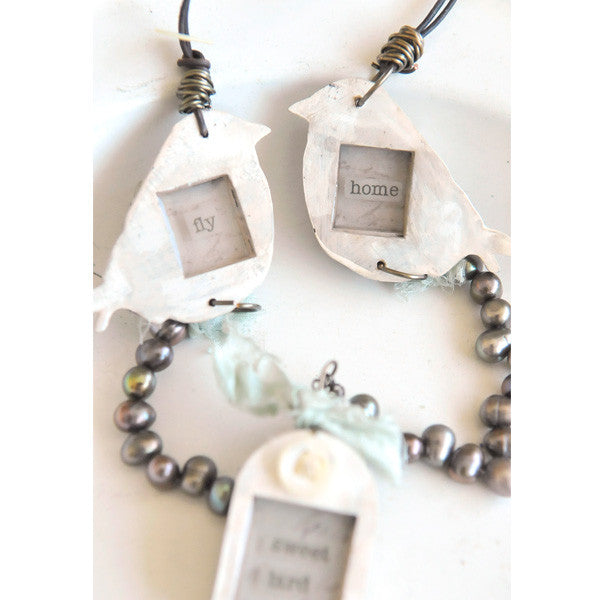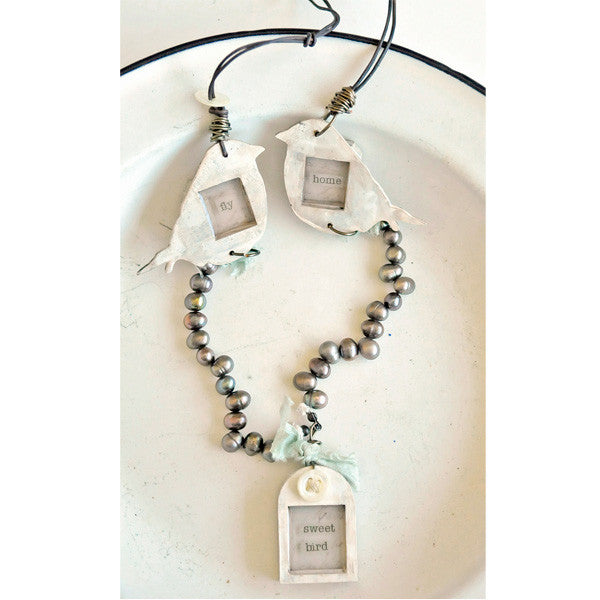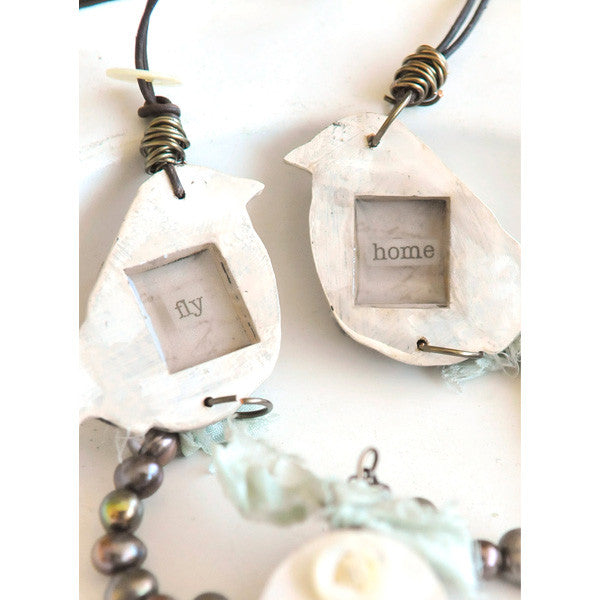


Fly Home Sweet Bird Project by Kristen Robinson
Assemble shrines per instructions on packaging. Once the wood glue has dried, begin by painting the inside and outside of all shrines and set aside to dry.Once the first coat of paint is dry, apply a second coat with white paint. Let dry for 5 minutes and rub off excess with a paper towel.
Cut clip art to size (using the left over inserts) and place into shrine. Mix equal parts of ice resin (approximately ½ ounce) per packaging directions. Allow the resin to rest for 5 minutes and then fill all shrines ½ ways with the resin. Let first layer dry for 6 hours.
Cut text to size to fit into each shrine and place on top of the first resin layer. Mix an additional ½ ounce of ICE Resin and pour into the shrines. Allow to dry for 24 hours before handling.
Create a knot in the end of the stringing thread and place clamshell clasp onto thread. Close clamshell with a pair of flat nose pliers. String 14 beads onto thread. Create a knot at the end pulling very close and tight to the top of the pear. Place a second clamshell on this end and close. Repeat for the adjacent side.
With a 1/8” drill bit create a hole at the top and the bottom of the bird shrines. Repeat this by creating a hole at the top of the shrine pendant. Place a 10mm jump ring through each of the holes you drilled in all pendants. Place open end of clamshell over jump ring and close with round nose pliers, repeat this on the adjacent side as well as the bottom jump rings of both bird pendants.
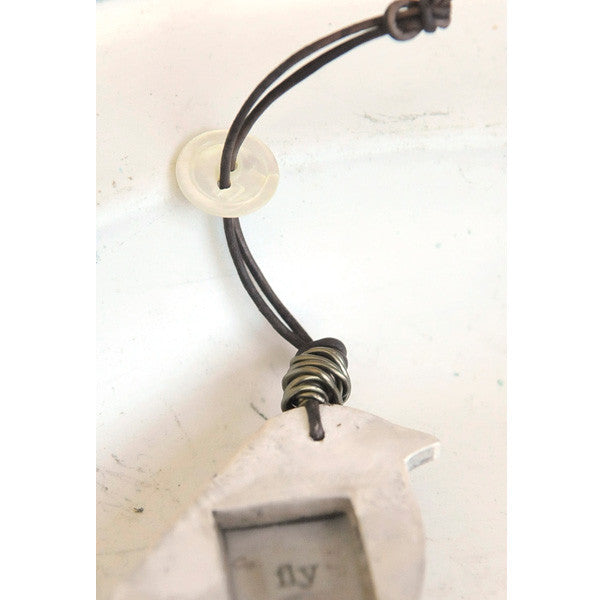
To the top of the bird located on the left side when facing you, sting leather cording. Once the cording is through the hole, pull the other end of the leather up so the two ends meet. Cut an 8” piece of 20 gauge gunmetal wire and wrap around base of the leather cording to hold in place. Trim any excess with wire cutters. Tie a knot in the cording above the wrapped wire. Place one Mother of Pearl button onto the cording and tie a second knot approximately 3” from the last. Repeat this until 5 buttons are on the leather cording.
Place two ends of cording through the top jump ring of the remaining bird shrine, allowing approximately 1” of cording to overlap. Cut an 8” piece of 20 gauge gunmetal wire and wrap closed, trimming any excess wire. Add silk ribbon at the top of the shrine as well as the bottom of both birds. As a final touch tie a piece of string at the base of each pearl strand and trim excess.
Tips: When drilling through the birds it is easiest to place them together to insure the hole is located in the same place on both.
Free Shipping on Subscriptions
Easy 60 Day Returns
Friendly Customer
Support


Fly Home Sweet Bird Project by Kristen Robinson
Frequently asked questions
Looking for a quick answer? Here are some of our customer’s most frequently asked questions to help you along the way.
Thanks for your interest in our magazines! We encourage you to visit our Calls & Challenges page to see what our editors are looking for.
Ready to begin? Here is where you can find our Submission Guidelines.
Our subscriptions ship directly from our printer in Wisconsin. For this reason, we need to be notified of your change of address at least two months before the next issue comes out, or it will be sent to the address we had on file and provided to our printer at the time it was due.
How to Notify Us About Your Change of Address
- Email the following to customerservice@stampington.com:
- The publication(s) you subscribe to
- Your name and new address
- Your old address
2. Call to inform us of your new mailing address:
- Toll-Free: 1-877-782-6737 or International: 1-949-380-7318
Mail Forwarded by the Post Office
If you forward mail to your new address through the Post Office, it won't apply to periodicals/your magazine subscription unfortunately. Also, since mail forwarding only lasts for a short time-frame, we request that you still notify us of your address change to prevent any service interruption to your subscription.
Stampington & Company cannot be held responsible for replacing "lost" issues from your subscription, if we did not receive your change of address request at least two months prior to your next issue's release date.
Subscription issues should arrive within the first week of the month your publication is released. Please add up to two weeks for international delivery.
If your magazine has not arrived by the 20th of the month, please contact our customer service department, so we can check to make sure nothing is amiss with your subscription, and see if you're eligible for a replacement copy. International subscribers can receive a digital version of the magazine as a replacement if one attempt has already been made to deliver the print edition to you.
Stampington & Company cannot be held responsible for postal delays or circumstances outside of our control, but we will make every effort to make it right.
We offer FREE shipping on all magazine subscriptions and instant download purchases to our customers. You can also take advantage of free U.S. shipping on select pre-orders of your favorite magazines (discounted International rates will apply). Browse our selection of Pre-Orders With Free U.S. Shipping here.
What are my shipping charges?
Shipping charges are calculated by weight, shipping destination, and speed. You will be able to choose the best delivery method for your needs at checkout.
To help keep your costs down, we offer a discounted rate of $5.95 to ship a single magazine to you (within the United States).
Need your order fast? We offer the following expedited shipping options:
- 3-day delivery
- 2-day delivery
*Please contact us if you have any questions or special instructions regarding your rush order.
What Carriers do You Use to Ship Items?


