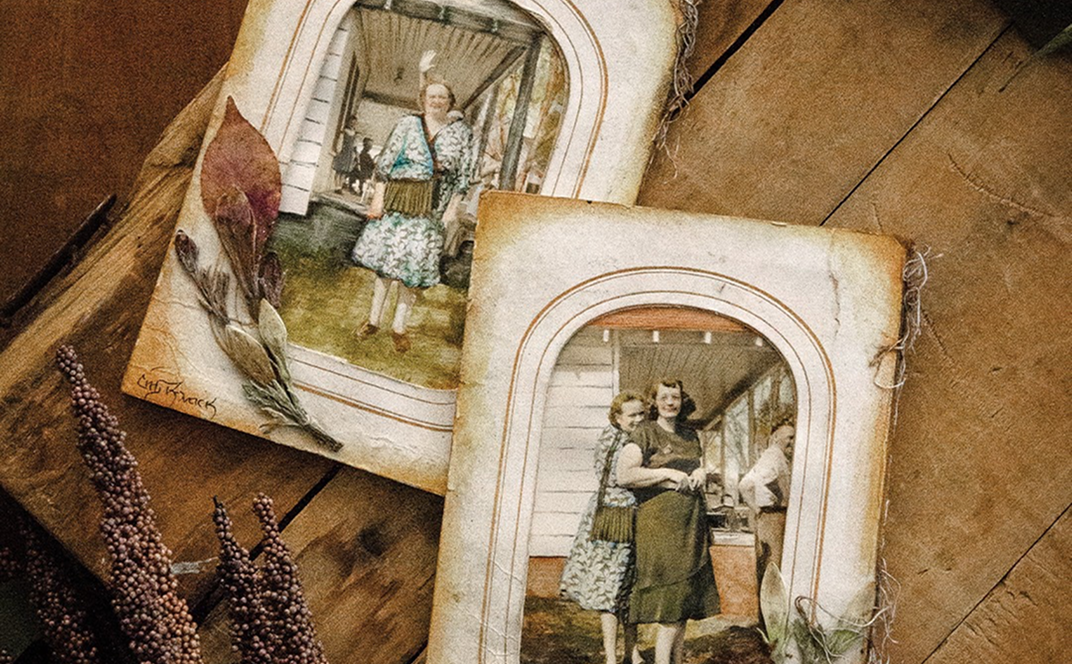


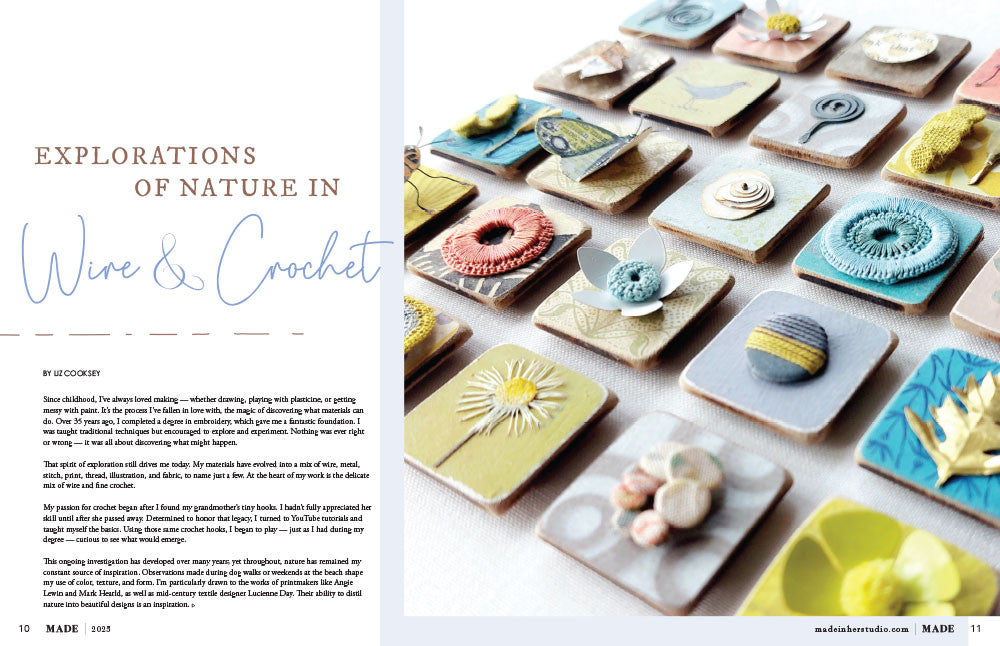
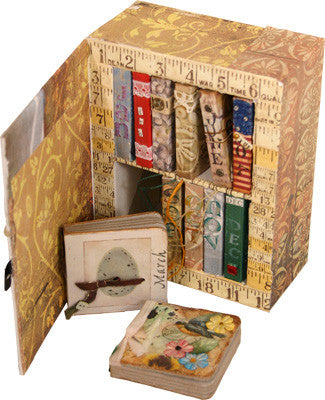

Mini Books of the Year Project by Diane Michioka, Carolyn Fuentes, Linda Tong, and Cher Lashley
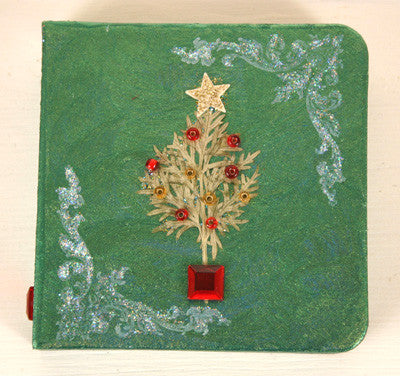
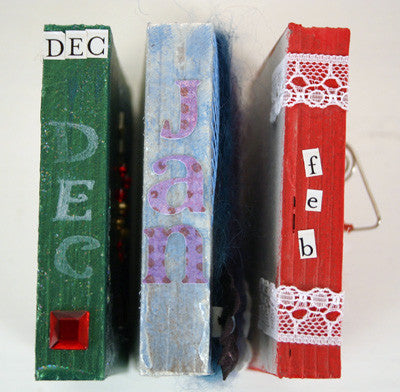
December, January, February:
Apply acrylic & Lumiere paint paint to outside covers of each mini book. After paint is dried, stamp and emboss images and adhere pressed leaves , paper flowers from Prima Got Flower Milk Crate and other embellishments as shown for each book cover. Adhere stickers of the month for the spine of each book.
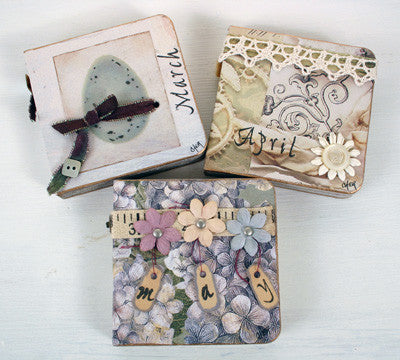
March, April, May:
Measure, cut and adhere patterned paper to each book.
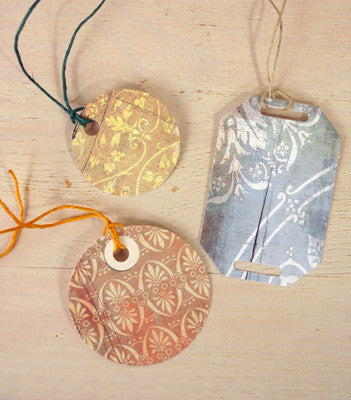
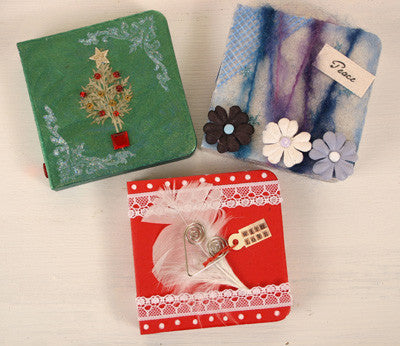
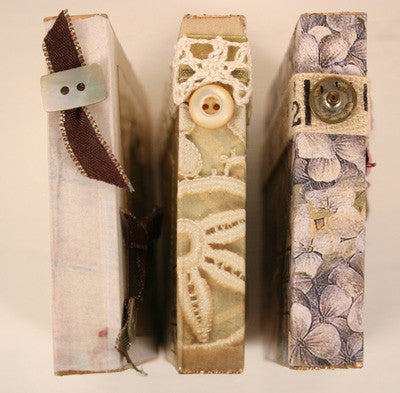
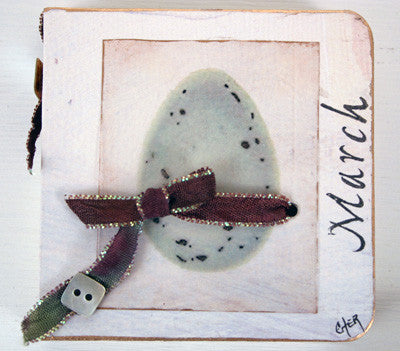
- March: Cut transparency to fit front cover, ink edges and interior corners, then, punch two holes. Punch two corresponding holes in cover: line transparency up and thread with ribbon; then, tie a one loop bow and attach a button to longest tail. Stamp MARCH with Versafine Black Ink to cover. Attach a coordinating button to a snippet of ribbon and adhere to spine with a Mini Glue Dot.
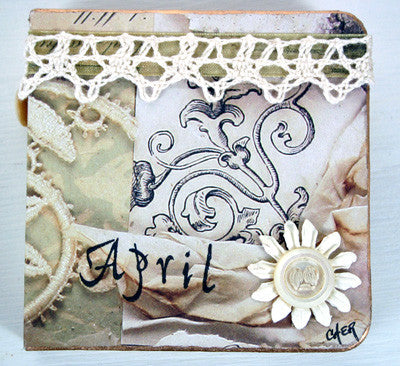
- April: Encircle top section of book with ½" sheer ribbon, then, place open tatted lace over with glue dots. Mount an antique button to the center of (flower) and attach to the lower right corner with a glue dot. Stamp APRIL with Versafine Black Ink to cover. Attach a tiny antique button to spine in lace area with glue dot.
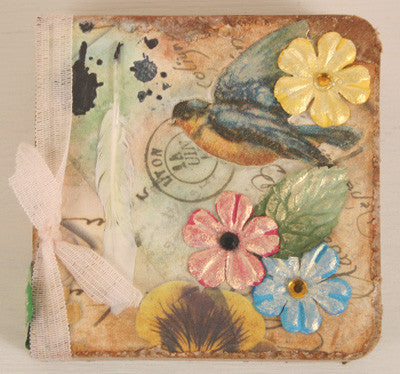
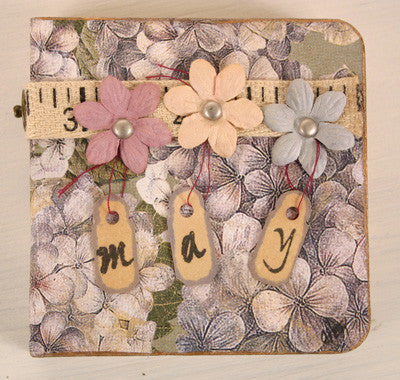
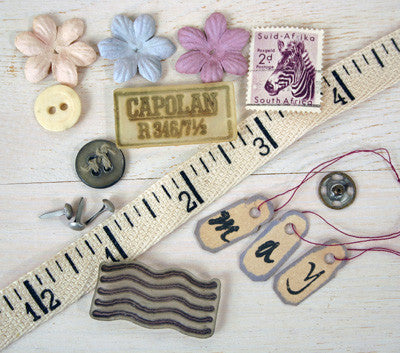
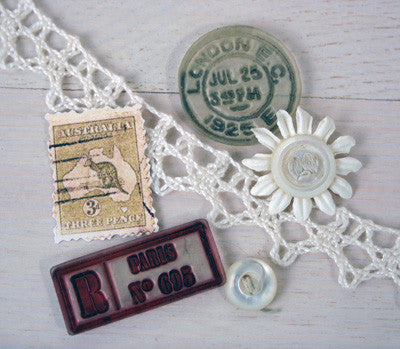
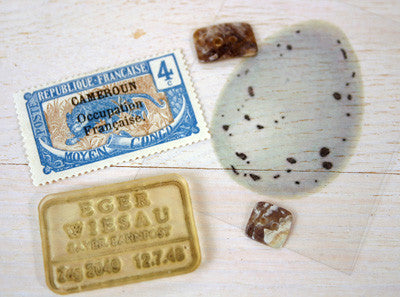
- May: Edge, then, stamp MAY to three tea stained jewelry tags with Black Versafine Ink. Insert mini brads to the center of three flowers from the Prima Got Flower Milk Crate, then, insert into what will be the front of a cut length of ruler printed twill tape and secure with a glue dot on back. Attach more glue dots to mount flowered tape to upper section of book, then, loop one jewelry tag around each flower. Attach a snap over the twill tape at spine. Finish the backs of all three books using vintage postage stamps and postal related stamps. Edge all covers, back and front, with a gold paint pen.
June, July, August:
- June - Measure Magnetique 12x12 Paper cut to size and attach decorative eyelet screw and phillips head on the bind. Take about 3½’ of Scrapper's Floss - White and age it with Distressed Ink Pad - Vintage Photo and cut it in half. Glue the bind down first with BORDERLine™ Rectangular Glue Stick , then start with the back; be sure to insert 1" of Scrapper's Floss into the eyelet and repeat with the front. Brush with blue and yellow chalks Earth Tones. Take a 7gypsies Small Tag and attach words from ArtChix paper snippets Tell Me. Glue a pale blue flower from Prima Got Flowers Large Flowers - Winter 2 and attach a black rhinestone from K & Company Maison Adhesive Rhinestones. Stamp June on the binding with A-B-Seas Stamp Set.
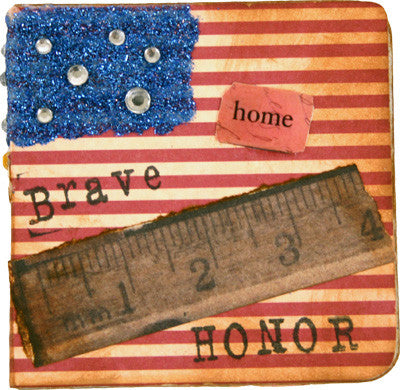
- July - Measure and cut red and beige stripped paper to the size of the book. Adhere to book with BORDERLine™ Rectangular Glue Stick. Glue Cobalt Fine Glitter to make a flag and attach K & Company Maison Adhesive Rhinestones; stamp and glue words on.
- August - Cover book with Pansy 6x6 Paper Pad and age with Distressed Ink Pad - Vintage Photo . Cut bird from Somerset Artists Paper, glue flowers from Prima Milk Crate and brush with Interference Gold (Fine). Stamp ink blotch from - Rock and Roll and tie ribbon around cover.
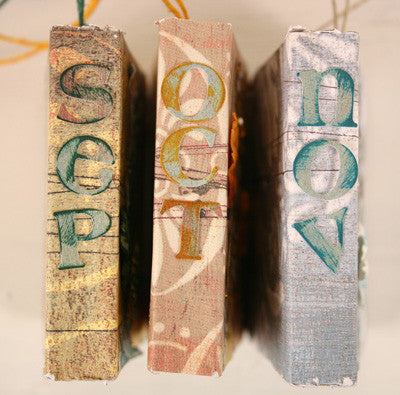
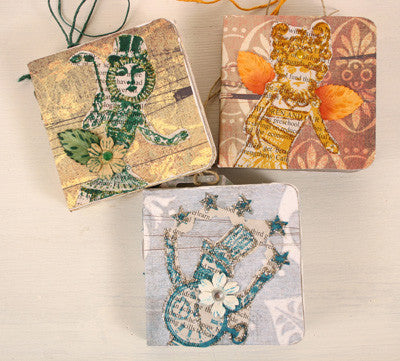
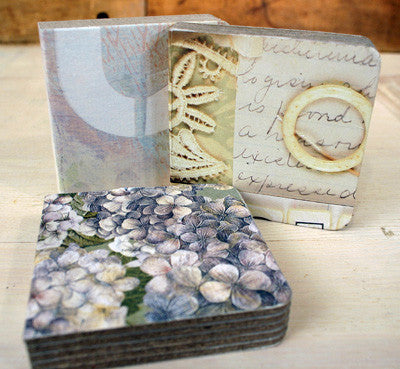
September, October, November:
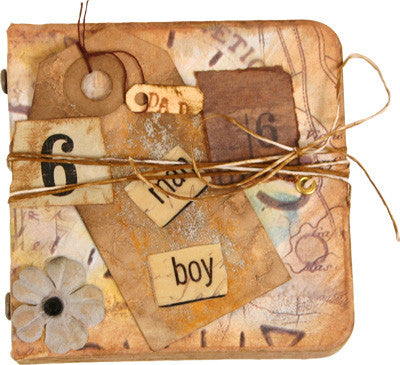
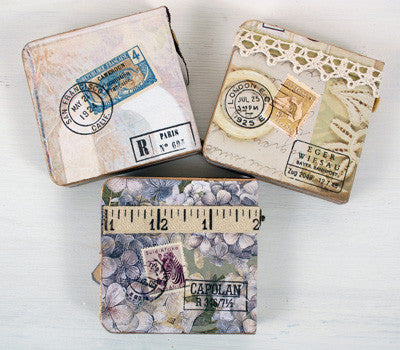
Using three sheets as shown from the Basic Grey Motifica Collection Pack , adhere one paper design to each of three books with Designer Dries Clear Glue. Trim excess with a craft knife. Adhere strips of matching paper to the edge of each page, trim when dry.
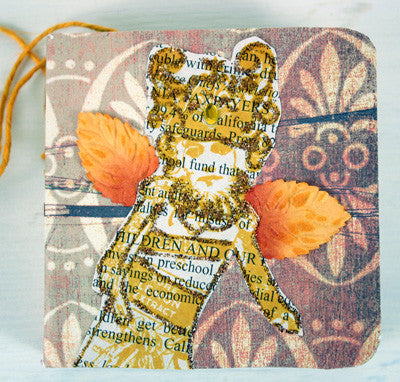
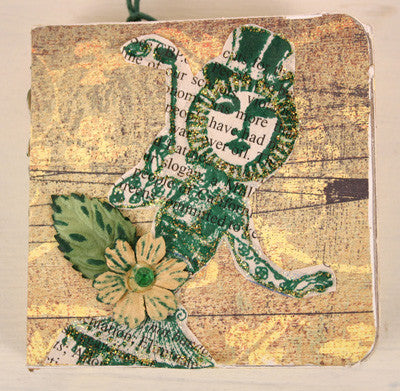
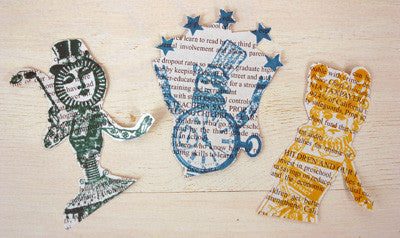
Using three images from the new Sandra Evertson line of stamps, Fanciful Whimsies Collection I - Dramatis Personae (Star Juggler, Elegant Extract, Top Hat Whimsey) stamp on newsprint in StazOn ink (Teal Blue, Mustard, Forest Green). Trim around stamped image and adhere to front cover of each book at interesting angles.
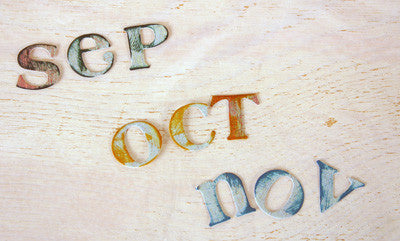
Select letters of the month from the sticker sheet from the Motifica Collection Pack. Lightly apply ink directly from the ink pad (matching color to stamped image on cover) to the edges of each month's letters. (Tip: place sticker letters on craft knife blade, press lightly, then brush ink pad to edges.) Apply letters to spine of each book.
Adhere selected flowers and leaves from the Prima Got Flower Milk Crate and jewel embellishments as shown on stamped image or flowers with clear glue. Outline and enhance details of stamped image with Stickles Glitter Glue (Copper, Patina, Diamond).
String Hemp Twine (Natural, Mustard, Dark Green) through punch-out tags from the Motifica Collection pack to use as book markers.
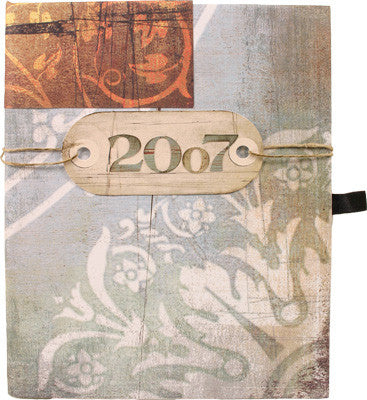
Outside Book Cover:
Lightly apply Nick Bantock Van Dyke Brown ink directly from pad to edge of numbers, 2007 from the Motifica sticker sheet. Loop two pieces of Natural Hemp Twine through holes in Motifica punch out tag - run brown ink on edges of tag and twine. Place sticker numbers on to tag.
Using the remnants from the three sheets of paper from the Basic Grey Motifica Collection Pack used for mini-books SEP, OCT, & NOV, adhere to front cover in patchwork with Designer Dries Clear Glue . Run hemp twine from tag around to back of cover and back of book. and attach with tape. Continue to cover remainder of book and inside cover with paper in patch work, covering ends of twine. Trim excess with a craft knife.
Free Shipping on Subscriptions
Easy 60 Day Returns
Friendly Customer
Support
Mini Books of the Year Project by Diane Michioka, Carolyn Fuentes, Linda Tong, and Cher Lashley
Frequently asked questions
Looking for a quick answer? Here are some of our customer’s most frequently asked questions to help you along the way.
Thanks for your interest in our magazines! We encourage you to visit our Calls & Challenges page to see what our editors are looking for.
Ready to begin? Here is where you can find our Submission Guidelines.
Our subscriptions ship directly from our printer in Wisconsin. For this reason, we need to be notified of your change of address at least two months before the next issue comes out, or it will be sent to the address we had on file and provided to our printer at the time it was due.
How to Notify Us About Your Change of Address
- Email the following to customerservice@stampington.com:
- The publication(s) you subscribe to
- Your name and new address
- Your old address
2. Call to inform us of your new mailing address:
- Toll-Free: 1-877-782-6737 or International: 1-949-380-7318
Mail Forwarded by the Post Office
If you forward mail to your new address through the Post Office, it won't apply to periodicals/your magazine subscription unfortunately. Also, since mail forwarding only lasts for a short time-frame, we request that you still notify us of your address change to prevent any service interruption to your subscription.
Stampington & Company cannot be held responsible for replacing "lost" issues from your subscription, if we did not receive your change of address request at least two months prior to your next issue's release date.
Subscription issues should arrive within the first week of the month your publication is released. Please add up to two weeks for international delivery.
If your magazine has not arrived by the 20th of the month, please contact our customer service department, so we can check to make sure nothing is amiss with your subscription, and see if you're eligible for a replacement copy. International subscribers can receive a digital version of the magazine as a replacement if one attempt has already been made to deliver the print edition to you.
Stampington & Company cannot be held responsible for postal delays or circumstances outside of our control, but we will make every effort to make it right.
We offer FREE shipping on all magazine subscriptions and instant download purchases to our customers. You can also take advantage of free U.S. shipping on select pre-orders of your favorite magazines (discounted International rates will apply). Browse our selection of Pre-Orders With Free U.S. Shipping here.
What are my shipping charges?
Shipping charges are calculated by weight, shipping destination, and speed. You will be able to choose the best delivery method for your needs at checkout.
To help keep your costs down, we offer a discounted rate of $5.95 to ship a single magazine to you (within the United States).
Need your order fast? We offer the following expedited shipping options:
- 3-day delivery
- 2-day delivery
*Please contact us if you have any questions or special instructions regarding your rush order.
What Carriers do You Use to Ship Items?