


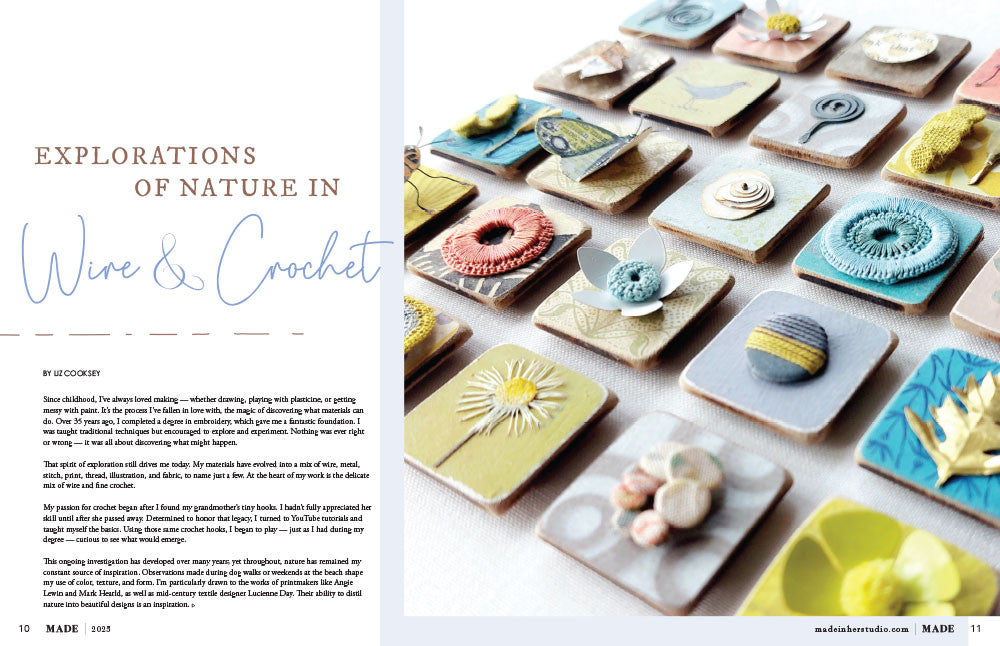
Stencilicious: Techniques to Try by Christen Olivarez
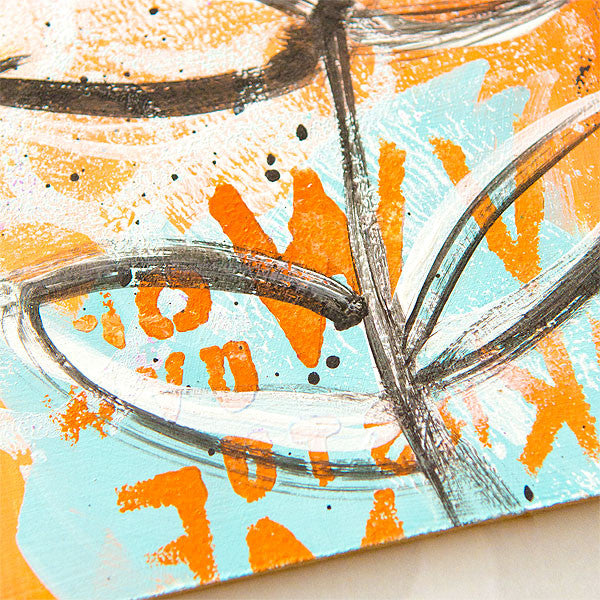
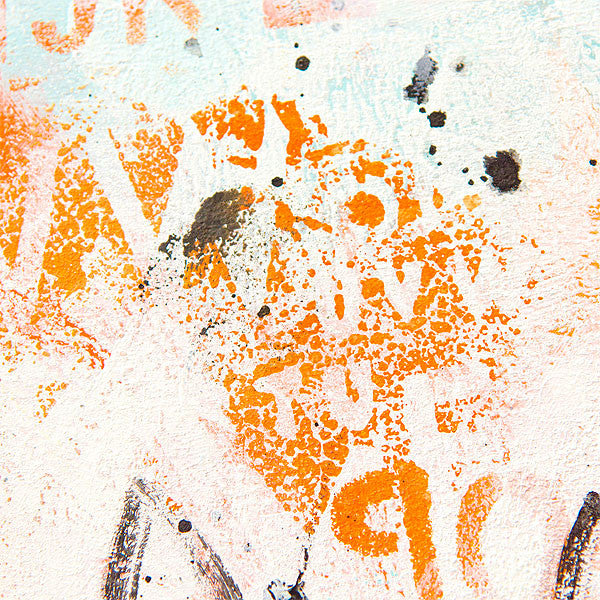
It’s no secret that the art world has been bitten by the stencil bug. They’re being used all over the place, from greeting cards, to art journal pages, and so much more. When I first began playing around with stencils, I limited myself to using them with spray ink. I never really went beyond that until recently. Now I’m trying to use them in as many ways as I can!
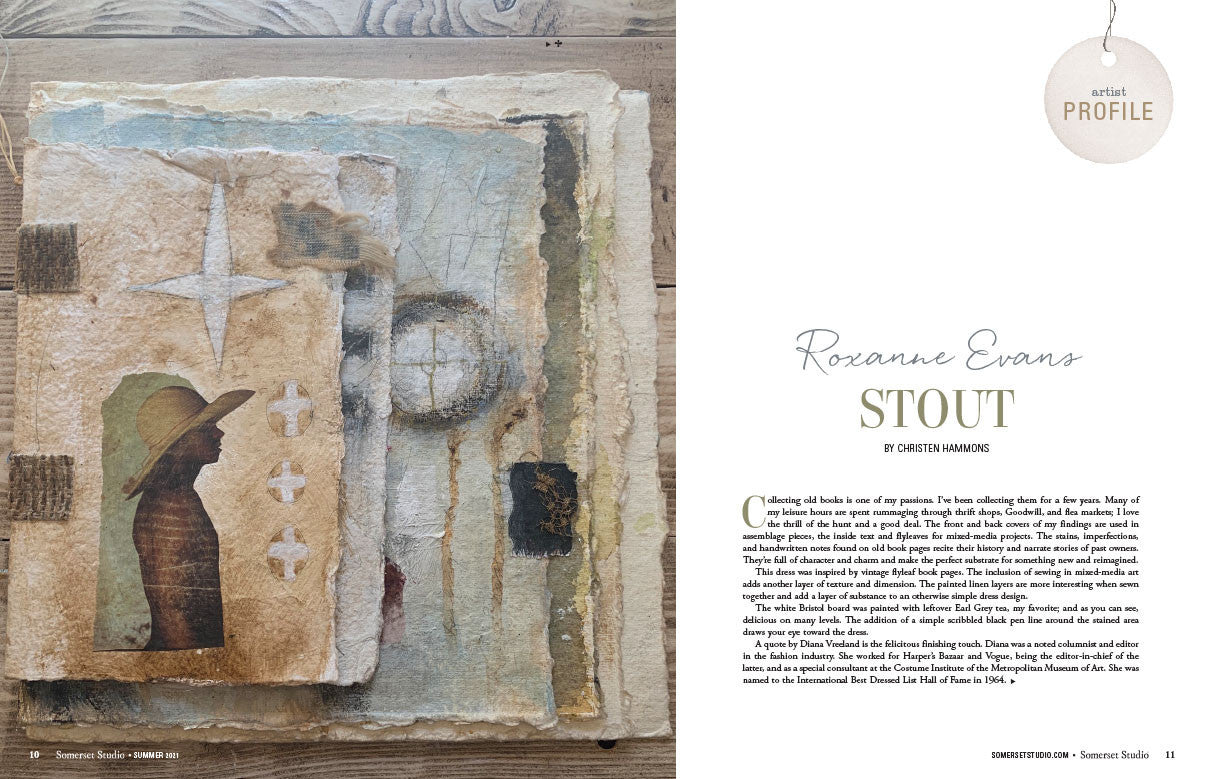
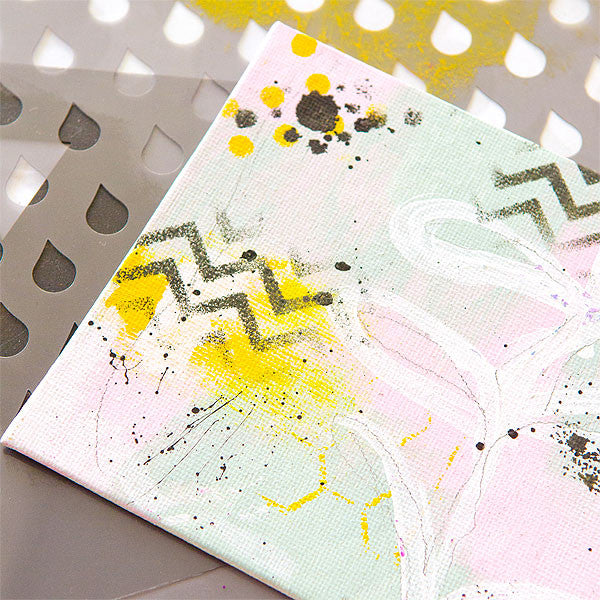
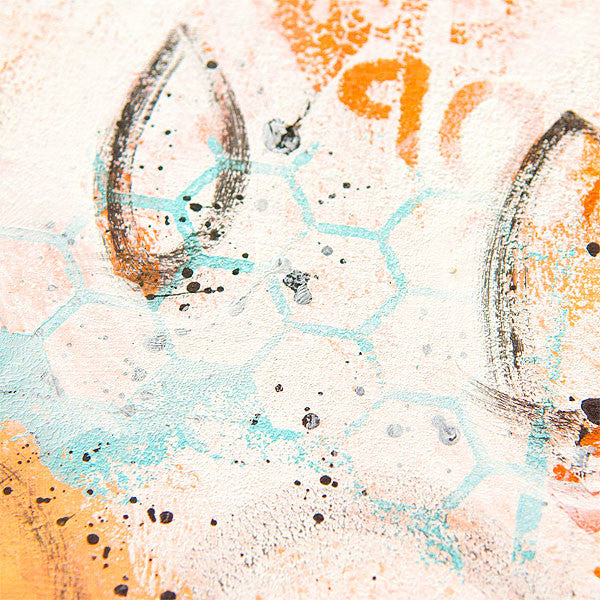
My favorite type of stencils to use are textures and patterns. I prefer them because I do not use a lot of focal images in my work, as it tends to be more on the abstract side. We carry a lot of great ones in The Shoppe at Somerset, and I have also found some really interesting ones in the wall stencil aisle at my local craft store. I purchased round stencil sponges, and have really liked the effect I get from “pouncing” paint through the stencil. Because of the build-up of paint I get on the stencil, I also like to flip the stencil and “stamp” it onto whatever surface I’m working on. It’s an easy way to add another layer as well as use up all the paint. The stencil sponges are great because I’m able to use the paint left on them to stamp circles as desired.
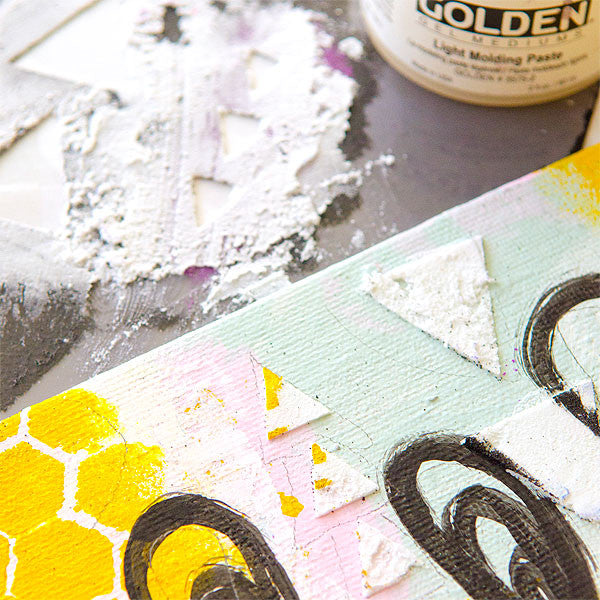
I also have been playing around with adding true texture with stencils. I am able to do that a couple different ways. One way is to emboss a stenciled design by applying a Versamark inkpad as if it were a sponge through the stencil. I then remove the stencil, sprinkle on embossing powder, and use a heat gun to finish it. I also like to use a palette knife and molding paste to add thick texture to my canvases. You can leave the molding paste white, or mix in a little bit of color.
Creating Your Own Stencils:
Finally, as an artist, I like to make things myself. From Traci Bautista, I learned to create my own stencils using hot glue. I simply lay down some parchment paper (you can also use a non-stick craft sheet), and draw a design using hot glue. Once the hot glue has set, the design easily peels away and is ready to be used in your art. They are more delicate than store-bought stamps, so I suggest using your handmade stencil with spray ink, as it’s less likely to pull or tear at the stencil.
 | About the Artist: Interests: art, slow food, writing, books, yarn, authentic living Follow Christen on Her Blog: thedeliberatelife.typepad.com. |
Free Shipping on Subscriptions
Easy 60 Day Returns
Friendly Customer
Support
Stencilicious: Techniques to Try by Christen Olivarez
Frequently asked questions
Looking for a quick answer? Here are some of our customer’s most frequently asked questions to help you along the way.
Thanks for your interest in our magazines! We encourage you to visit our Calls & Challenges page to see what our editors are looking for.
Ready to begin? Here is where you can find our Submission Guidelines.
Our subscriptions ship directly from our printer in Wisconsin. For this reason, we need to be notified of your change of address at least two months before the next issue comes out, or it will be sent to the address we had on file and provided to our printer at the time it was due.
How to Notify Us About Your Change of Address
- Email the following to customerservice@stampington.com:
- The publication(s) you subscribe to
- Your name and new address
- Your old address
2. Call to inform us of your new mailing address:
- Toll-Free: 1-877-782-6737 or International: 1-949-380-7318
Mail Forwarded by the Post Office
If you forward mail to your new address through the Post Office, it won't apply to periodicals/your magazine subscription unfortunately. Also, since mail forwarding only lasts for a short time-frame, we request that you still notify us of your address change to prevent any service interruption to your subscription.
Stampington & Company cannot be held responsible for replacing "lost" issues from your subscription, if we did not receive your change of address request at least two months prior to your next issue's release date.
Subscription issues should arrive within the first week of the month your publication is released. Please add up to two weeks for international delivery.
If your magazine has not arrived by the 20th of the month, please contact our customer service department, so we can check to make sure nothing is amiss with your subscription, and see if you're eligible for a replacement copy. International subscribers can receive a digital version of the magazine as a replacement if one attempt has already been made to deliver the print edition to you.
Stampington & Company cannot be held responsible for postal delays or circumstances outside of our control, but we will make every effort to make it right.
We offer FREE shipping on all magazine subscriptions and instant download purchases to our customers. You can also take advantage of free U.S. shipping on select pre-orders of your favorite magazines (discounted International rates will apply). Browse our selection of Pre-Orders With Free U.S. Shipping here.
What are my shipping charges?
Shipping charges are calculated by weight, shipping destination, and speed. You will be able to choose the best delivery method for your needs at checkout.
To help keep your costs down, we offer a discounted rate of $5.95 to ship a single magazine to you (within the United States).
Need your order fast? We offer the following expedited shipping options:
- 3-day delivery
- 2-day delivery
*Please contact us if you have any questions or special instructions regarding your rush order.
What Carriers do You Use to Ship Items?